WhatsApp Business API | Integration with Sentry

Hi there!
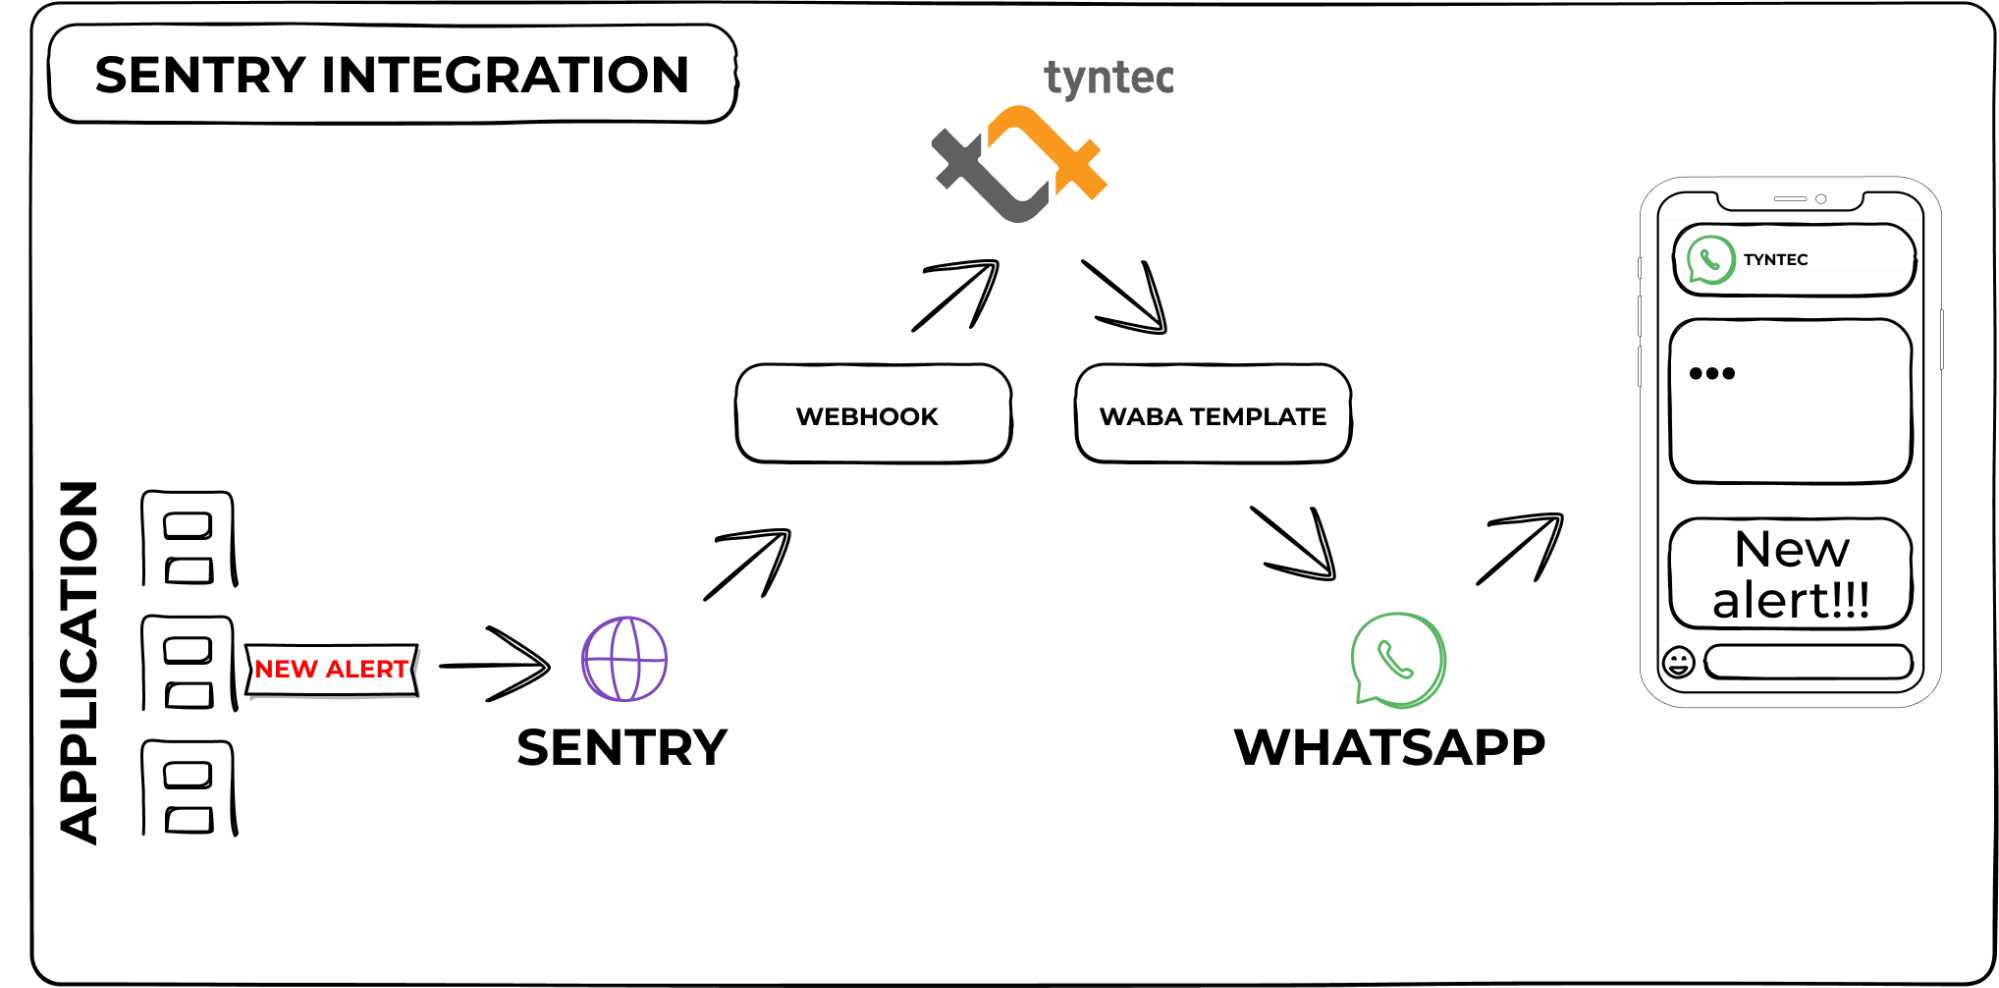
Application monitoring is the key part of how to ensure your business is up and running. Late reaction to finding a critical error or unavailability could cost loyalty of your customers. One way to get all your applications under control is Sentry.
This guide will help you connect Sentry monitoring alerts directly to your WhatsApp Business and have a real-time overview of deployed application integrated thanks to tyntec Conversations API.
You will need
- Tyntec API key from your tyntec account.
- A WABA (WhatsApp Business Account) provided from tyntec.
- A WABA template.
- A mobile phone with a WhatsApp application not associated with your WABA.
- Sentry account with connected application for monitoring.
- Node.js installed.
- Ngrok account and the binary installed.
Step One: Create Sentry Webhook
To receive incoming notifications from Sentry, you must previously have created a Sentry account, with at least one application monitored by account.
1. Run ngrok in a terminal.
<div class="geshifilter"><pre class="php geshifilter-php">npm i <span class="sy0">-</span>g ngrok <span class="co1">// Install ngrok globally</span>
ngrok http <span class="nu0">3000</span> <span class="co1">// Let ngrok listen port 3000</span></pre></div>
Ngrok will redirect a temporary https address from your local test environment on port 3000. You can use another port if 3000 is already reserved by another server.

2. Create Sentry Internal Integration in path Settings/Developer Settings/Create Integration.
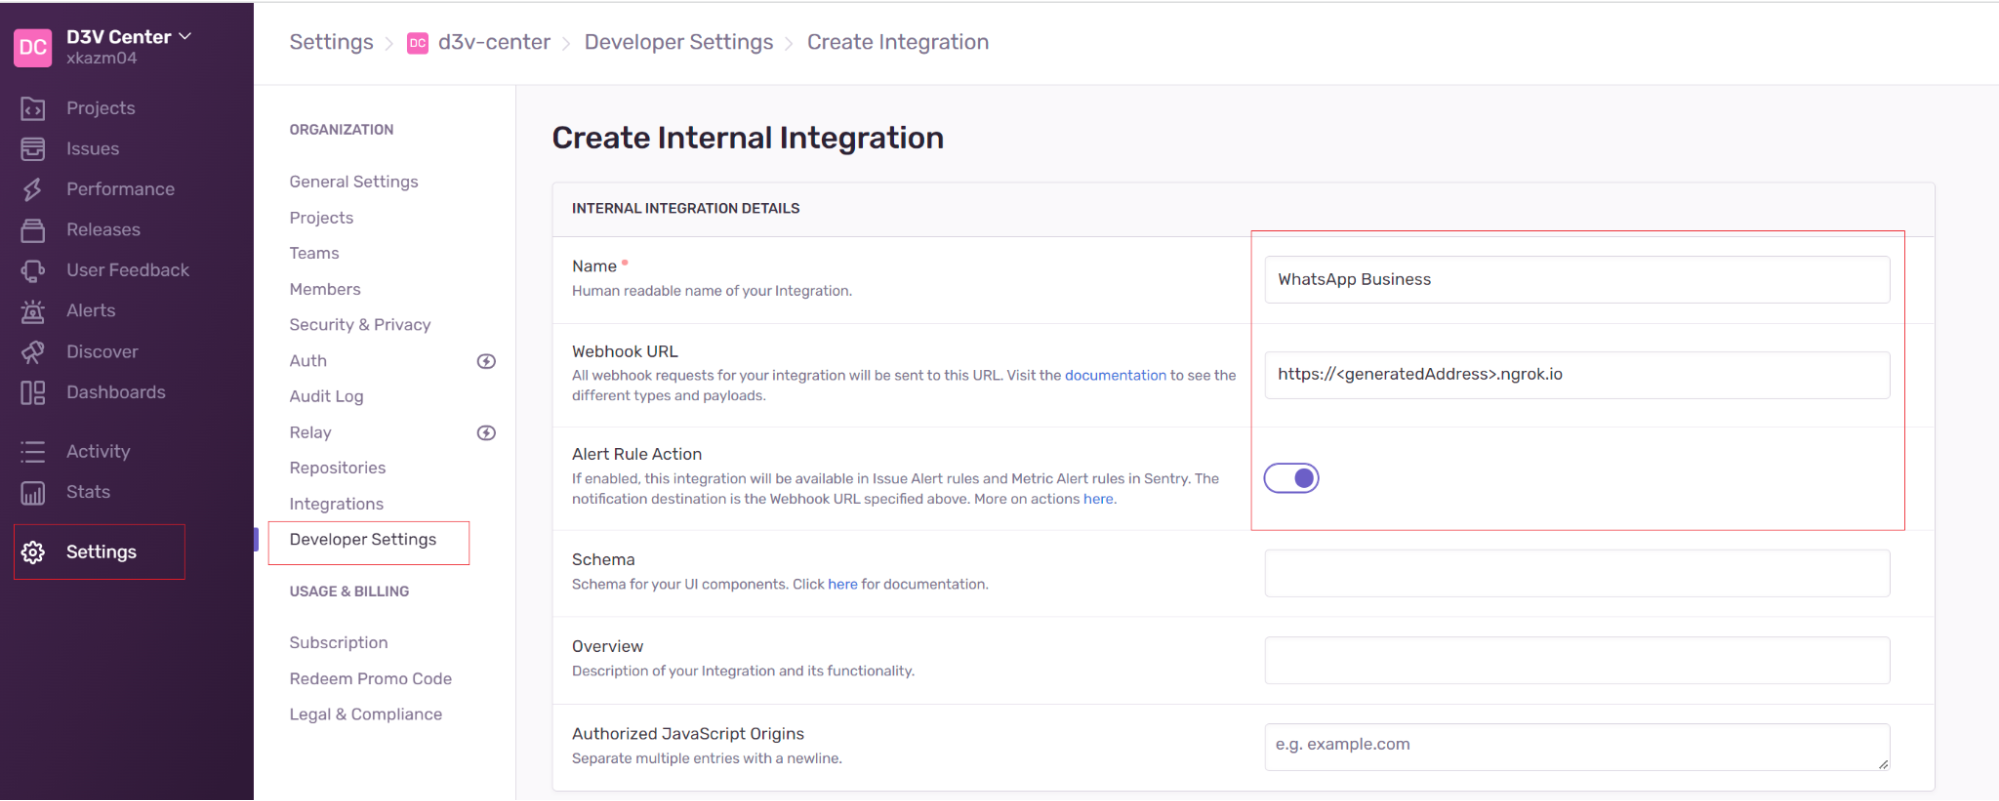
3. Pass ngrok generated https address into WebhookURL.
4. Save changes. Sentry Internal Integration will be created together with CLIENT SECRET needed later for test environment setup.
5. Create new or use existing Sentry Alert to be always notified when your monitoring rule reaches threshold.
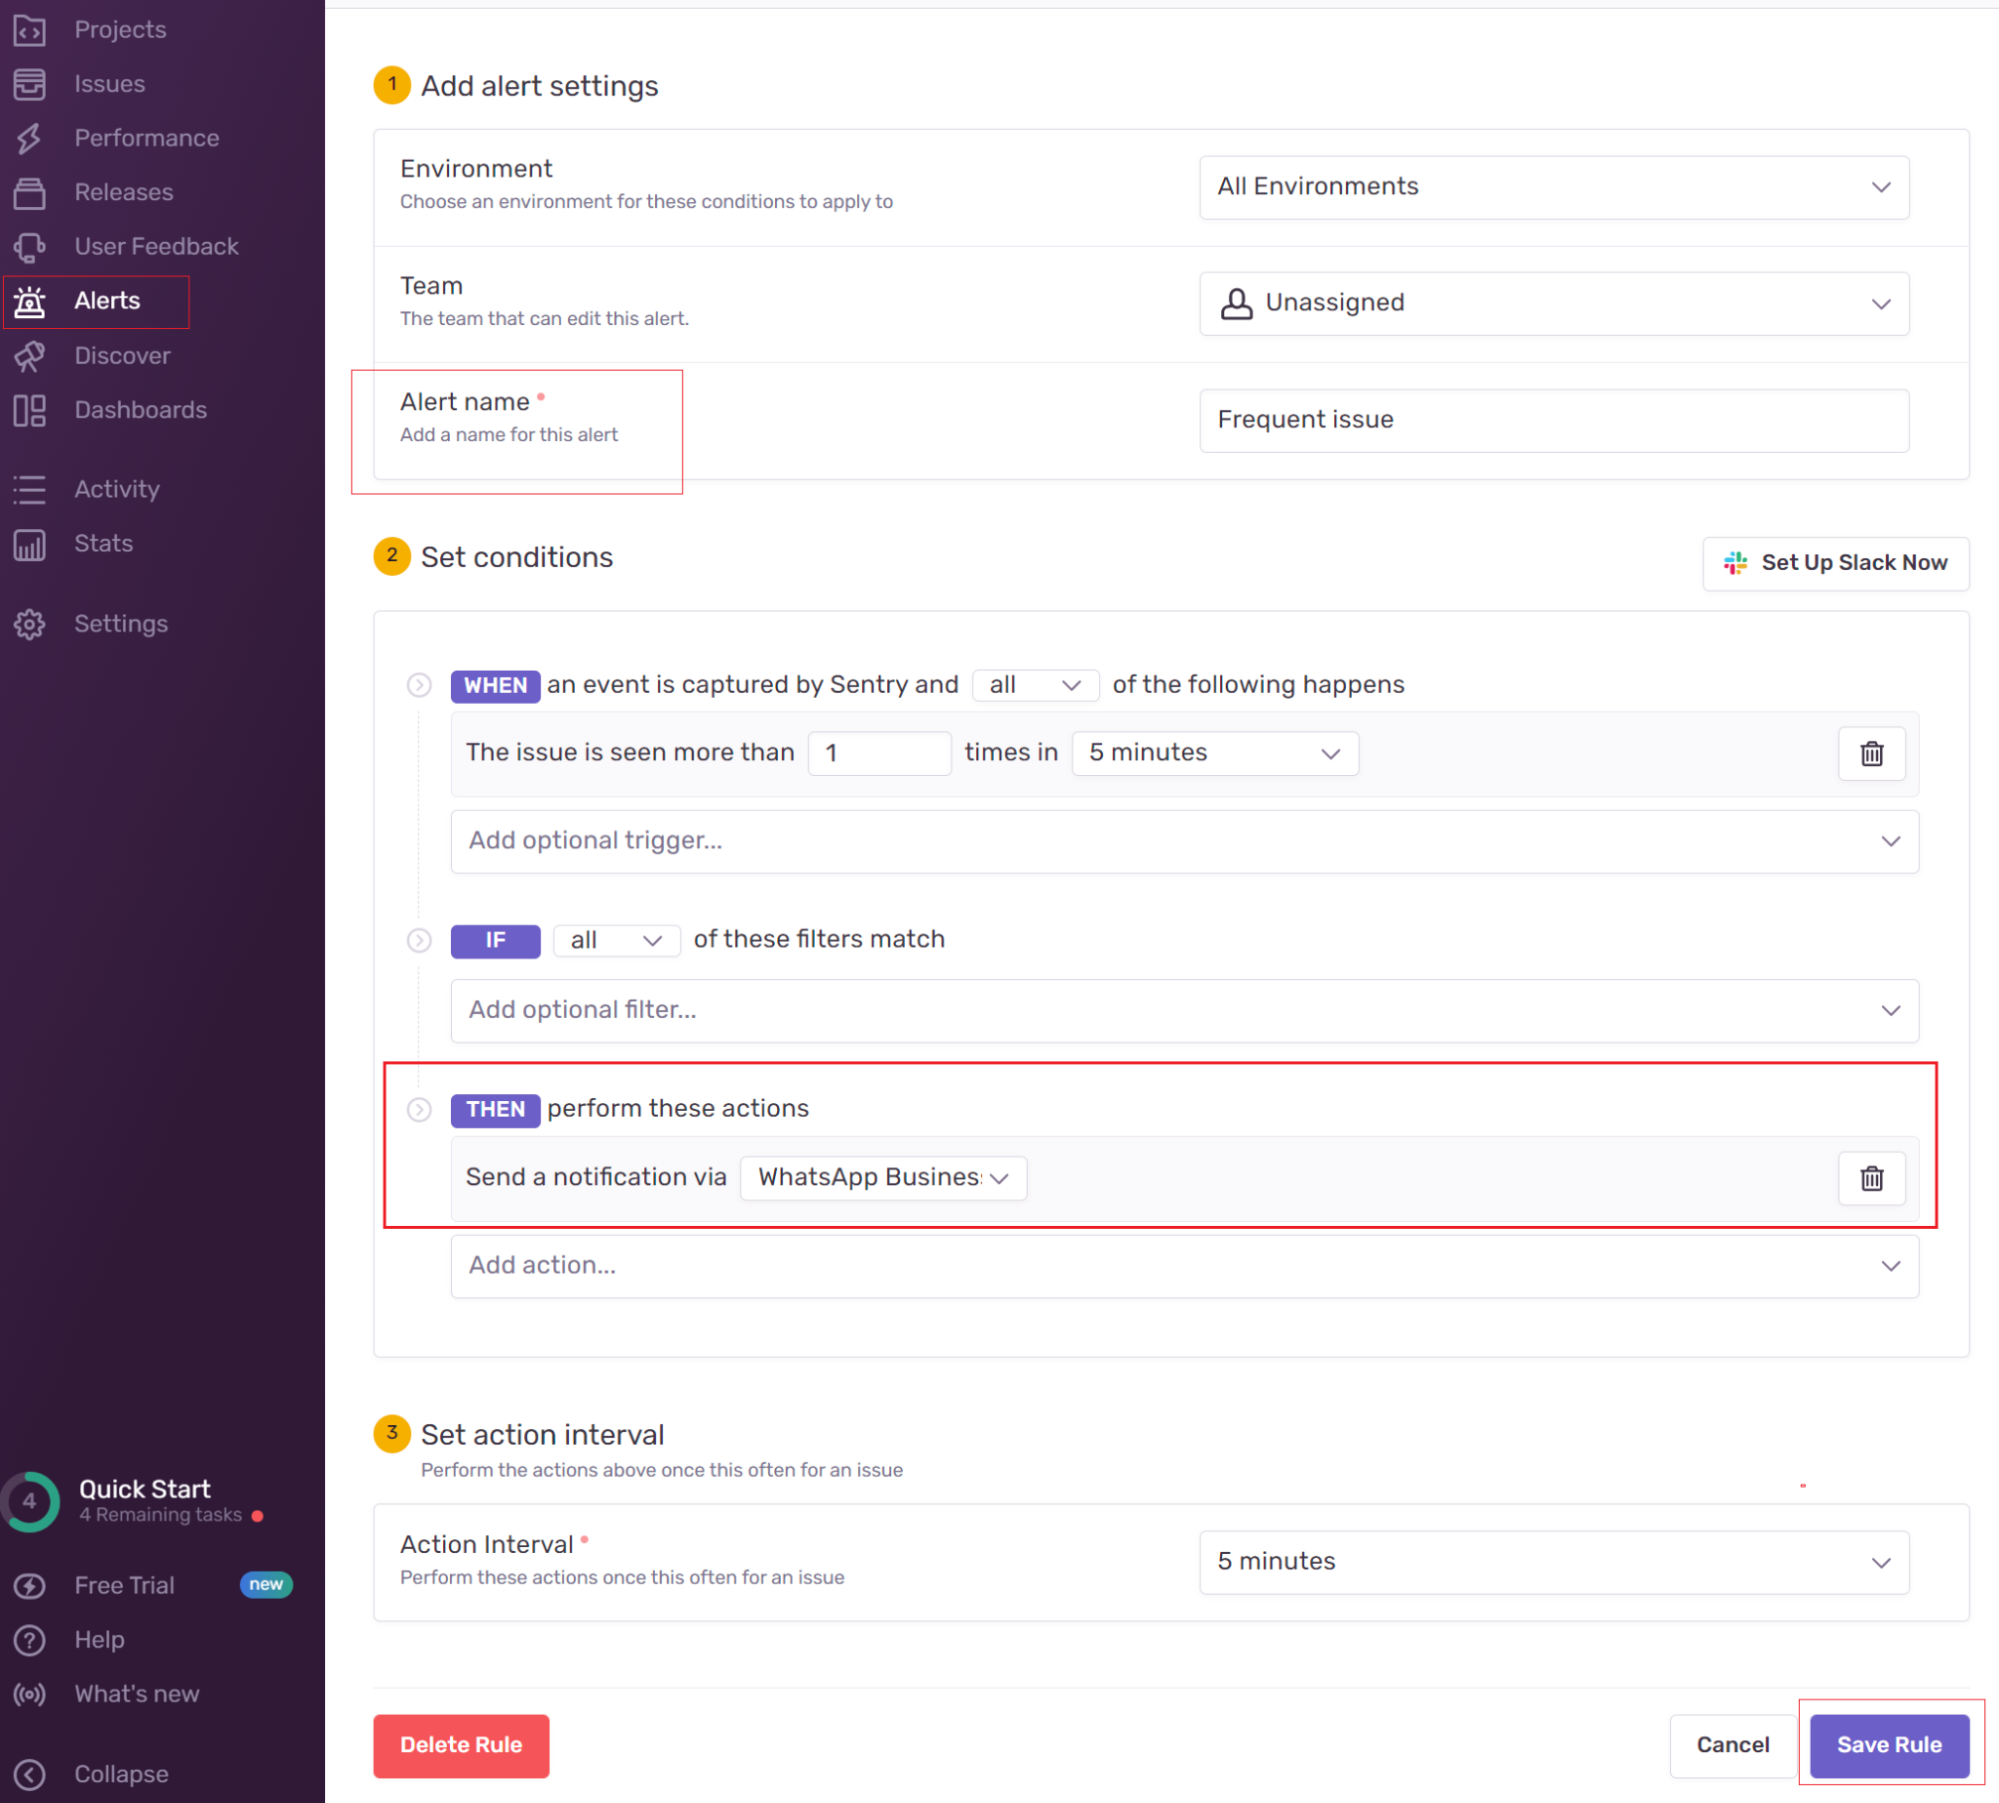
Result of the alert rule has to lead into custom integration created in the previous system.
Step Two: Setup Node.js environment
We have prepared a sample Node.js server for your quick webhook integration between WhatsApp Business and Sentry:
1. Open IDE and Install test server.
<div class="geshifilter"><pre class="php geshifilter-php">git clone https<span class="sy0">:</span><span class="co1">//github.com/tyntec/api-samples.git  // Clone quickstart repository</span>
cd api<span class="sy0">-</span>sample <span class="co1">// Go to cloned repository</span>
cd wa<span class="sy0">-</span>integrations <span class="co1">// Go to Integrations folder</span>
cd sentry <span class="co1">// Go to Sentry sentry folder</span>
npm install <span class="co1">// Install dependencies</span></pre></div>
2. Configure environment variables in .env:
- CLIENT_SECRET= Sentry Secret generated in step 2.2 with Internal Integration.
- PORT – (optional) Listening HTTP port for localhost. Port should match ngrok to generate a publicly visible environment for testing. Default value = 3000
- FROM – Your WABA number
- TO – Your phone number
- TYNTEC_API_KEY – Your tyntec API key
- WHATSAPP_TEMPLATE_ID – The ID of your WhatsApp template.
- WHATSAPP_TEMPLATE_LANG – A chosen language of the WhatsApp template.
Your WhatsApp template should have these parameters:
- Has no variable in the header.
- Has one variable in the body – the label of the rule that was triggered (e.g. “Very Important Alert Rule!”).
- Has one Call-to-Action button with `https://sentry.io/organizations/{{1}}` dynamic URL – the web URL for the event that triggered the alert rule (an example of the URL is “https://sentry.io/organizations/test-org/issues/1117540176/events/e4874d664c3540c1a32eab185f12c5ab/”).
Step Three: Test your app
1. Start by running your server. Go to the terminal and navigate to your Sentry folder.
2. Inside your Sentry folder, run the following command to start the server:
<div class="geshifilter"><pre class="php geshifilter-php">npm start</pre></div>Console should return response:
<div class="geshifilter"><pre class="php geshifilter-php">Server listening on port <span class="nu0">3000</span><span class="sy0">.</span></pre></div>3. Trigger Sentry alert by forcing an error in an application monitored by your Sentry account.
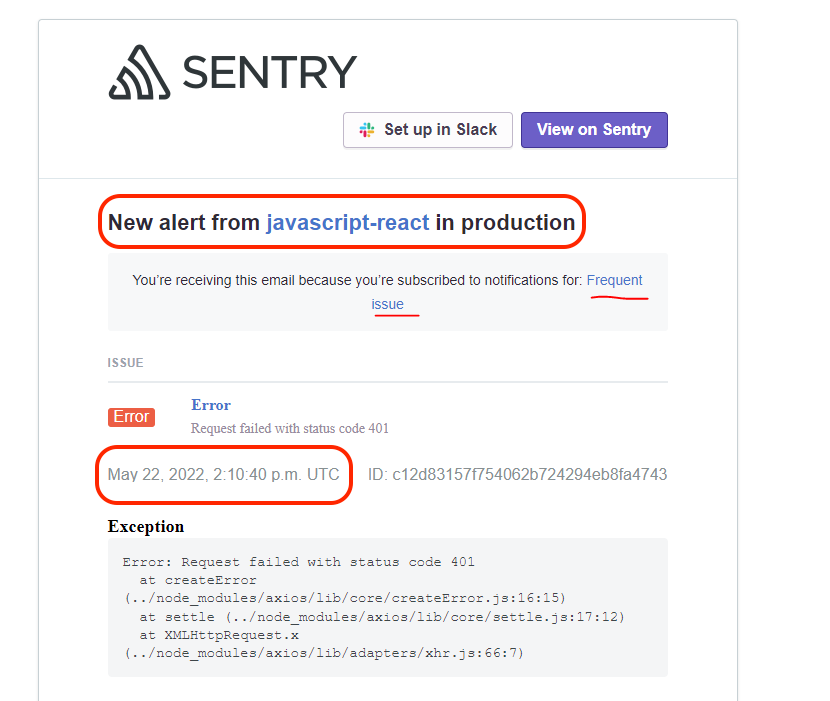
4. Check alerts on your WhatsApp.
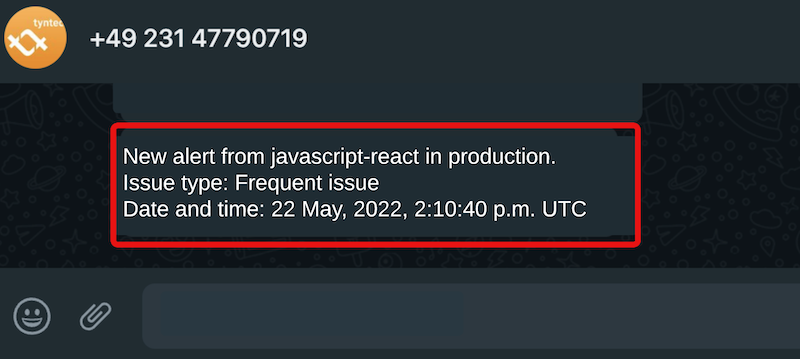
The integration is set up correctly and you will now receive alerts from Sentry on your WhatsApp.