WhatsApp Business API | Integration with WIT Conversation Platform

Hi there,
Would you like to connect your WIT chatbots with your WhatsApp contacts? Or are you simply looking for a platform where you could quickly build a WhatsApp chatbot? Either way, you don’t need to look further. With the tyntec Conversations API and WIT Conversation Platform, you can create a fantastic chatbot experience your users would actually appreciate — in a few simple steps.
Following this guide, you will add your tyntec WhatsApp account into WIT and build a simple Hello World conversation.
You Will Need
- Your tyntec account and API key.
- Your WhatsApp Business Account Number that has been assigned to you by tyntec
- Your tyntec WhatsApp account ID
- Your WIT Conversation Platform account
Step One: Create a simple bot with an enabled WhatsApp channel
Let’s start from scratch. If you already have your own bot, skip to Step 4.
1. Login to your WIT Conversation Platform
2. On the main bots screen, click on Wiby (WIT Eye-like mascot) to create a new bot.
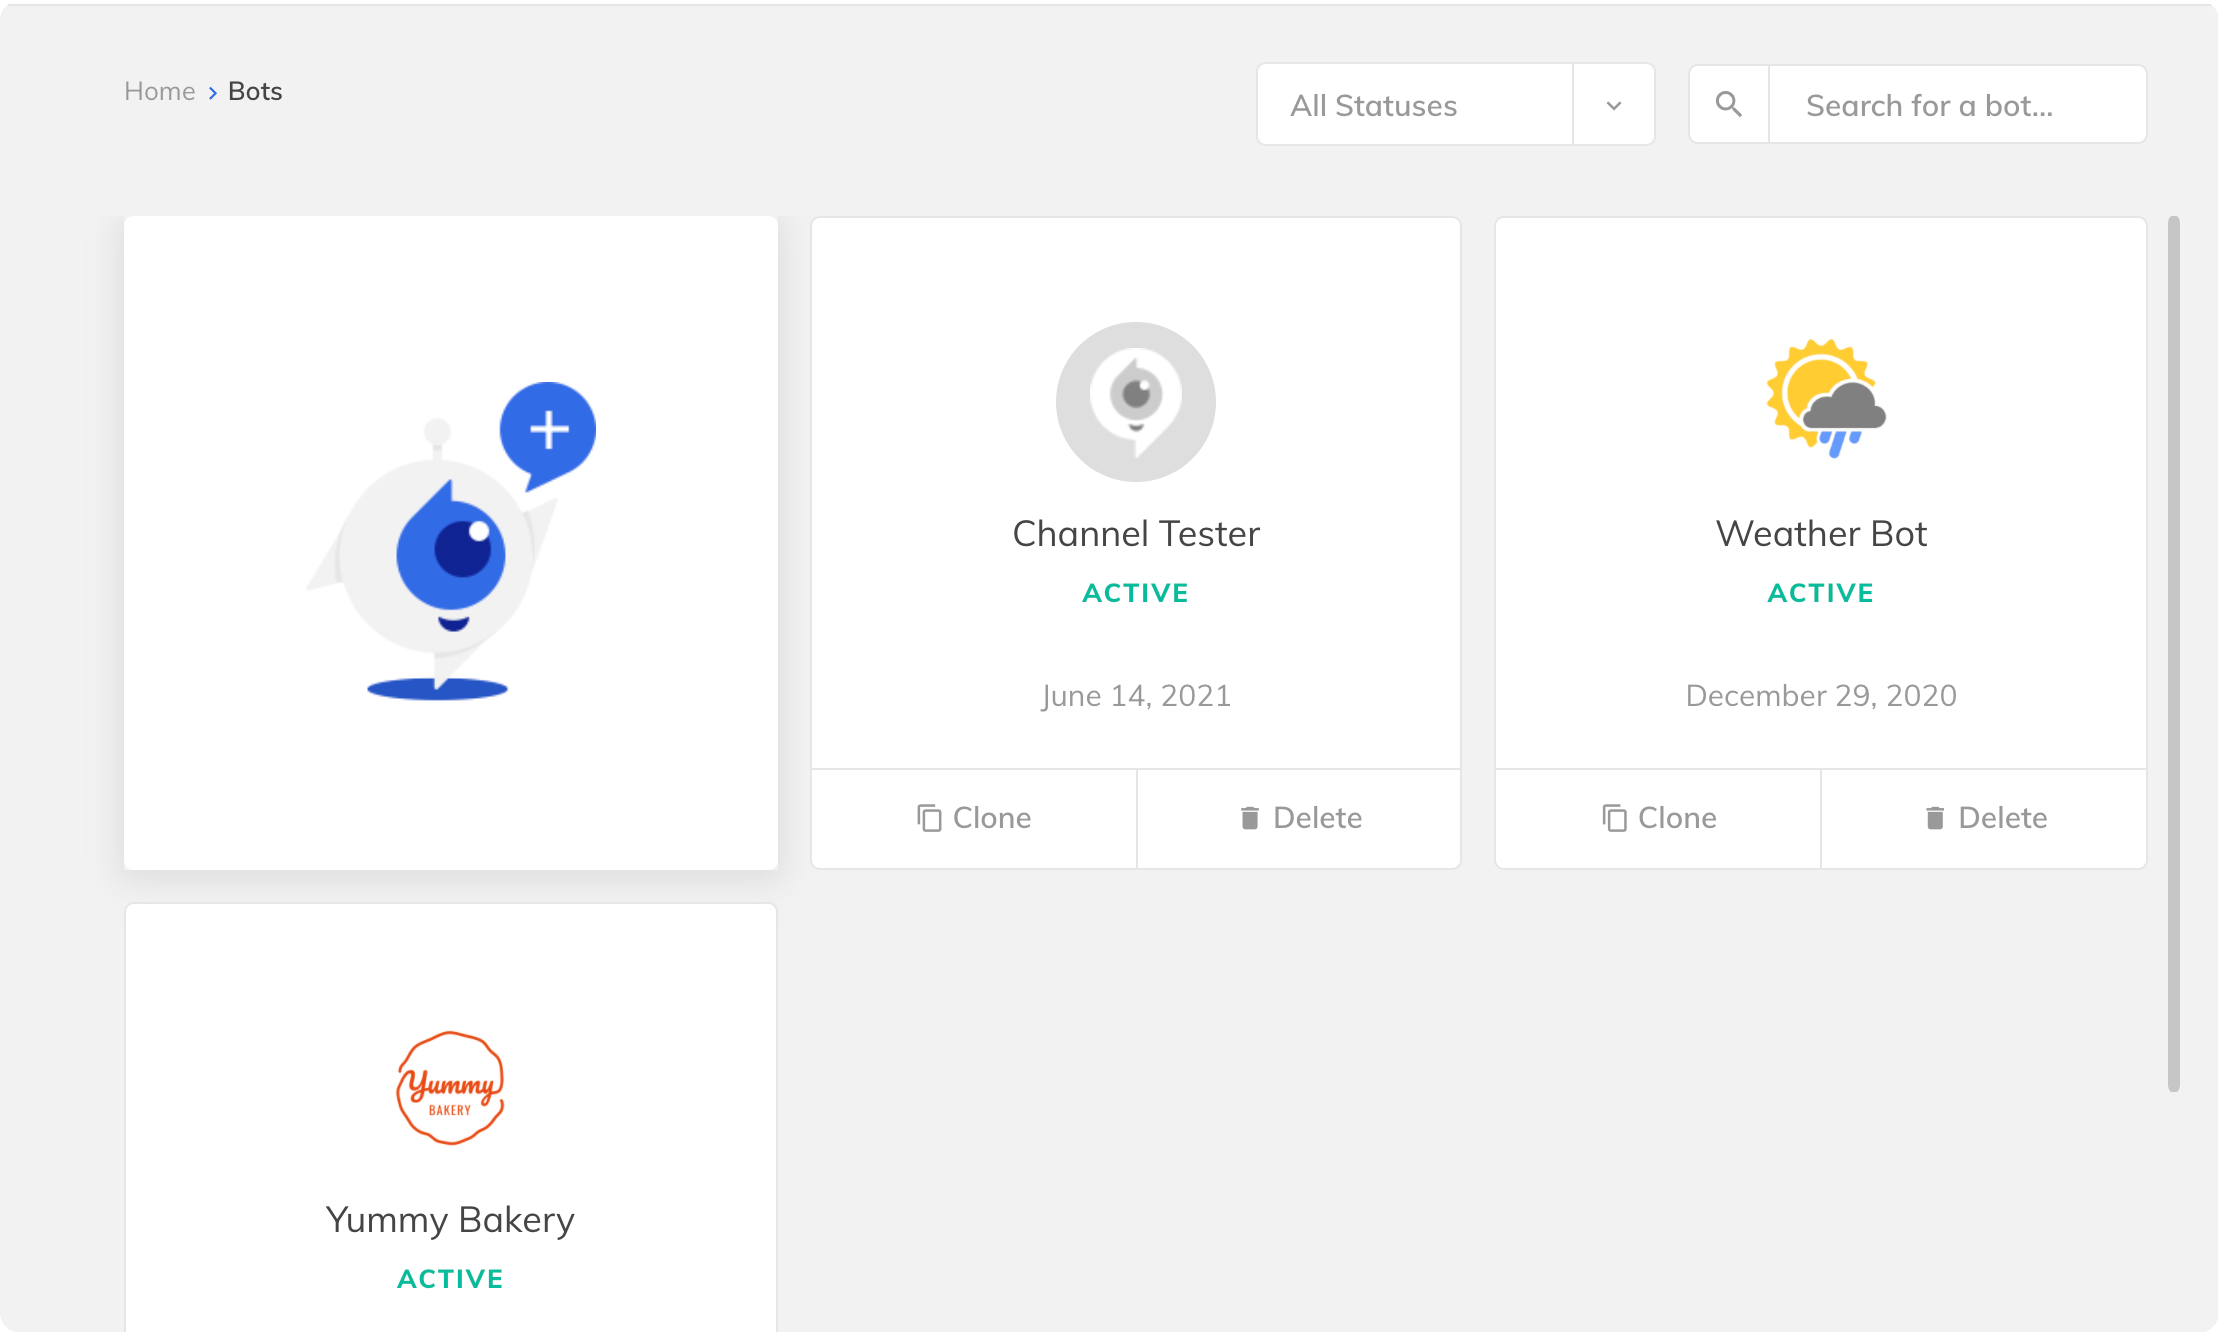
3. In the create bot pop-up, fill in the Display Name, Timezone, and your account Entity. Consider adding your logo for easier navigation on the main screen. Click Save. Then, click on your bot to open its control panel.

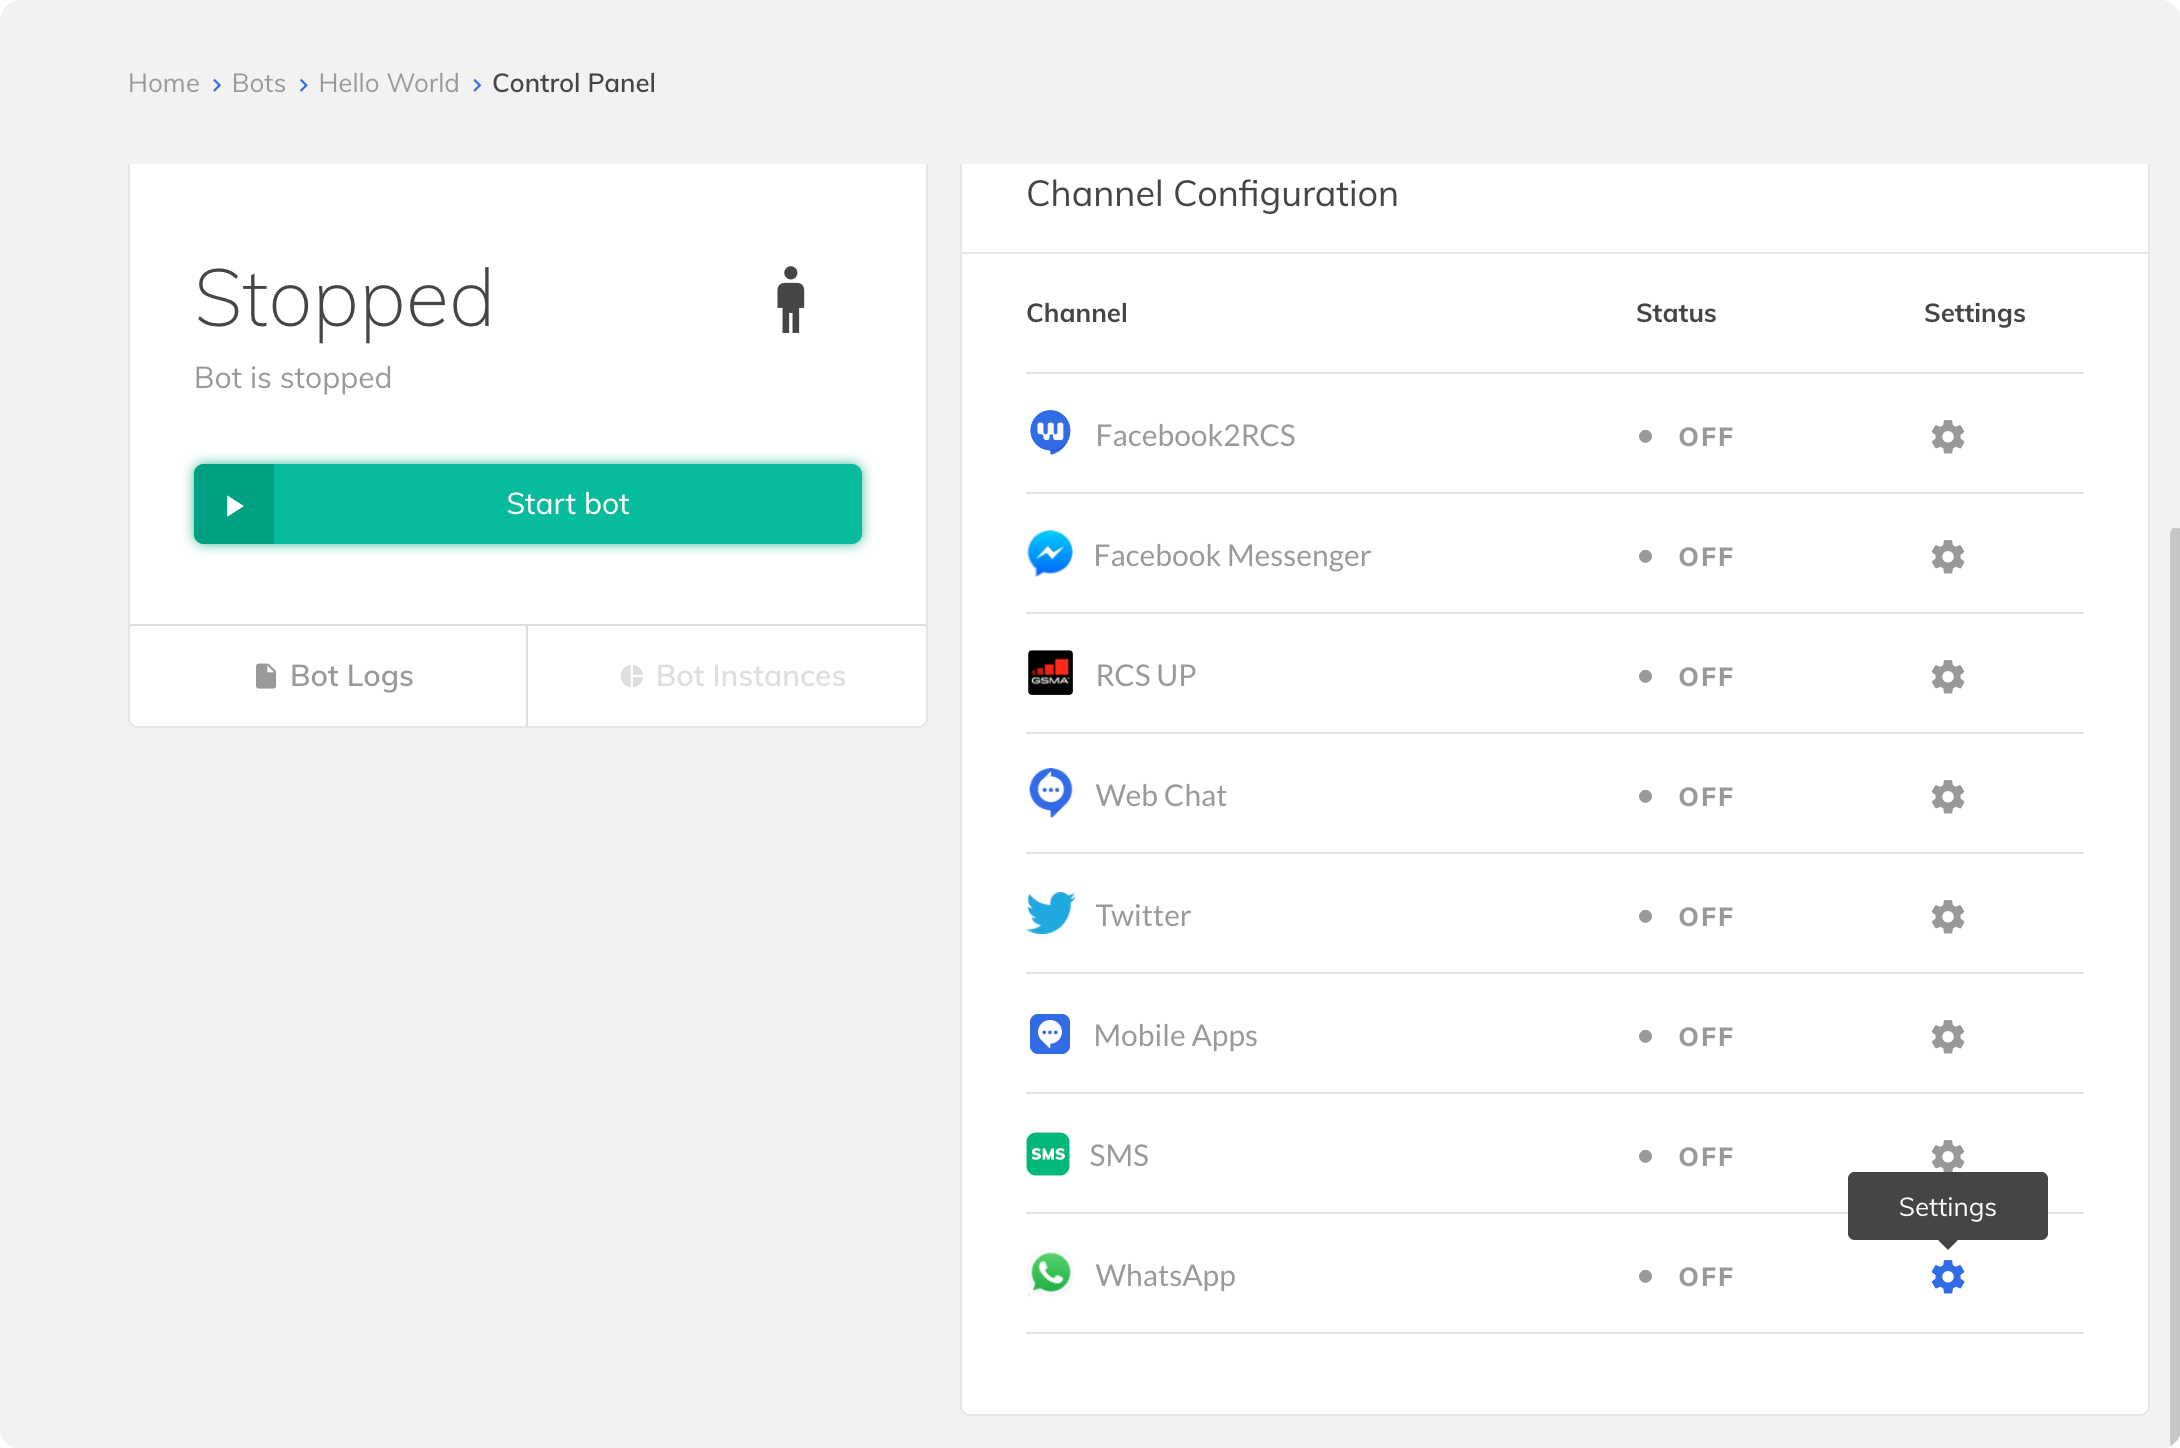
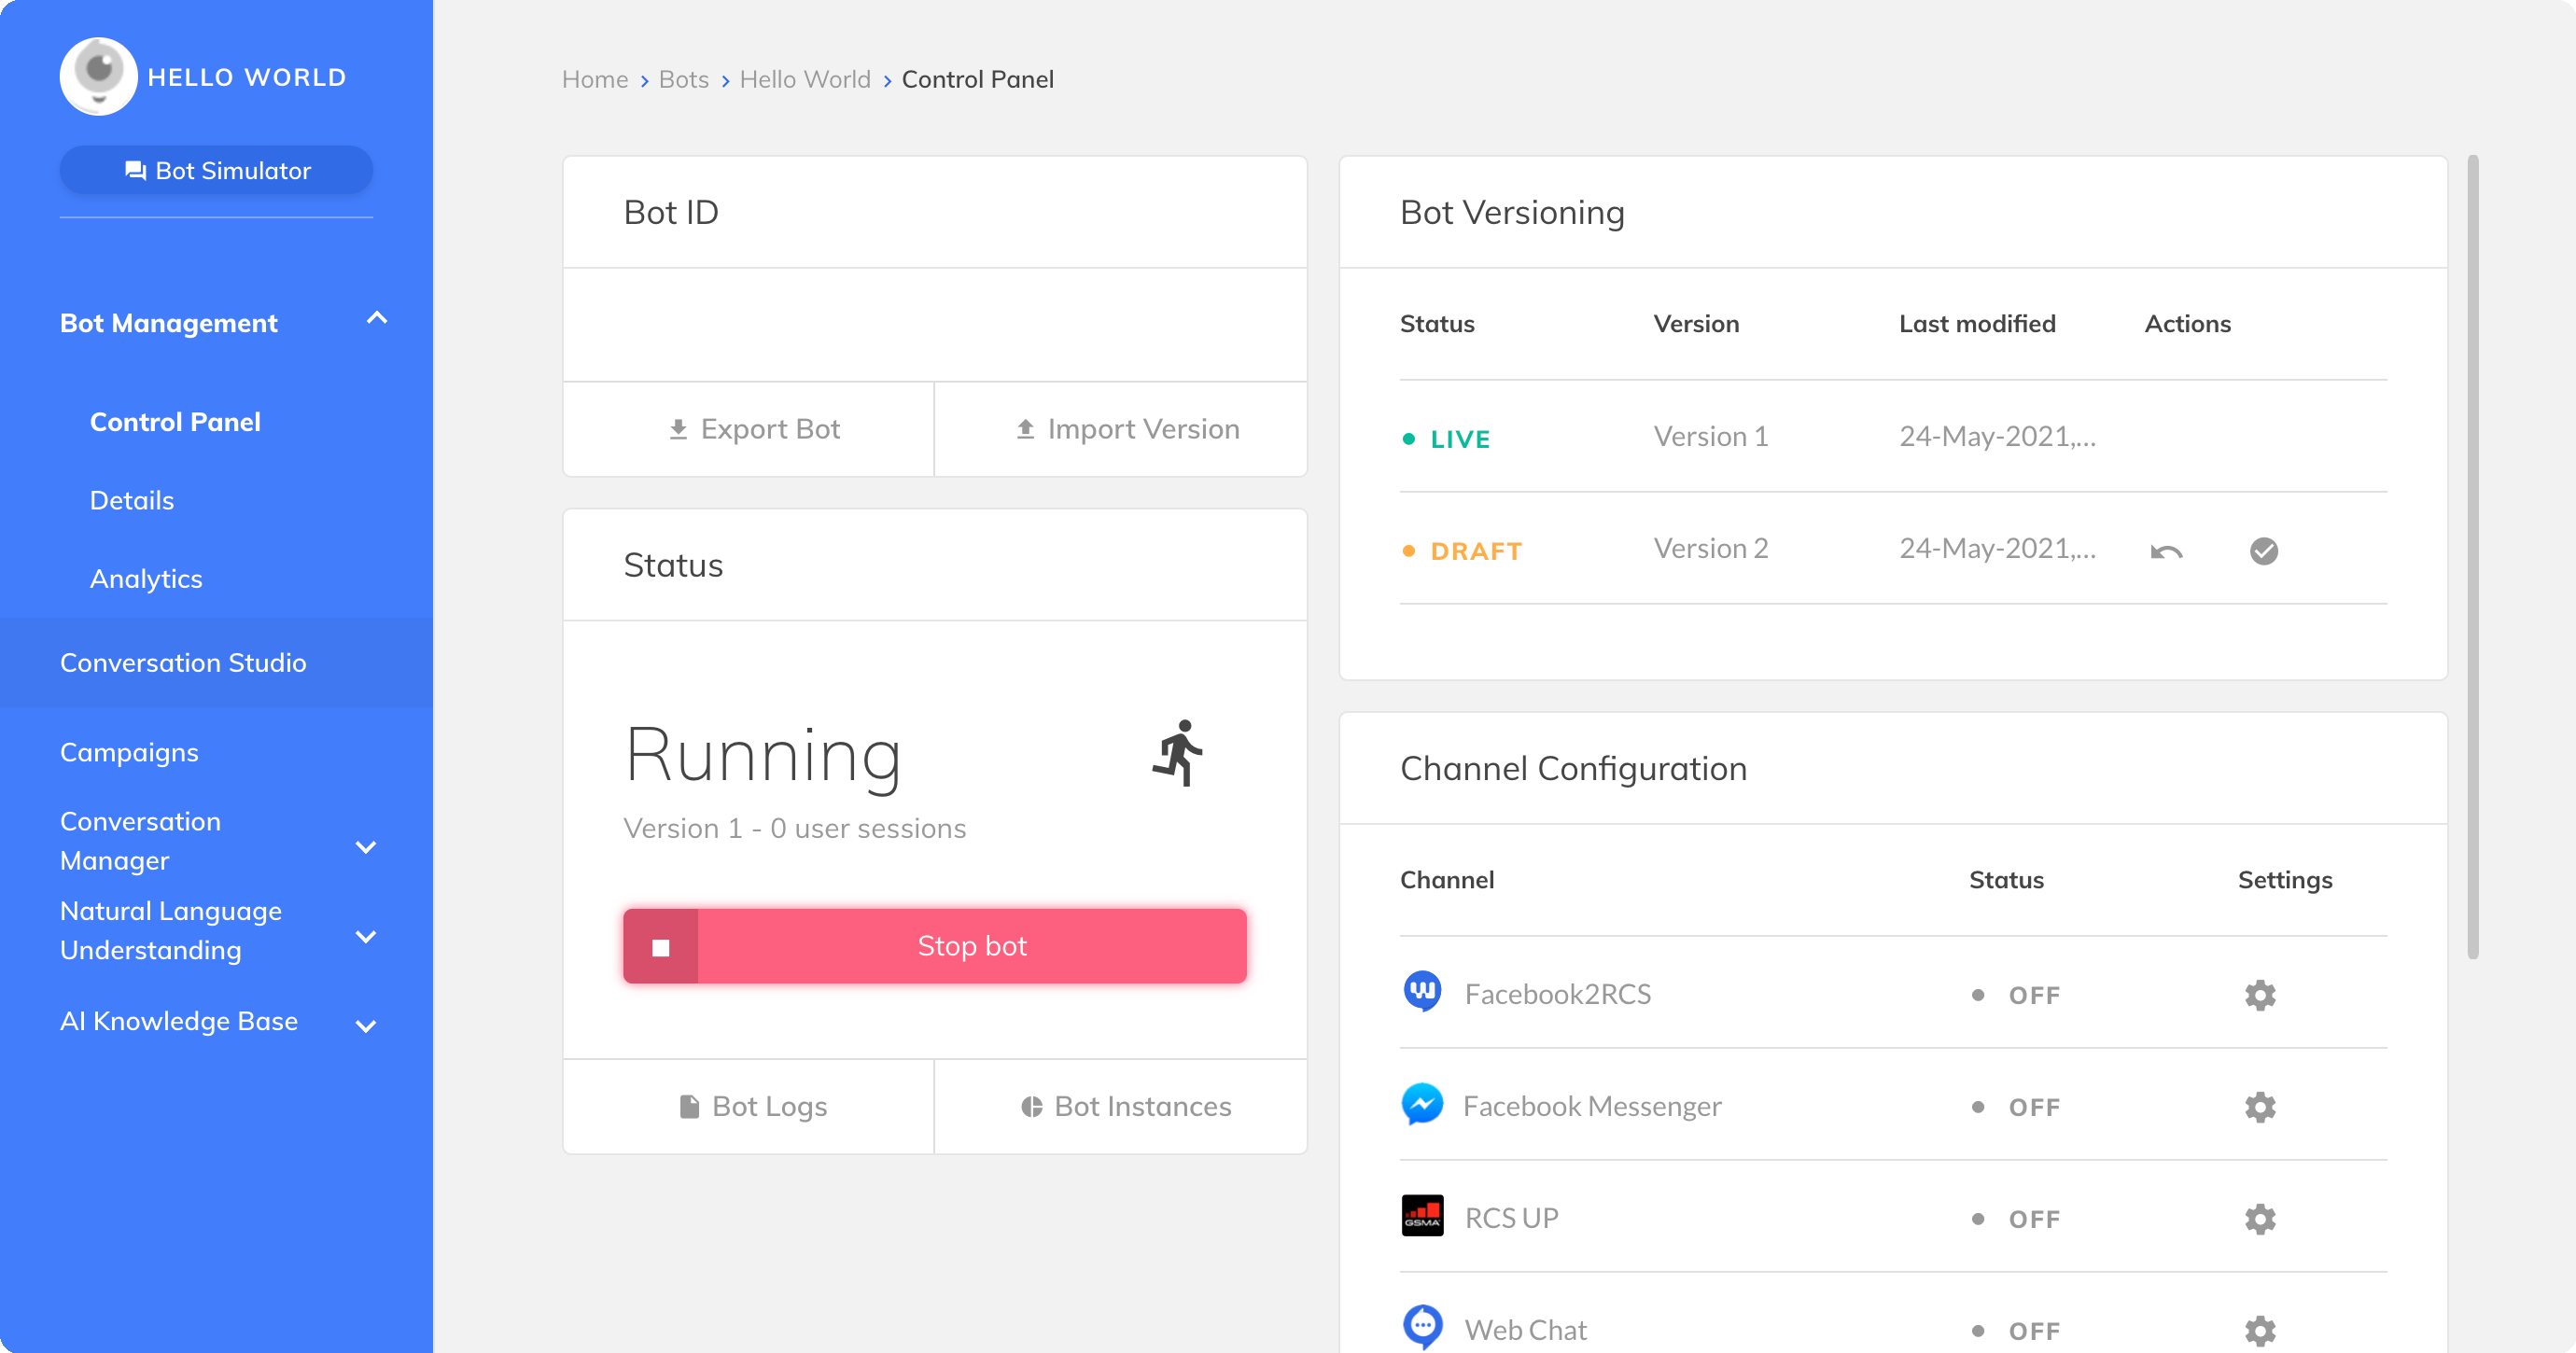
4. In the Bot Control Panel, locate the Channel configuration on right. Select WhatsApp by clicking the Settings icon.
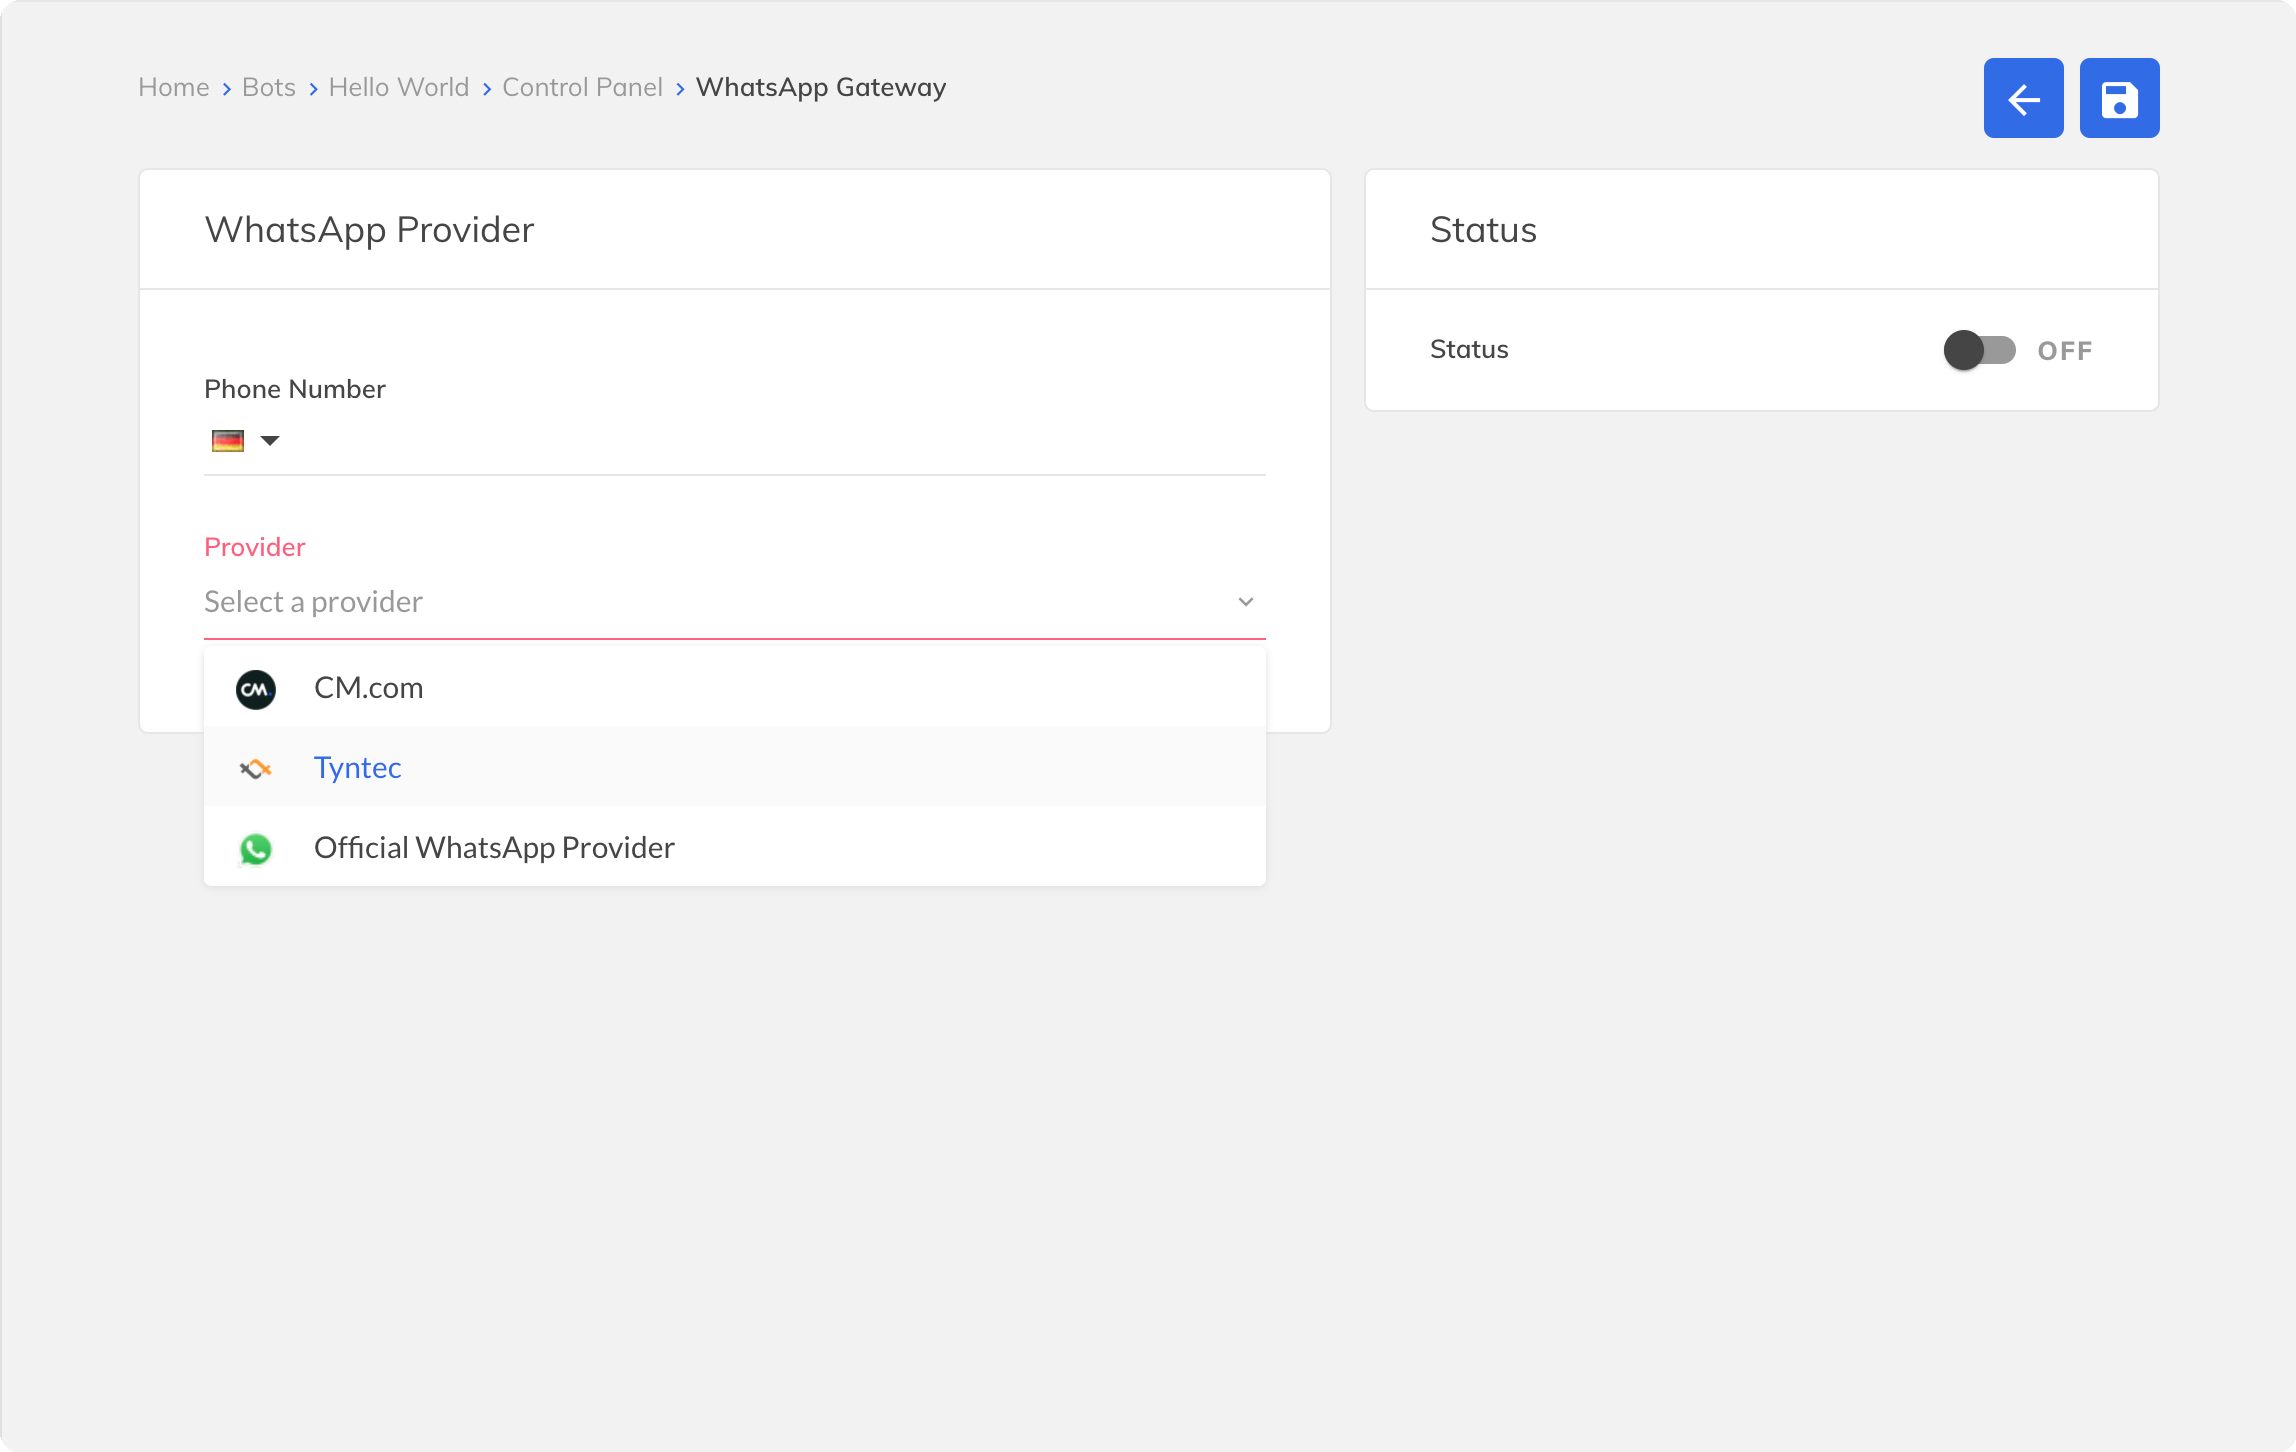
5. Inside the WhatsApp Gateway screen, start by filling in your WhatsApp Business Account number as Phone Number with the + at the start. Then, select tyntec as a service provider.
6. The WhatsApp Gateway updates itself to show you Endpoint, Token, and Account ID text fields. Fill the Endpoint with https://api.tyntec.com/chat-api/v2/messages, Token with your API key, and Account ID with your tyntec WhatsApp Account ID.
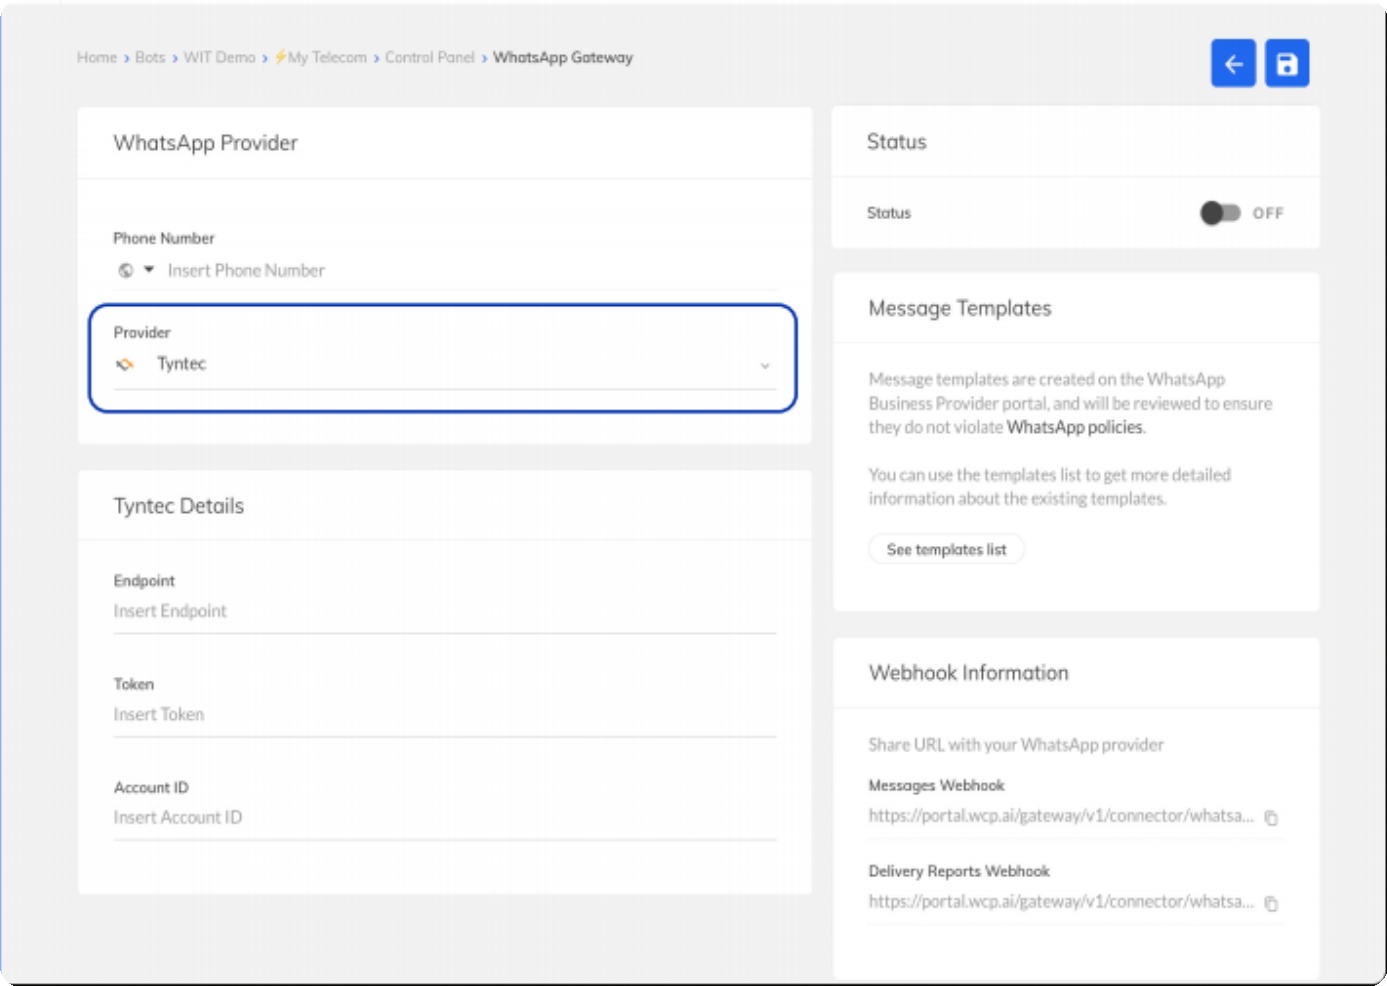
Tip: You can quickly get your Account ID by calling GET https://api.tyntec.com/conversations/v3/channels/whatsapp/accounts.
7. On the bottom right side, notice the Webhook Information. Copy the Messages Webhook and Delivery Reports Webhook. You will need them later to set a webhook.
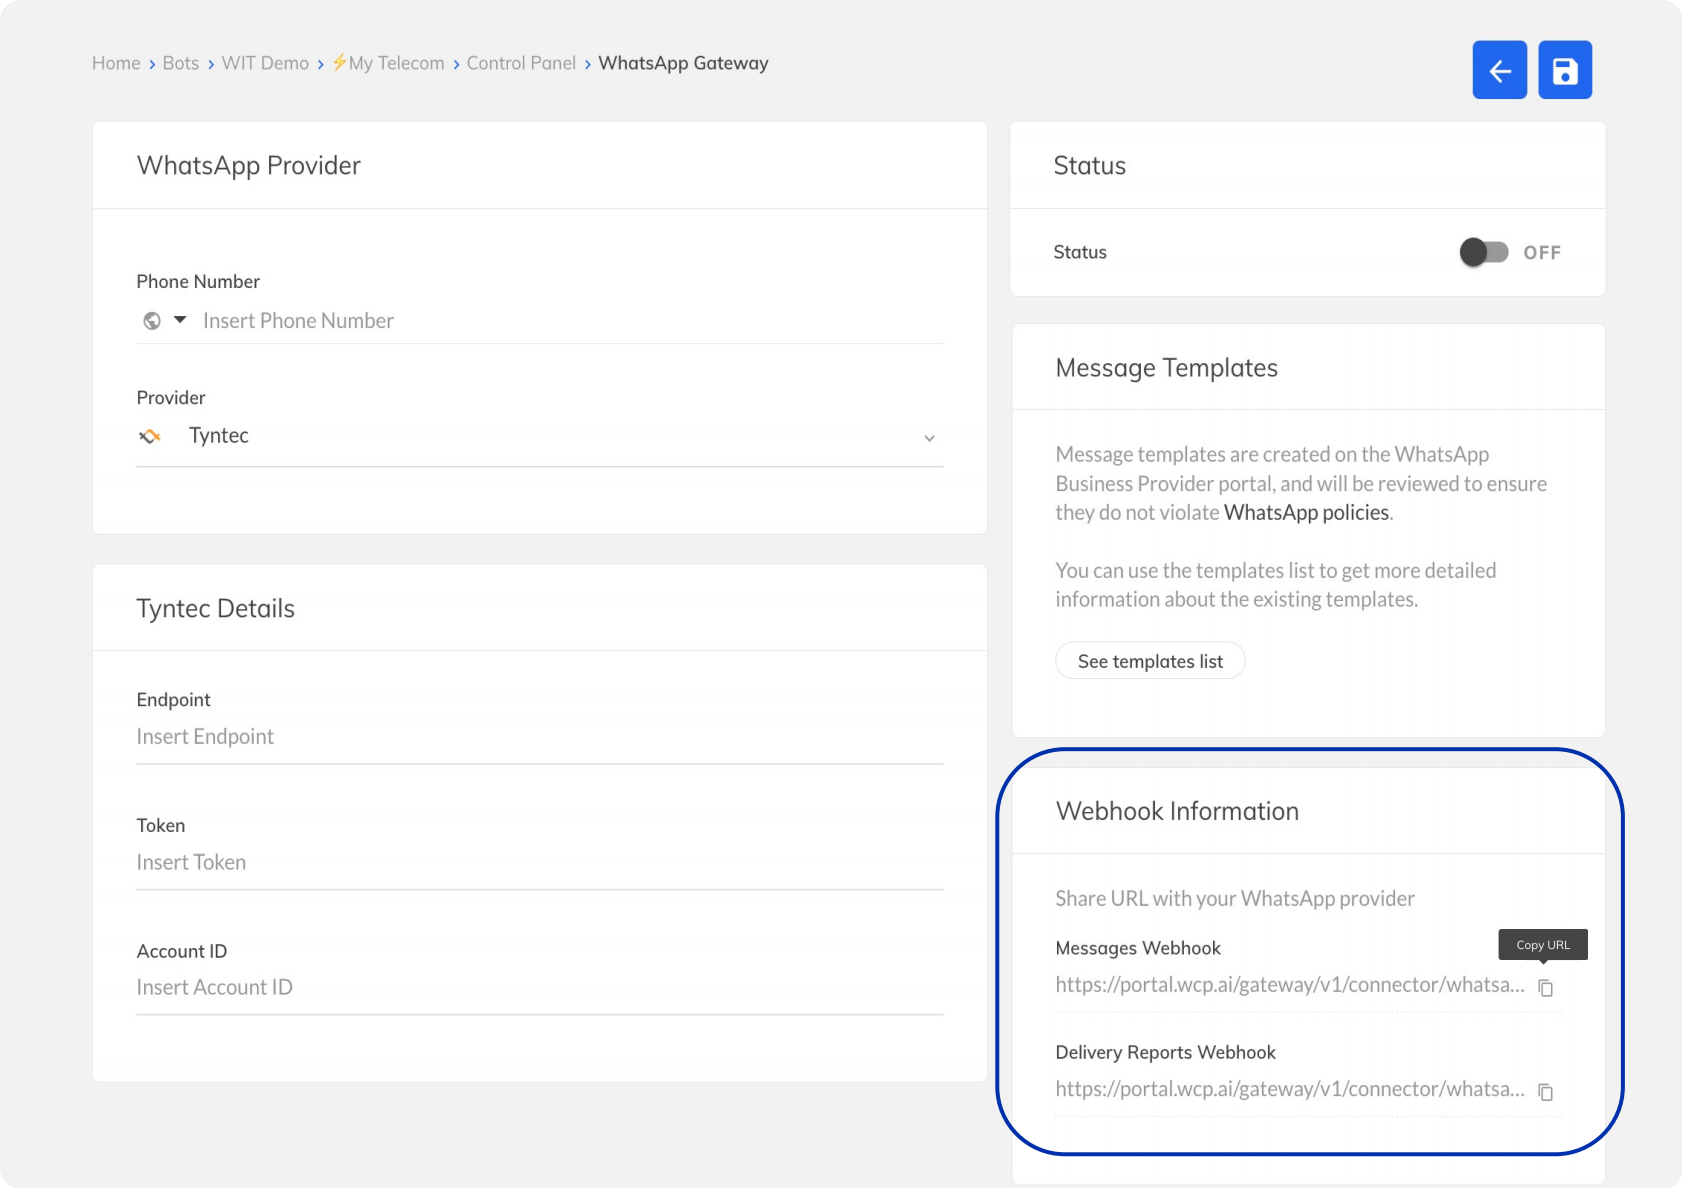
Tip: If your version does not show the Webhook Information, ask WIT to provide them.
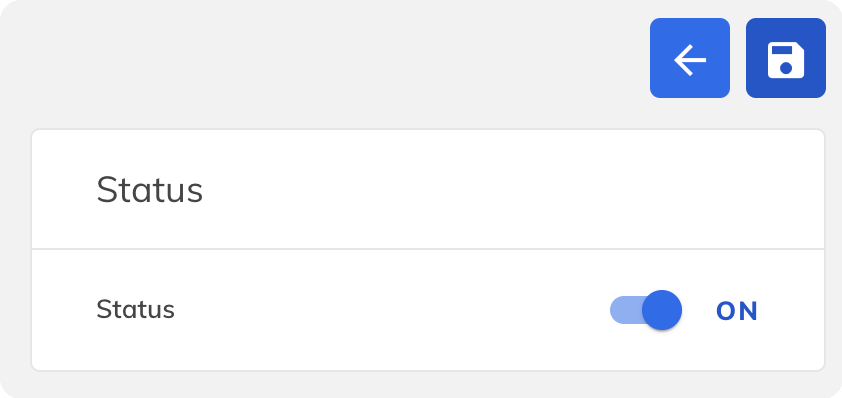
8. Toggle your bot Status on and click the save button above it.
9. Back in the bot Control Panel, press the Start bot button.
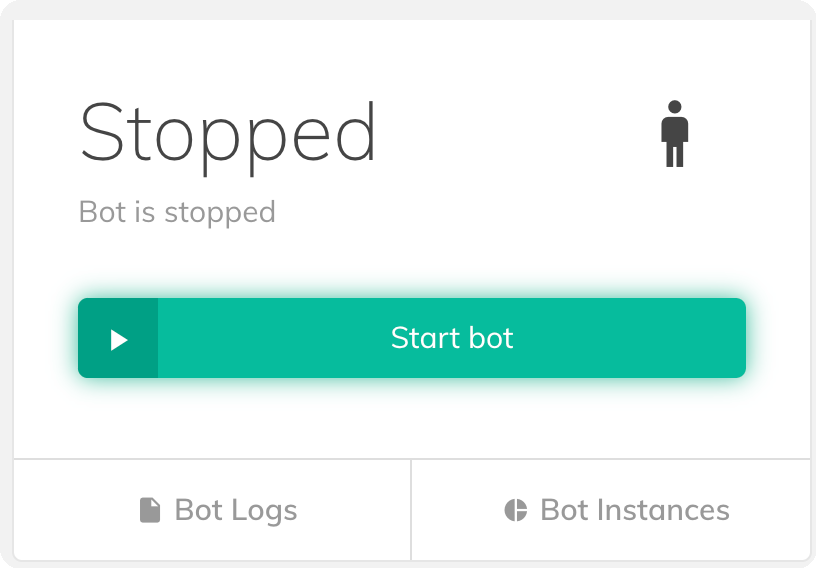
Your bot is now up and running, waiting on incoming WhatsApp messages.
Step Two: Subscribe your bot to incoming WhatsApp messages
Let the tyntec Conversations API know where to deliver WhatsApp messages from customers. You are going to subscribe to your webhook via an API call in Postman.
1. From the api-collection/conversations/v3 directory, import the Conversations V3.0.postman_collection.json into Postman.
2. Authorize Postman with your tyntec Conversations API key and your WABA number. Right-click the collection and select Edit. Then go to Variables and set the apiKey variable to your tyntec Conversations API key. Set also the {{whatsAppBusinessNumber}} variable to your WABA number.
3. Let’s set up the webhook! Open the WhatsApp folder. Inside, open the Configurations folder and select the Configure the callback for a specific number request and change the inboundMessageUrl in the body to the Messages Webhook and messageStatusUrl to Delivery Reports Webhook from the Bot Control Panel.
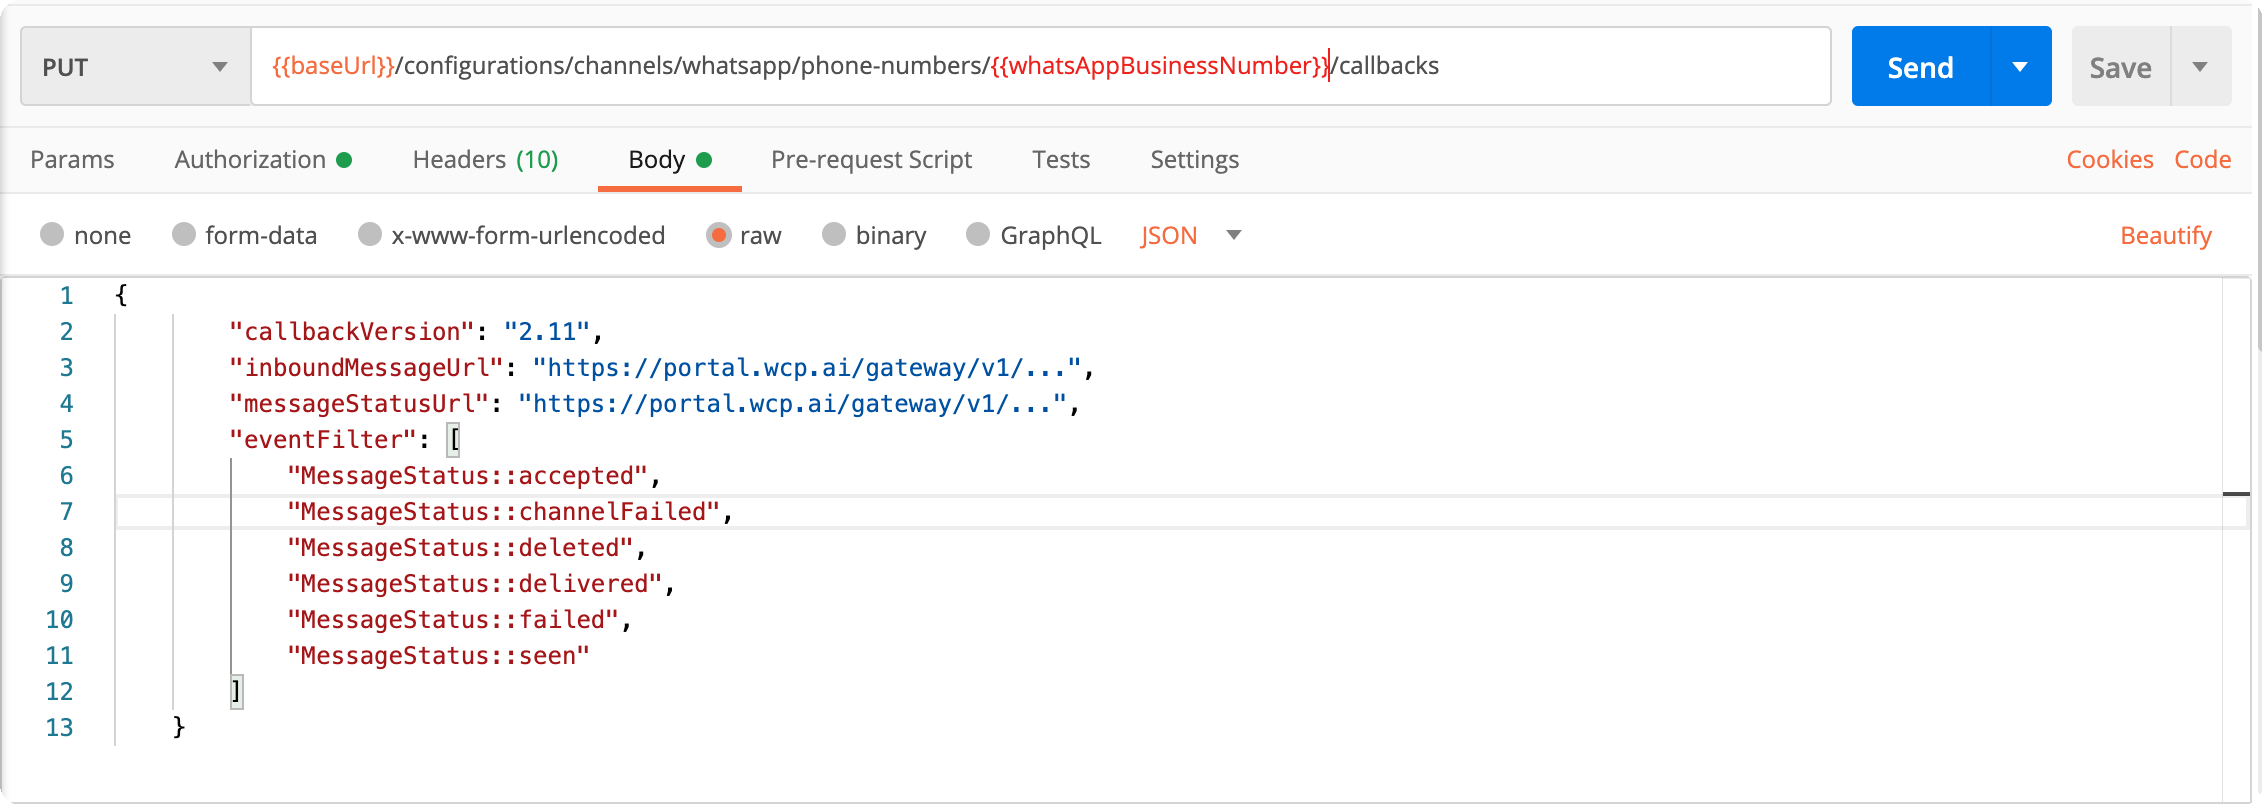
This request will subscribe to your WIT bot to incoming message events.
4. Hit the Send button. You should receive a 2xx status in the response if everything were okay.
Cool! Now your Inbox knows where to deliver WhatsApp messages from your customers. If you know your way around WCP, then you are now done. However, steps 3 and 4 show you how to create a simple conversation if this is your first time.
Step Three: Build a Hello World conversation
Let’s create a testing interaction between user and bot.
1. Go back to your WIT Conversation Platform.
2.Click on your Hello World bot with WhatsApp enabled.
3. On the left, select Conversation Studio.
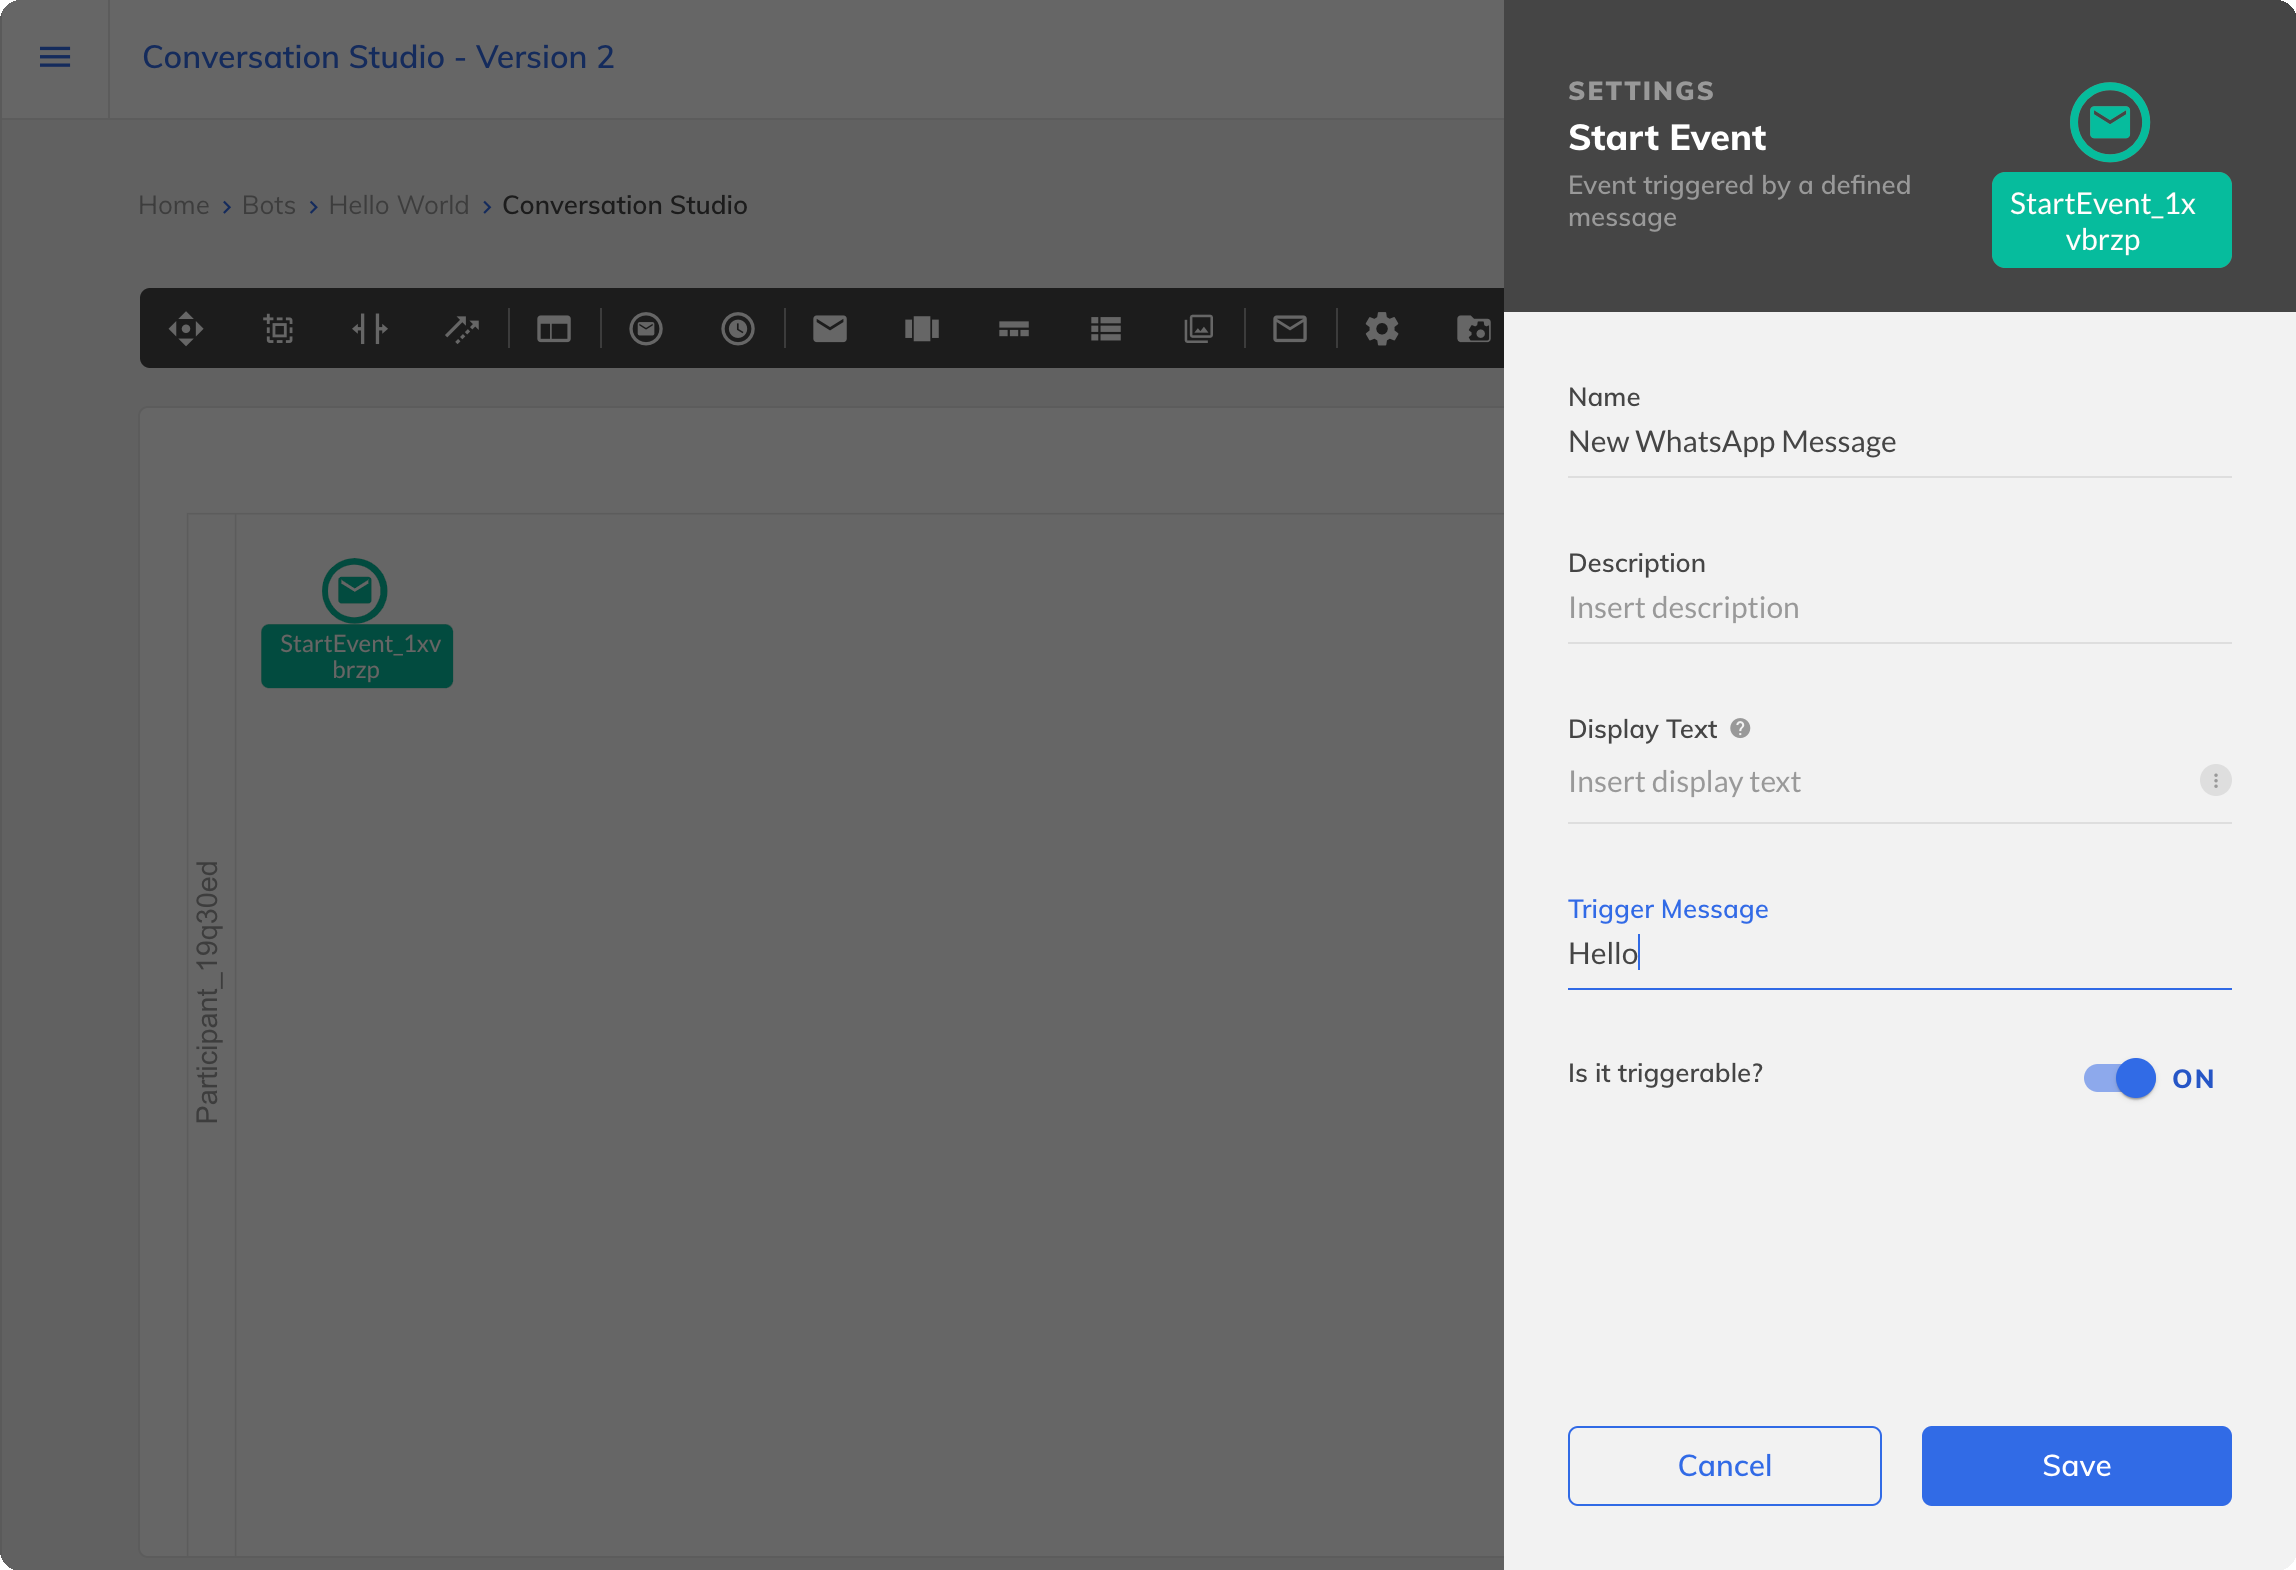
4. Let’s initiate your Conversation by receiving a message. Click on the Start event and drag it anywhere inside the canvas. Each Conversation needs to have the Start event and the End event.
5. Double click the Start event to configure it. Name it for better understanding and fill in the Trigger Message. When WIT receives your new WhatsApp message, they will check if it contains this Trigger Message. If you are happy with it, press Save.
6. Now you will add the response. Click your Start event once and select the first icon and then the envelope icon to add a Text Message event on your canvas.
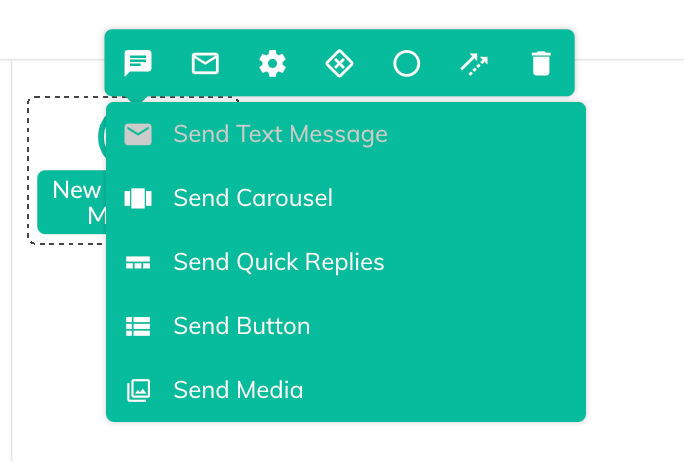
Alternatively, you can click the envelope icon on the icon bar to add a Text Message event.

If you do it this way, you will need to click the fourth (arrow) icon and connect your Start event with the Text Message event.
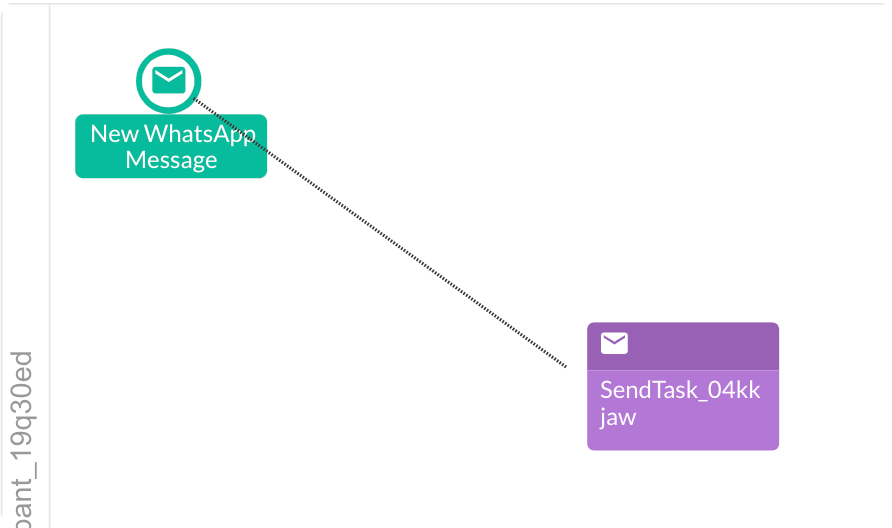
7. Double click the Text Message icon to configure it. You can now rename it, select if you want to use WhatsApp Text (free-form message) or WhatsApp Template. Select WhatsApp Text and fill in the Message to Send.
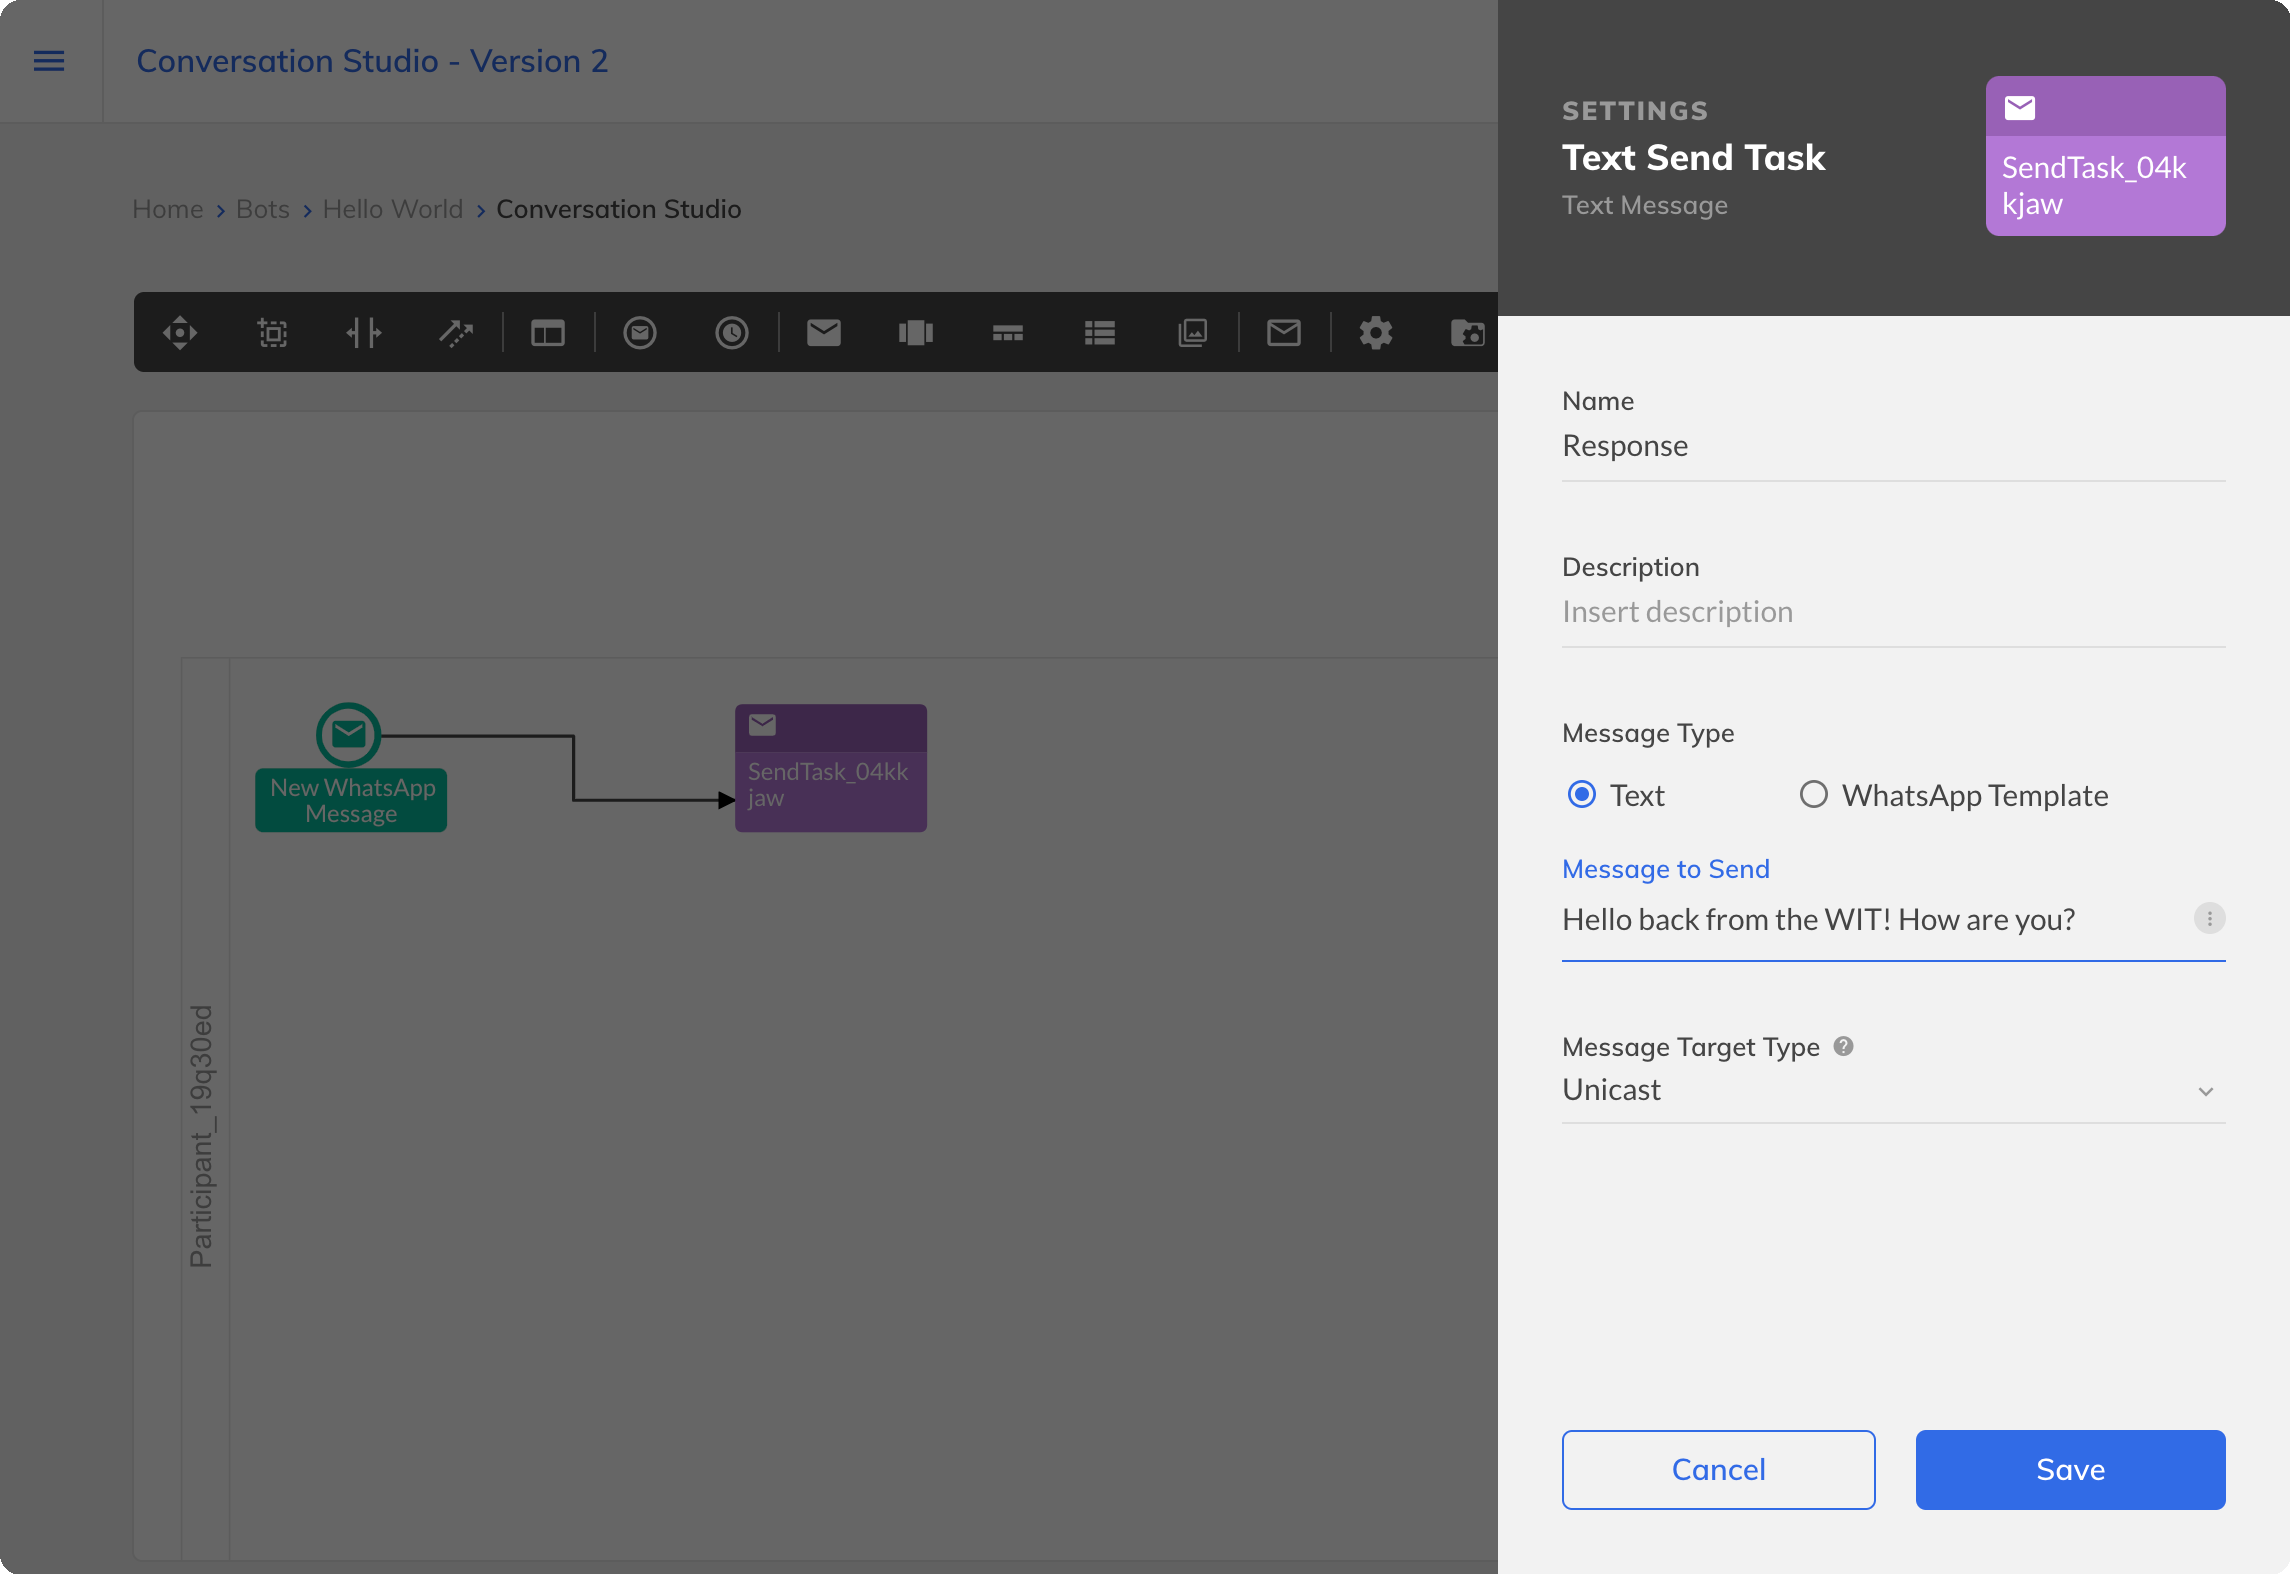
8. Then, press Save.
9. Now, the only thing missing is to add an End event. Press once your Text Message and select the circle icon for the End event.
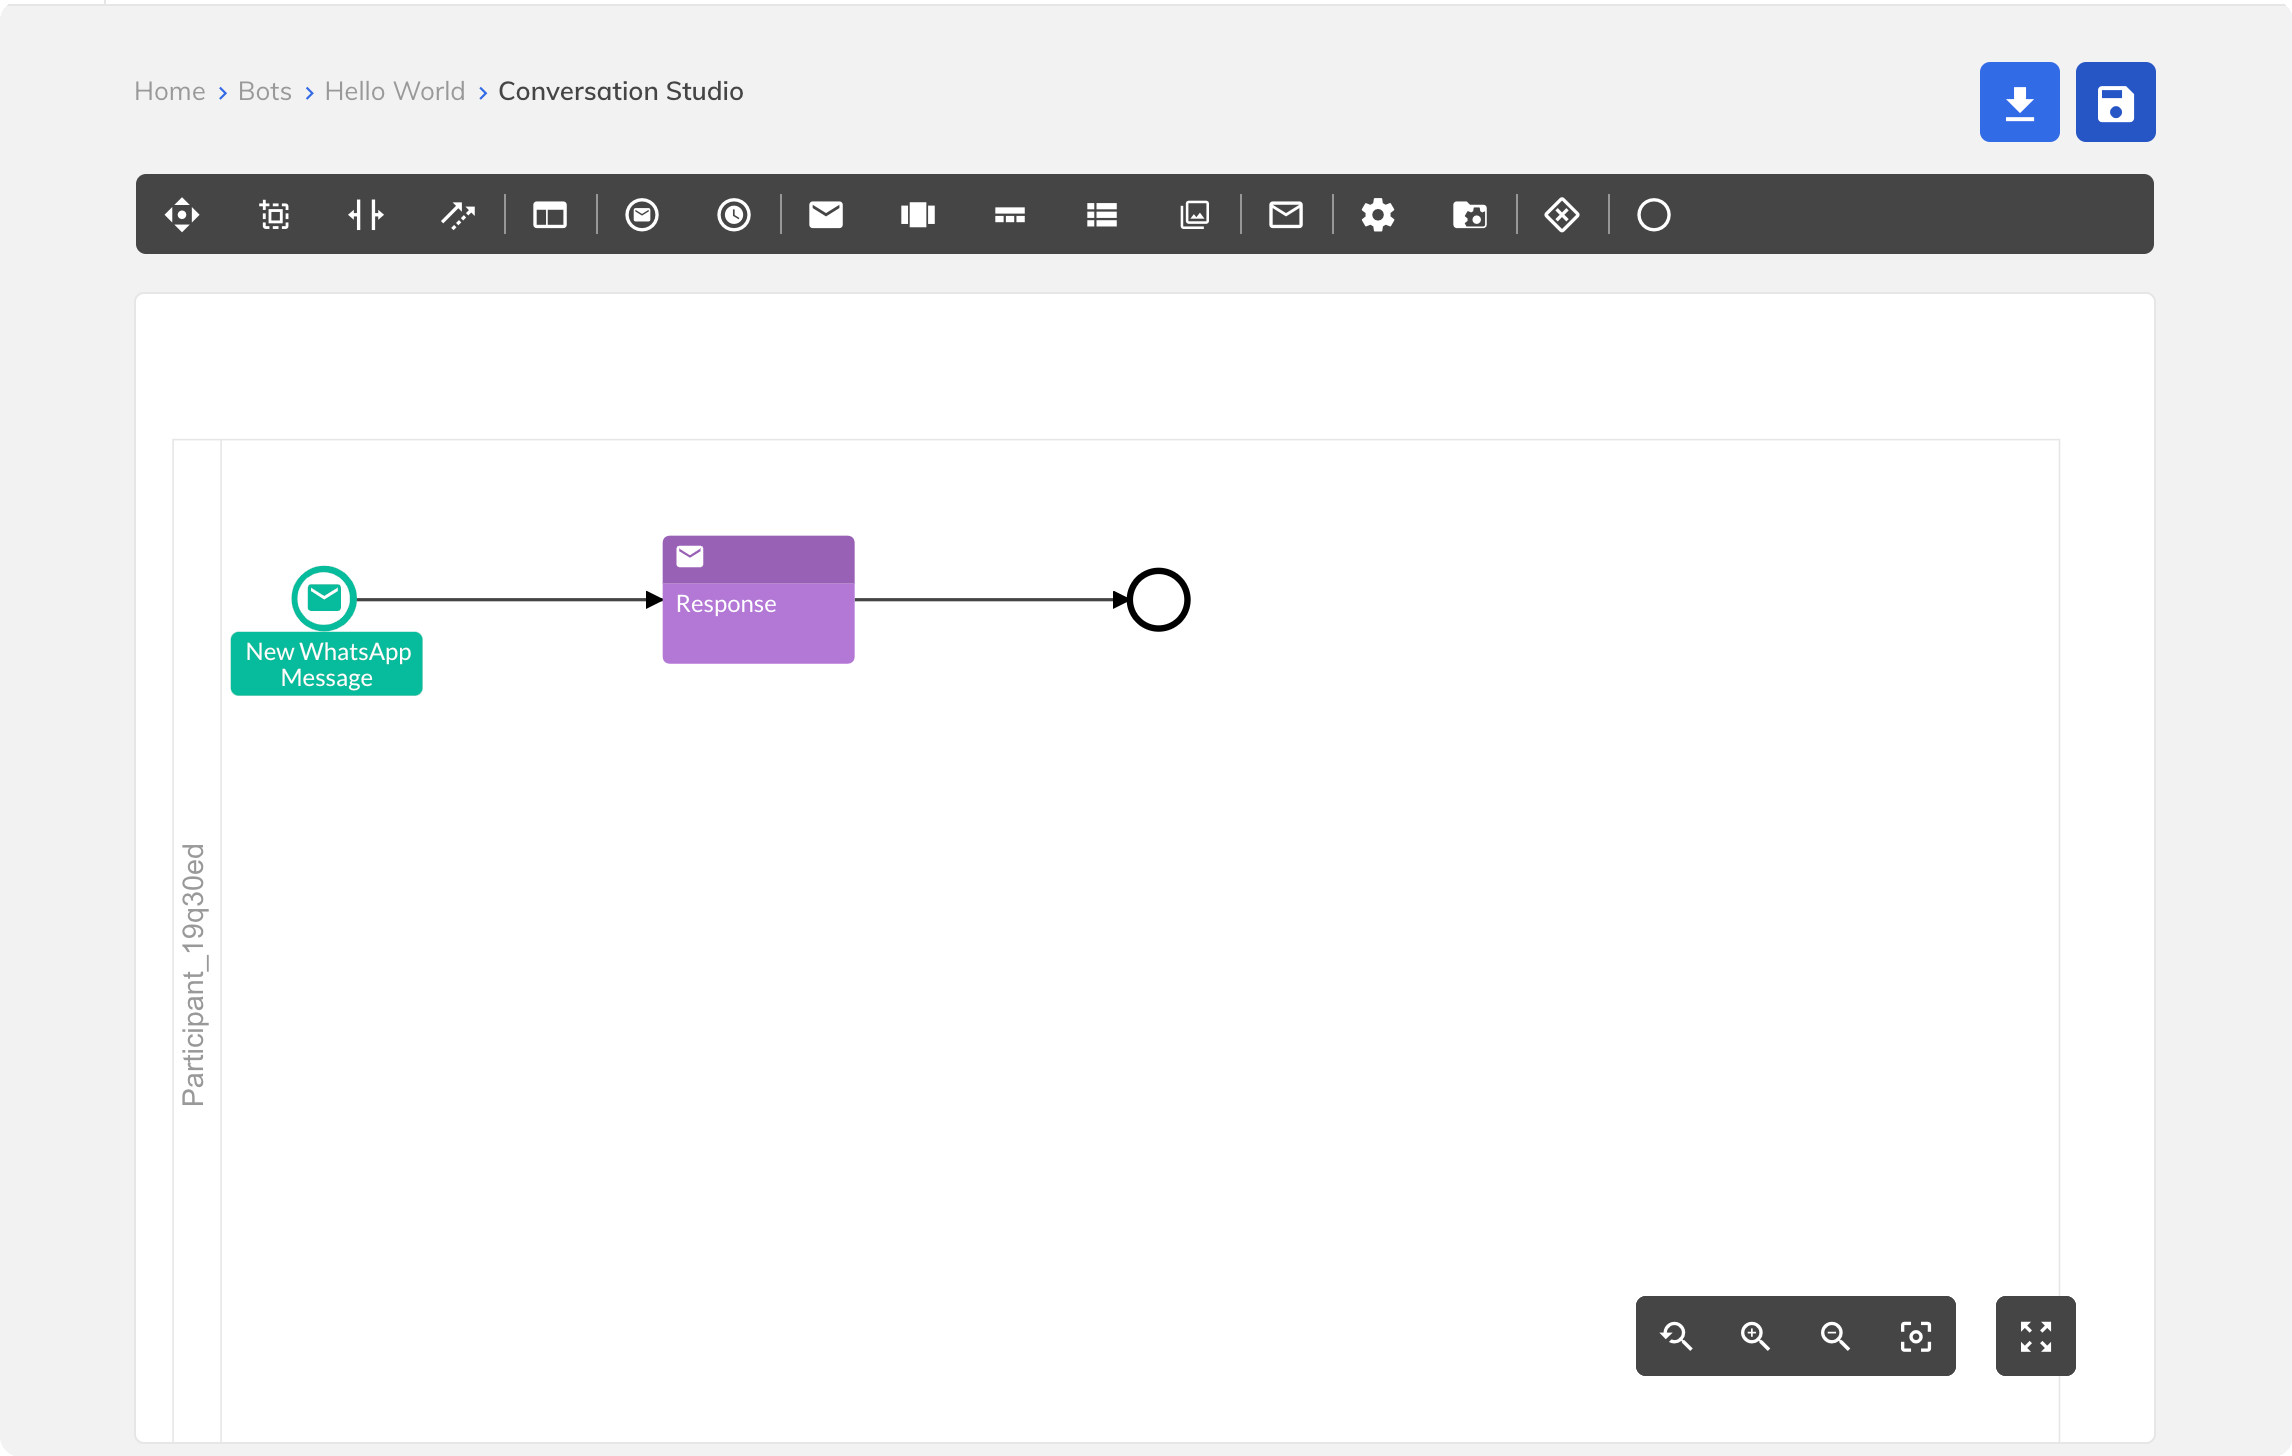
Similarly, as you can pick the action by dragging it from the icon bar, you can also select the End event like this. You need to connect it to the rest of your conversation.
10. Press the save icon in the top right corner.
Congratulations! Your Conversation is ready to rock. You can test it anytime by clicking the Bot Simulator button
Step Four: Test your Bot
Now, you are ready to test your bot and its first interaction.
1. Grab your phone and send a message to your WhatsApp Business Account number.
2. In a blink of an eye, you will receive the chatbot response. If your message matches its Trigger Message, then it is the same as you set. Otherwise, you will see a fallback message.
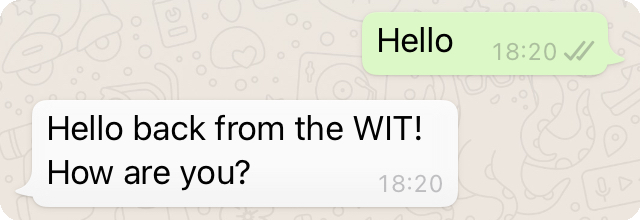
Congratulations, your chatbot on the WIT Conversation Platform now can communicate with your WhatsApp contacts via tyntec’s Conversations API!