const CIO = require('customerio-node') const express = require('express') const bodyParser = require('body-parser') const { siteId } = require('./keys') const { apiKey } = require('./keys') const { handleCustomerioMessage } = require('./handleCustomerioMessage') const cio = new CIO(siteId, apiKey) const app = express() app.use(bodyParser.json()) app.post('/fromWhatsapp', (req, res) => { messageFrom = '+' + req.body.from cio.identify(messageFrom, { phone: messageFrom, channel: 'WhatsApp', created_at: Math.floor( Date.now() / 1000 ) }).then(() => { res.send('ok').status(200) }, (e) => { console.log(e) }) }) app.post('/welcomeMessage', (req, res) => { handleCustomerioMessage(req) res.send('ok').status(200) }) app.post('/broadcast', (req, res) => { handleCustomerioMessage(req) res.send('ok').status(200) }) app.post('/whatsappNewsletter', (req, res) => { handleCustomerioMessage(req) res.send('ok').status(200) }) app.post('/orderConfirmation', (req, res) => { handleCustomerioMessage(req) res.send('ok').status(200) }) cio.track('+918971677453', { name: 'Purchase', data: { price: '3000', product: 'Car' } }) app.listen(3000, () => { console.log('Listening on port 3000') })
Prerequisites
-
Tyntec’s Whatsapp business account.
-
A Customer.io account. After signing up for Customer.io, navigate to https://fly.customer.io/settings/api_credentials to get your Site SID and API Key.
-
Set-up your own custom Webhook in Tyntec to handle incoming WhatsApp messages.
-
Node.js setup. (You may use other language but we are using NodeJs for this tutorial)
End Result
By the end of this document, you would be able to -
-
Create a new person (Contact) in Customer.io when a new user messages for the first time on your business WhatsApp number.
-
Send a response (welcome message) to new users on the WhatsApp channel from Customer.io.
-
Know how to trigger Campaigns that can send WhatsApp messages based on user data.
-
Send broadcast messages from Customer.io to all WhatsApp users
-
Send Confirmation messages on WhatsApp when users perform events such as product purchases etc.
-
The same messages can be sent as SMS using Tyntec’s SMS end-points. Just a small tweak in the request body would do the trick.
Let’s start the setup
This set-up mainly deals with the API integration method of Customer.io. There are other ways to integrate Customer.io with your business. Feel free to explore them here.
Let us go through the steps one-by-one.
-
Create a NodeJs application
First, create a node project and install necessary dependencies by following the below commands.
a. Create a project folder
b. Open the terminal and inside the project folder run the following. npm init
npm install express customerio-node node-fetch
c. Create a file with the name app.js inside the project directory and paste the below code.
We will define the functions to handle customerio messages later in the document.
Our API keys and phone numbers are stored in two files called keys.js and phoneNumbers.js.
2. Create a person in Customer.io on receiving a message from WhatsApp.
The following function is written inside the app.post() method that is used to handle incoming WhatsApp messages. This function is used to extract information from the latest WhatsApp message and use that info to create a new Person in Customer.io.
3. Set-up Campaign in Customer.io to send welcome messages to new users.
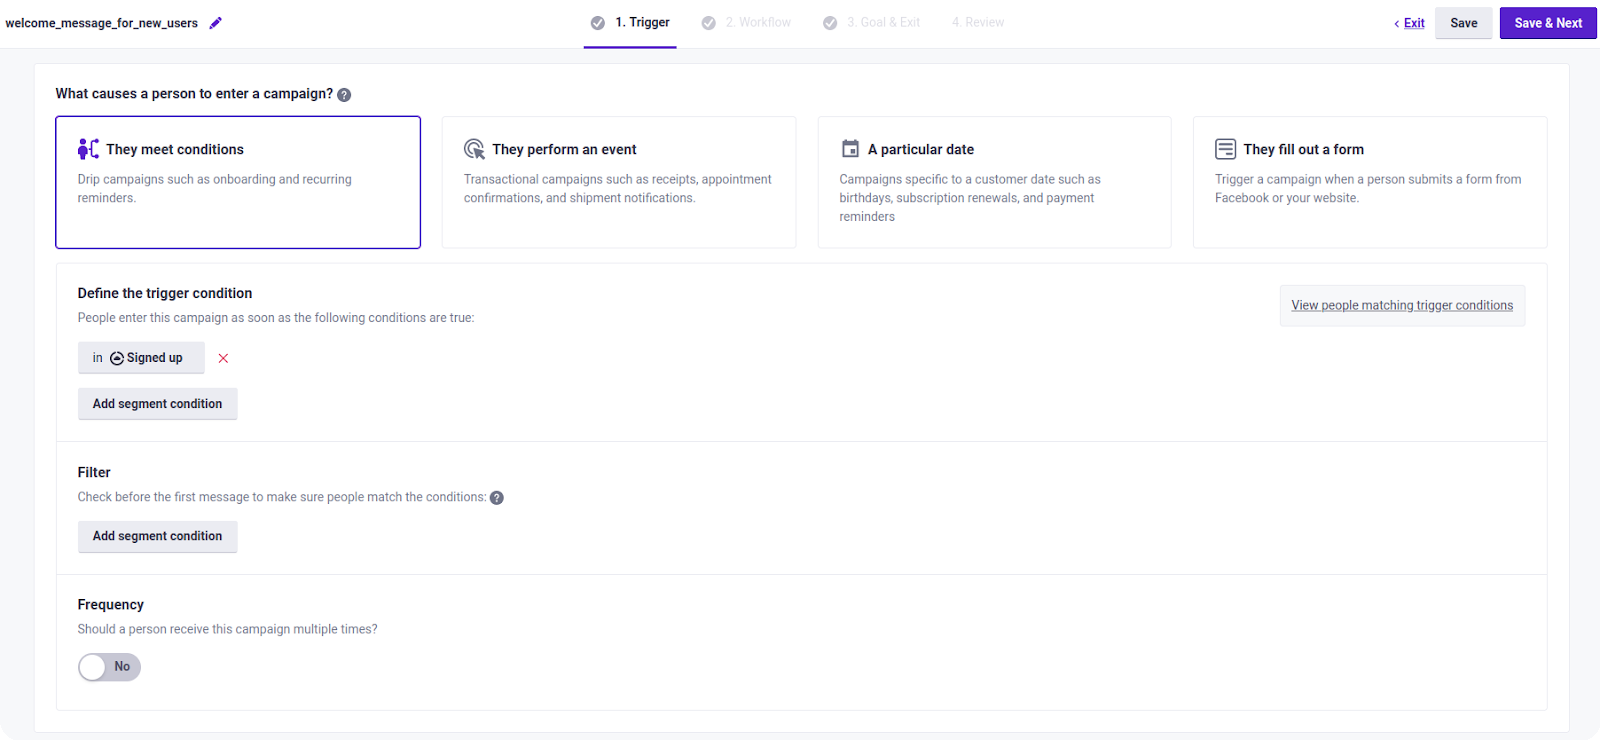
a. Create a Campaign that gets triggered when a new person is created
If we want Customer.io to send the users something useful in return whenever an event happens (we will consider the event of a new person being added), we need to set-up a Campaign that lets us target the people we want to send the messages to.
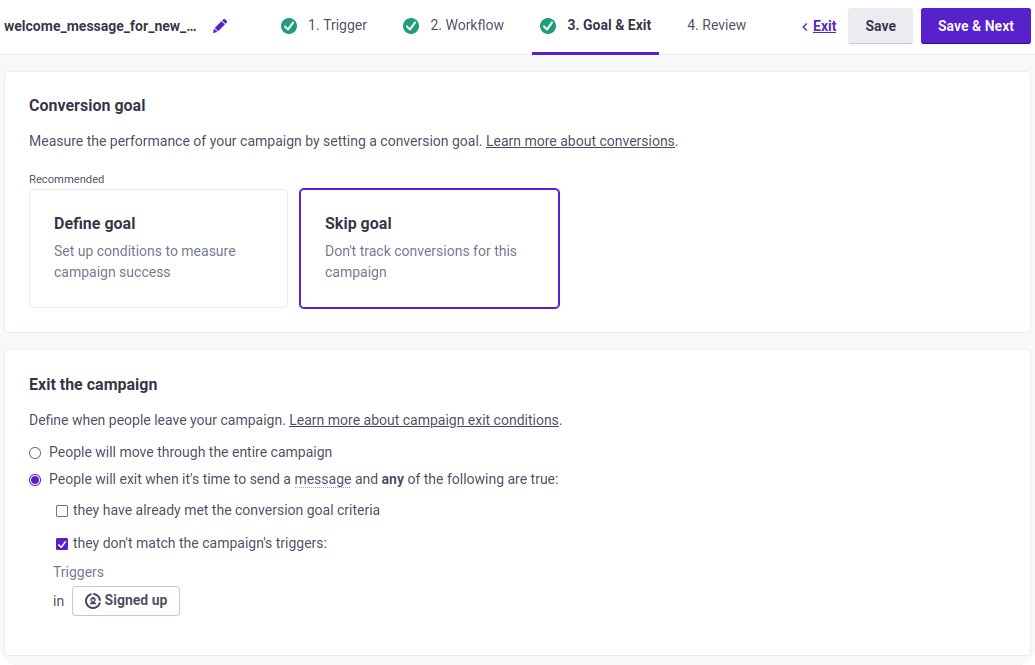
Whenever a new person is created through WhatsApp, the person is added to the ‘Signed Up’ segment which is provided by default by Customer.io. We can use this Segment to run a Campaign that sends every new person a welcome message.
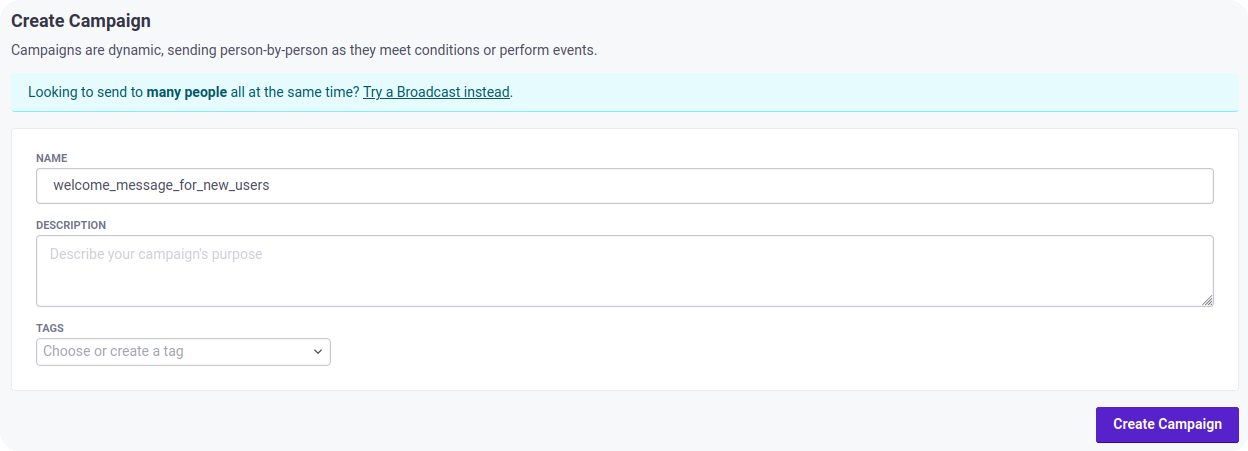
To do this, head over to the Campaigns tab in Customer.io dashboard. Click on ‘Create Campaign’.
Enter a Campaign name that suits your use case and give a small description. Then click on create campaign.


Click on Save > Next.
c. Create a workflow; configure your webhook
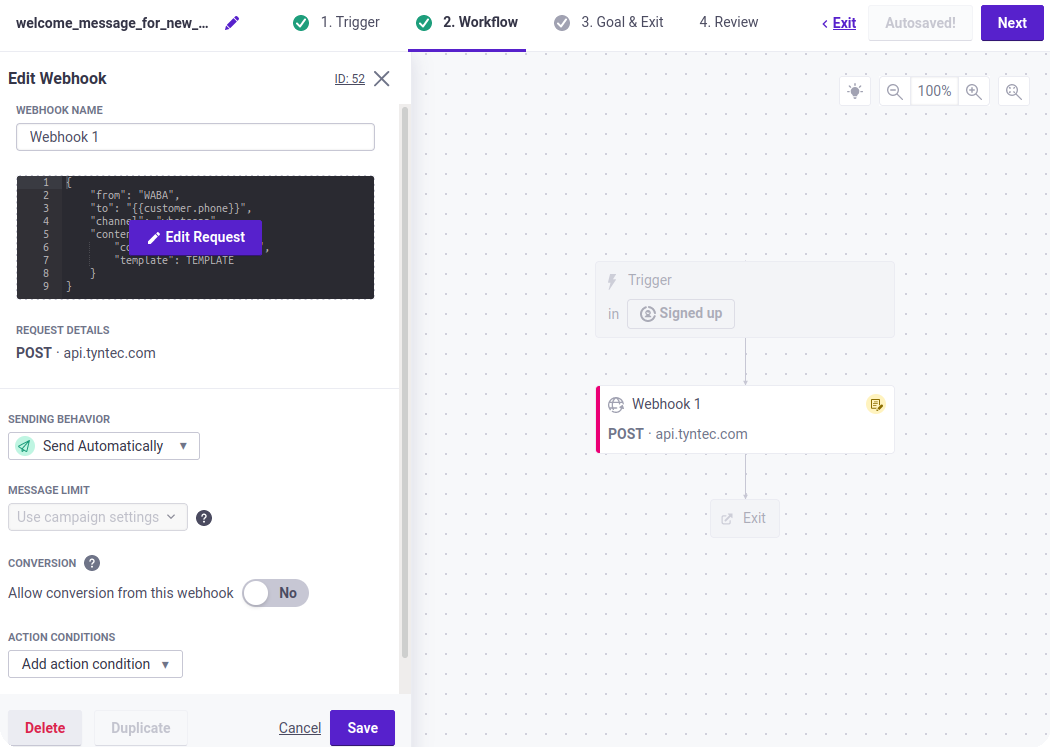
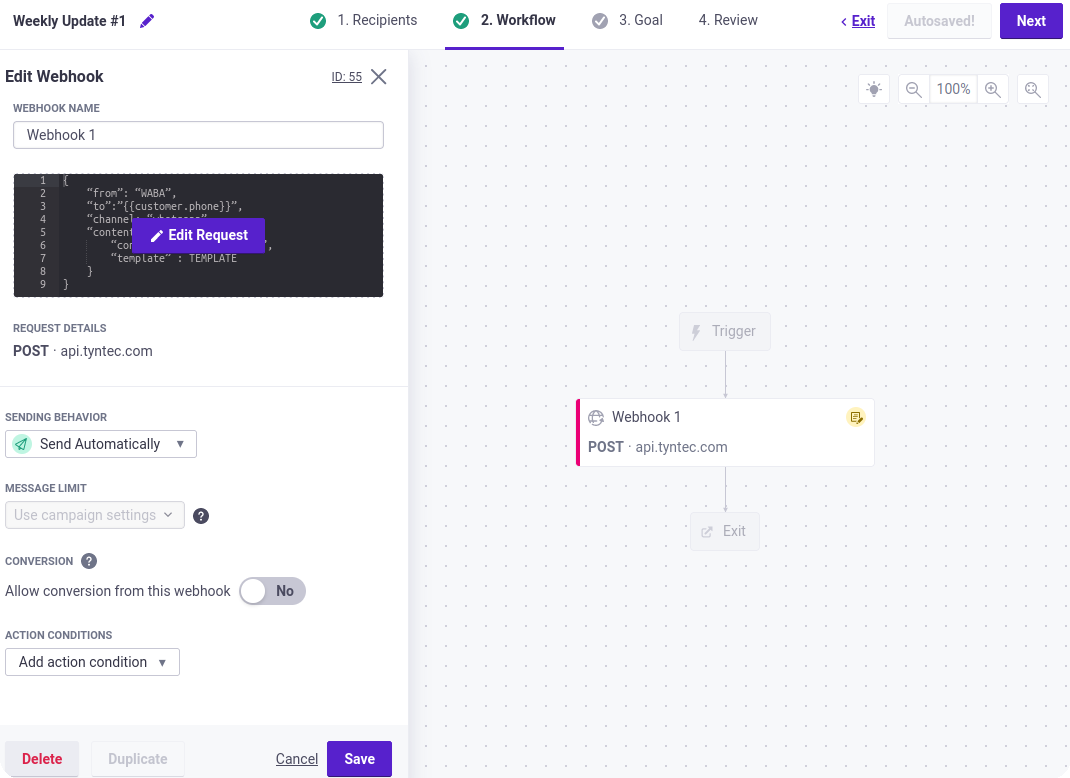
Now you will be directed to the Workflow section. This is the most important part as this is where we decide what kind of message is to be sent after the Campaign is triggered. We want to select ‘Webhook’ as we have to send the info in a POST request to our end-point.
Drag and drop the Webhook from the Workflow items tab into the middle. Now select the Webhook and it gives you options to edit it.

Choose the name that you desire and click on Add Request.
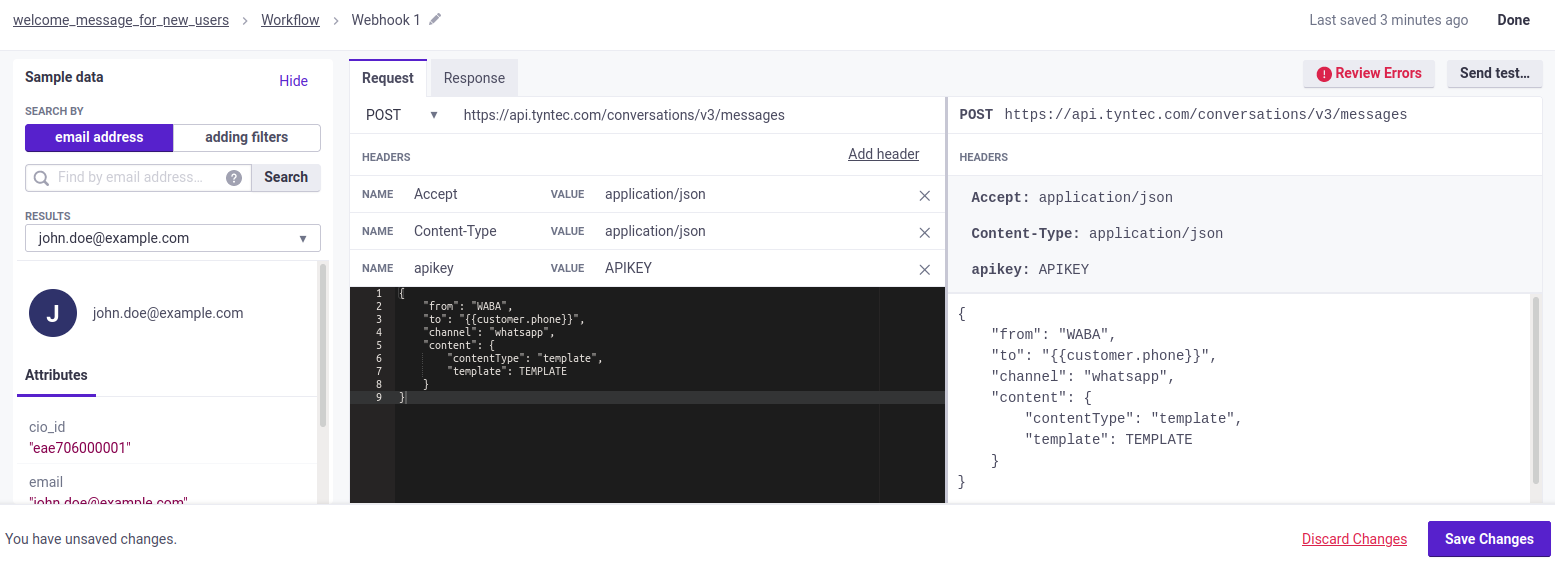
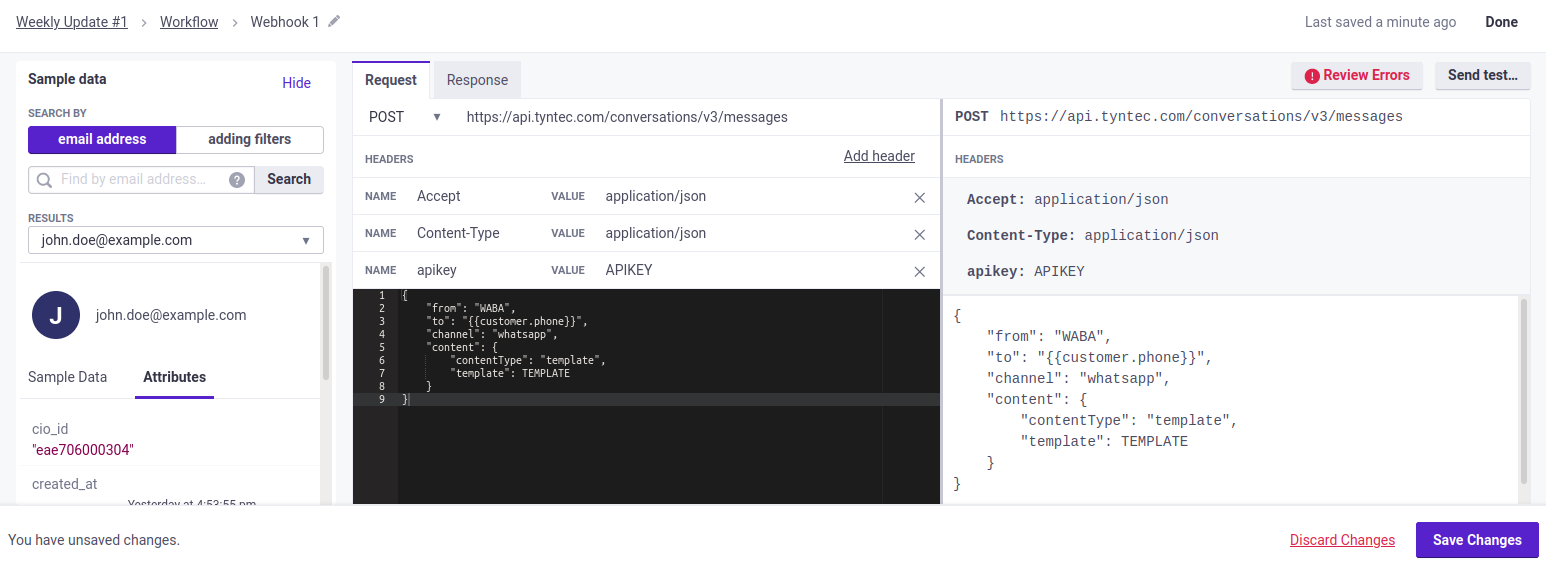
This will take us to a configuration screen where we can add information.
In the URL section of the Request, use our end-point your_server_url/welcomeMessage)
Other fields like Name and Value should be ‘Content-Type’ and ‘application/json’ respectively. Finally, add the json content you want to send from Customer.io to your Webhook. This data is going to be parsed inside the Webhook and sent as a reply on WhatsApp.


In the review section, click on Current people and future additions and start Campaign. In the next step, we will write the code to send the message to whatsapp number using Tyntec’s API.
4. Get the response from the campaign and send it as a WhatsApp message
Now we can make use of the Campaign by writing a few lines of code. We will write a single function that will be used to handle all incoming messages from Customer.io. Copy and paste the code below in handleCustomerioMessage.js.
const fetch = require('node-fetch') const { apikey } = require('./keys') const { fromPhoneNumber } = require('./phoneNumbers') const handleCustomerioMessage = (req) =>{ const inputBody = { "to": req.body.phone, "channels": [ "whatsapp" ], "whatsapp": { "from": fromPhoneNumber, "contentType": "text", "text": req.body.message } } const headers = { 'Content-Type':'application/json', 'Accept':'application/json', 'apikey': apikey } fetch('https://api.tyntec.com/chat-api/v2/messages', { method: 'POST', body: JSON.stringify(inputBody), headers: headers }) .then((response) => { return response.json() }) .then((body) => { console.log(body) }) } module.exports = { handleCustomerioMessage }
const inputBody = { "to": req.body.phone, "channels": [ "sms" ], "sms": { "from": fromPhoneNumber, "contentType": "text", "text": req.body.message } }
In the next steps, we will use the WhatsApp channel to send any updates/news to your customers as you wish in terms of broadcast or order status updates. This set-up is a guide to show you how to create a continuous pipeline between WhatsApp and Customer.io.
5. Broadcast messages to only WhatsApp users.
Broadcasts are useful when you want to send a message or alert to multiple users at the same time. Customer.io lets us create broadcasts that can be triggered over API calls, or email Newsletters.
API triggered broadcasts can be used to send SMSs, Emails, or data to Webhooks. We can broadcast the data to a Webhook and send the data as a WhatsApp message. The set-up is quite similar to Campaigns. Broadcasts make requests to Webhooks one after another for each user. We can use this to send users’ phone numbers dynamically so that every user gets the message on WhatsApp.
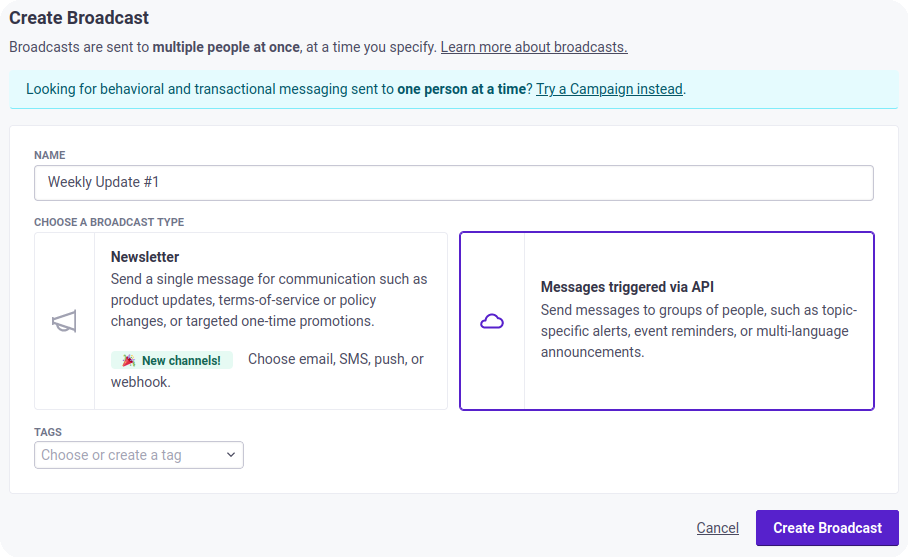
Navigate to Customer.io console > Broadcasts. Then click on ‘Create Broadcast’. Now select ‘Messages Triggered via API’ and give it a name. Once done, click on ‘Create Broadcast’.

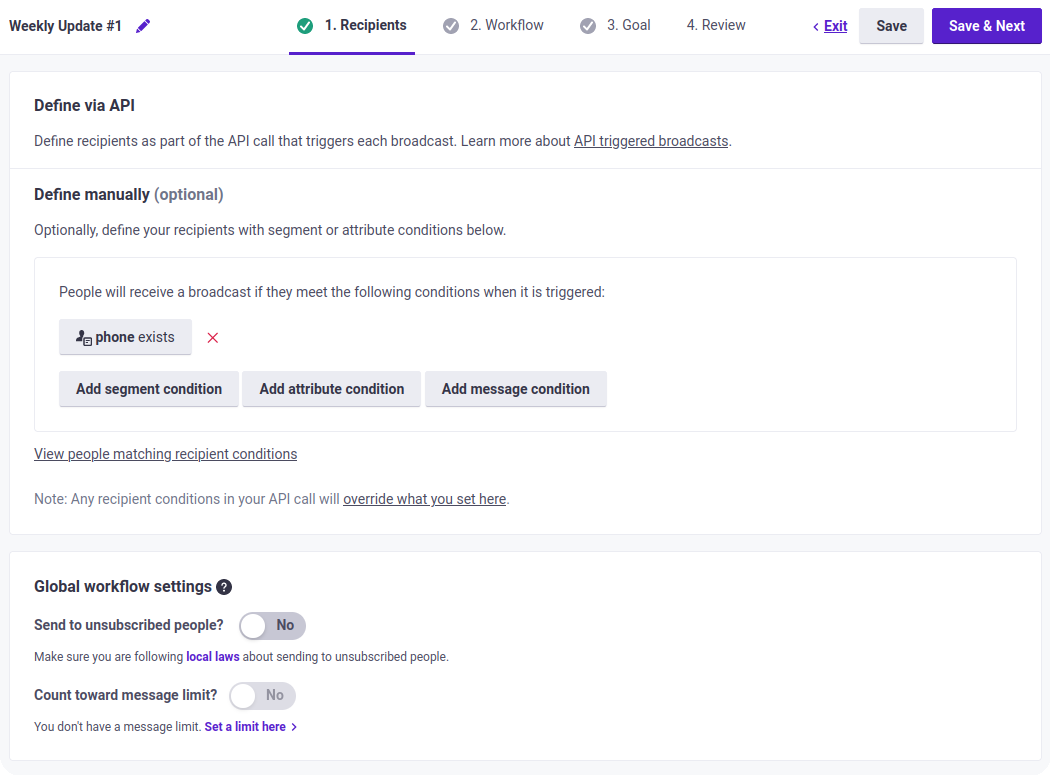
Since this is an API triggered broadcast we can trigger it by writing code, however we do need to set up a default condition. That is, target only people from the WhatsApp channel. This means no matter what segment we target, the broadcast message will be sent only to WhatsApp users.
To do this, in the Recipients section select ‘Add attribute condition’. Click on ‘Attribute name’ and select ‘channel’. Then type in the value as ‘WhatsApp’. Let the condition be ‘is equal to’. Then save it.

In the Workflow section, as we have done before, drag and drop the Webhook into the middle. Then proceed to editing the Webhook request.
In the Request URL, add a different endpoint like ‘/broadcast’. This is to make sure that only broadcasts are sent to this endpoint, which makes it easier to handle.
In your node.js file add a new app.post method:
app.post('/broadcast', (req, res) => { handleCustomerioMessage(req) res.send('ok').status(200) })

cio.triggerBroadcast(campaignId, data, { segment: { id: segmentID }});
The data part can be empty: {} because we have already defined the message to be sent.
6. Send order confirmation to WhatsApp users when they perform a purchase
If someone performs an event like buying a product or booking a cab, it is important to send them confirmations over WhatsApp. This can be implemented easily using Campaigns. Also remember that you can send confirmations through SMS as well, as shown previously.
First you need to track an event in Customer.io. That is, update in Customer.io whenever a person performs an event. This can be done by running the following Node.js code.
cio.track(person_id, { name: 'Purchase', data: { price: '3000', product: 'Headphones' } })
Once this is done, you can head over to the Customer.io console to see that the event is registered.
Next, head over to the Campaigns tab and Create a new Campaign just like before. This time in the trigger section, select ‘An event is performed’ under What causes a person to enter a campaign? Section. Then set the trigger event as Purchase and add another filter to include WhatsApp users. For this, you can create a new data driven Segment which contains only WhatsApp users.
Click Save > Next.