WhatsApp Business API | Integration with Customer.io
Hi there!
In this tutorial, you will learn how to integrate a Customer.io campaign with the WhatsApp channel in the Conversations API. This integration allows you to reach your customers via WhatsApp.
You will need
-
- Your tyntec API key from your tyntec account
-
- Your WABA phone number that has been assigned to you by tyntec
-
- WhatsApp template messages created for a welcome message and for a new product showcase message
-
- A mobile phone with WhatsApp installed that’s not associated with your WABA
-
- A verified Customer.io account
Step One: Create a campaign
You will create a workflow of a message that Customer.io will send in response to user behavior. (In this case, to new opt-ins.).
1. Sign in to your Customer.io account.
2. Head over to the Campaigns tab.
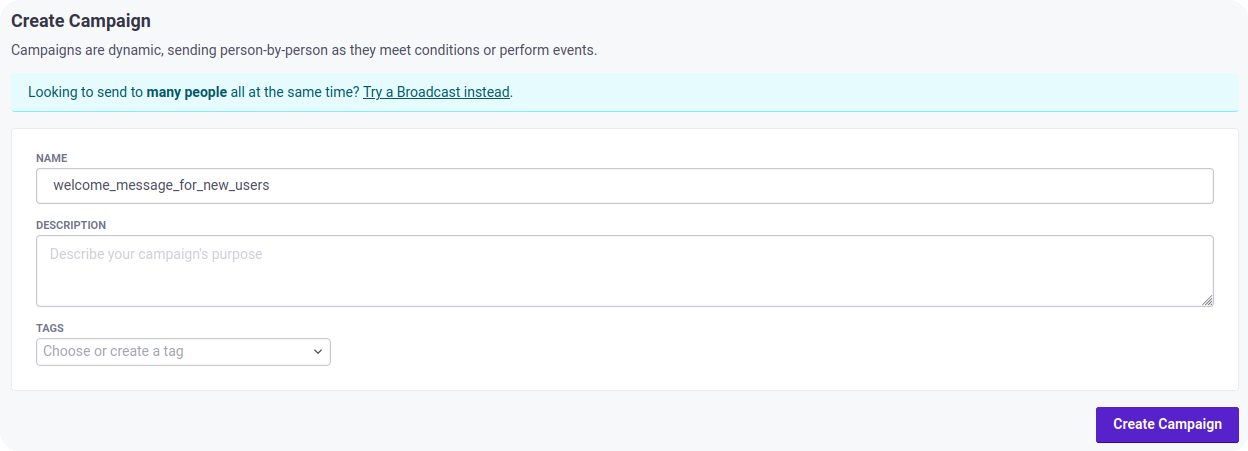
3. Click Create Campaign.
4. Enter a campaign name and click Create Campaign.
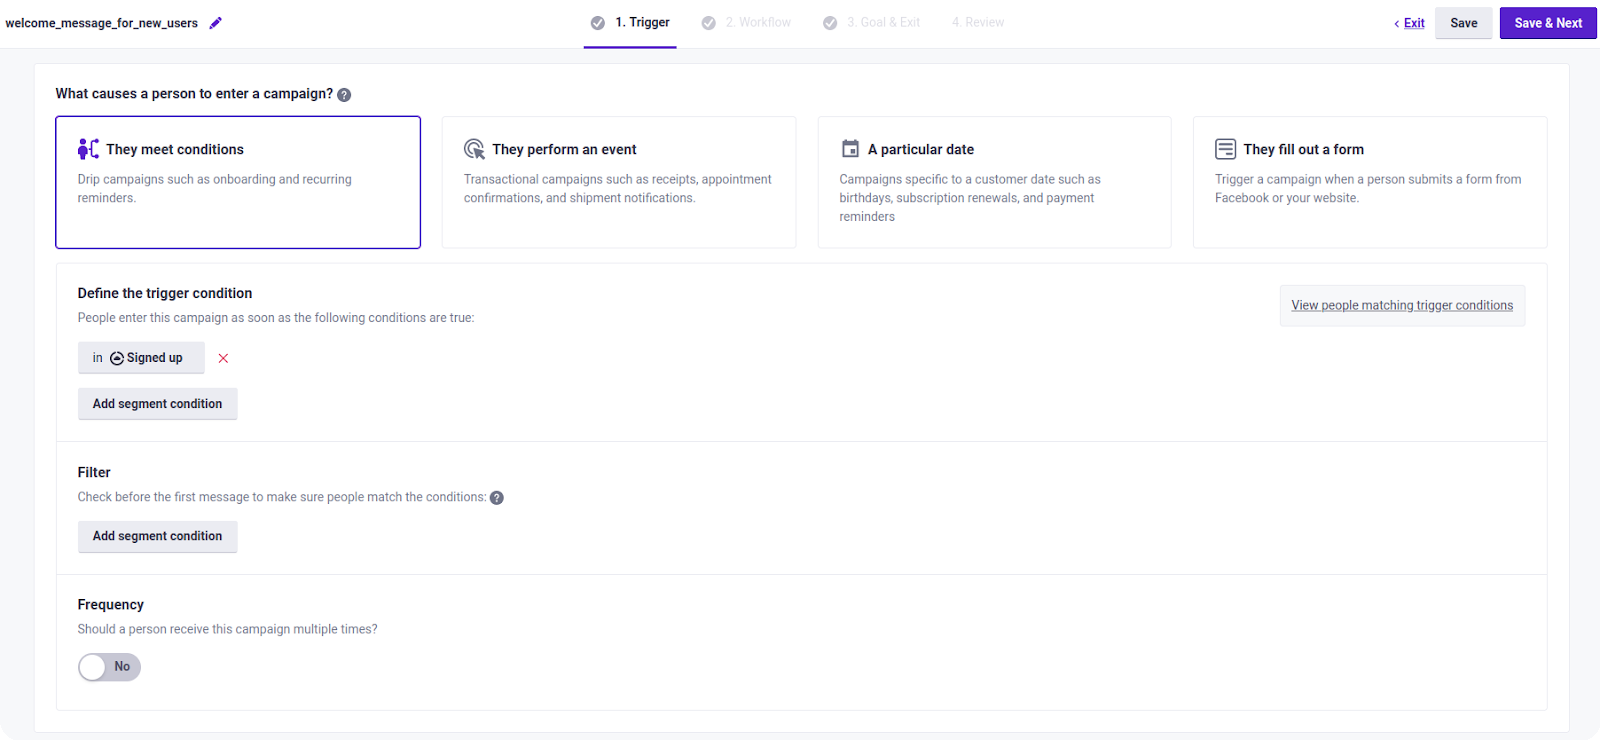
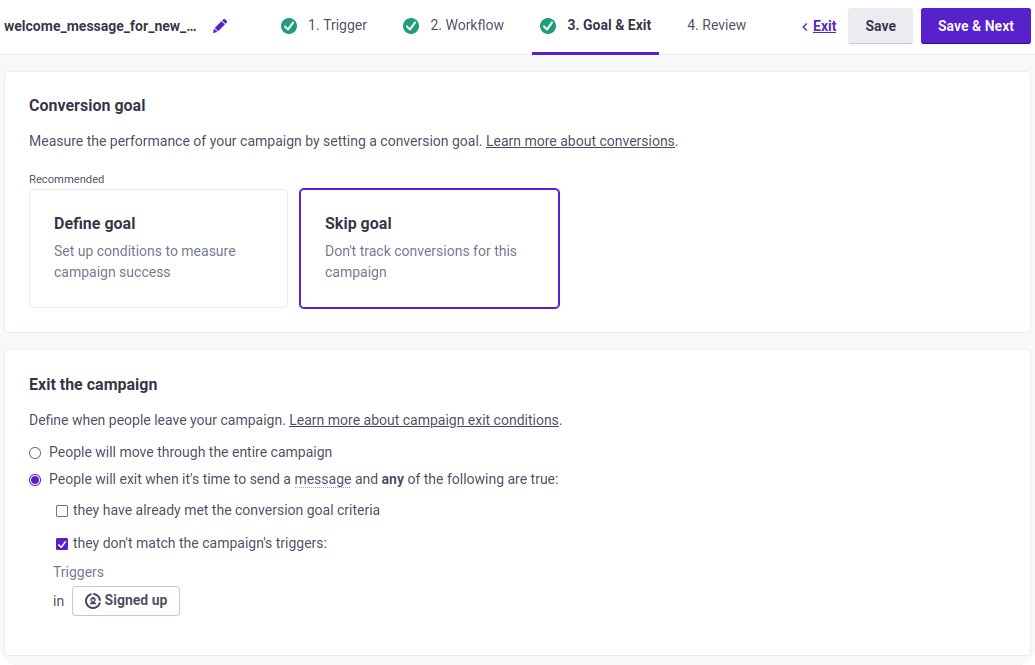
5. Select the They meet conditions trigger. Under the Define the trigger condition section, click Add segment condition, select in Signed up, and click the checkmark button. Click Save & Next.
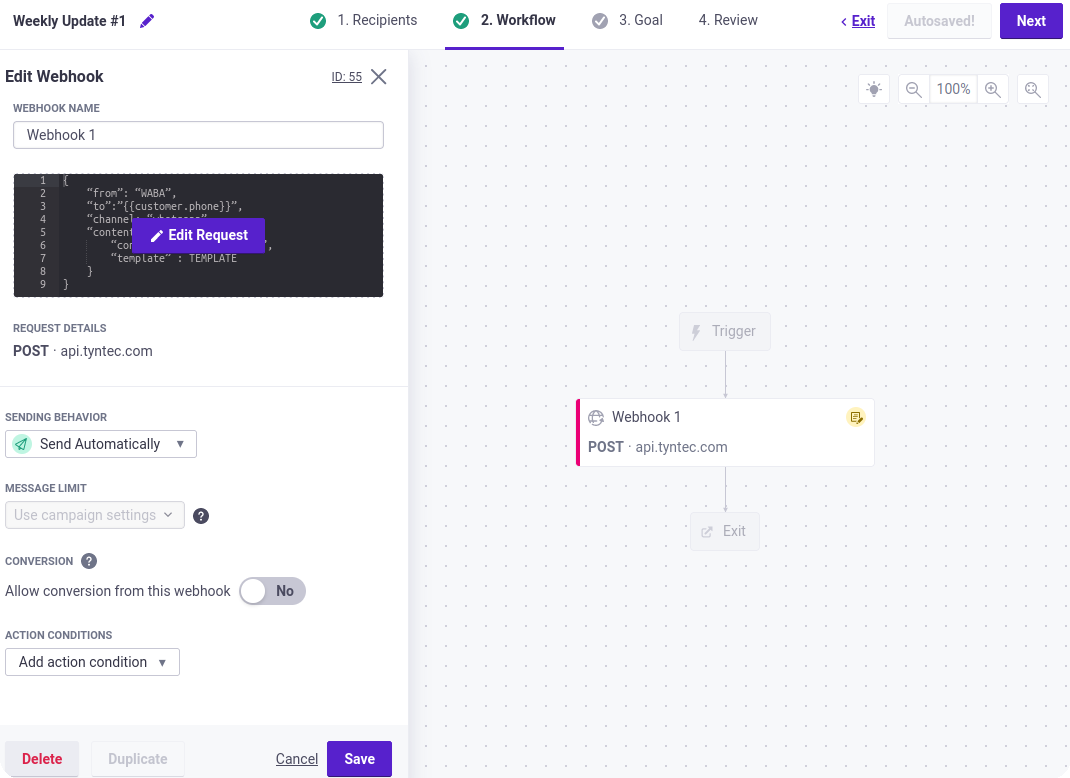
6. Drag the Webhook block and drop it in the middle.
7. Select the dropped Webhook block.
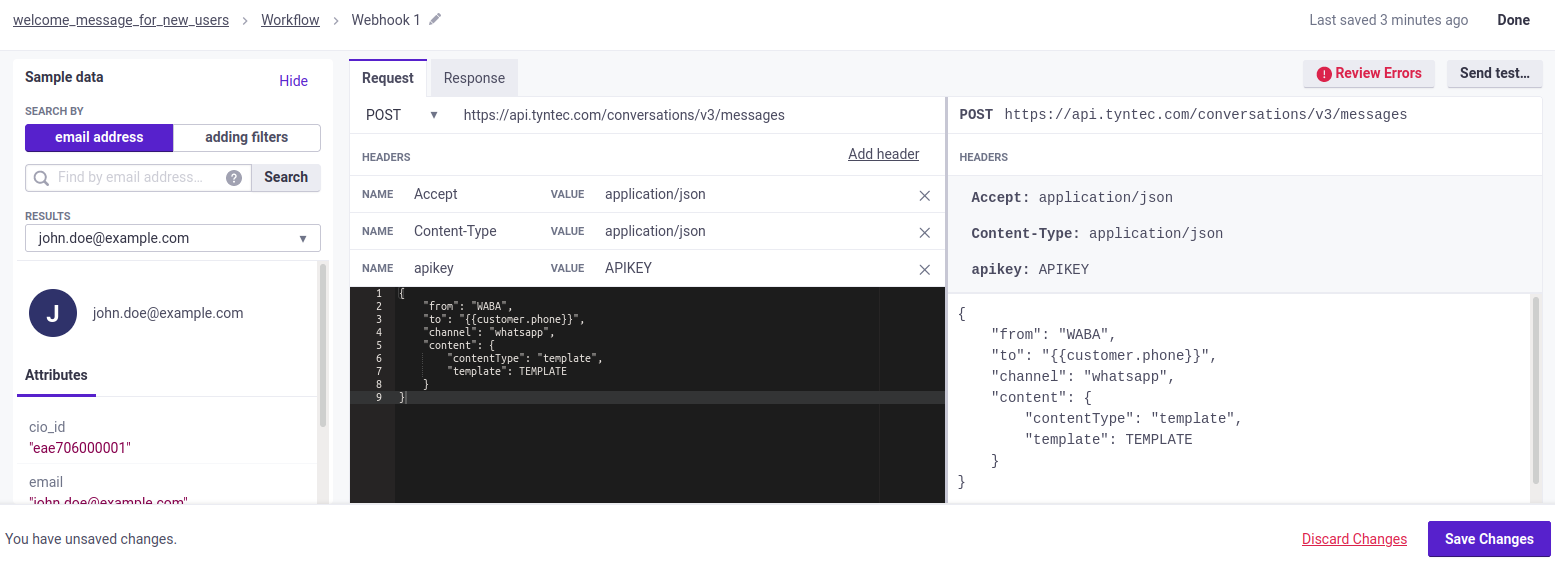
8. Click Add Request. Set the method to POST, URL to “https://api.tyntec.com/conversations/v3/messages” and create a header with the name apikey and with your tyntec API key as its value. Then set the body to the following JSON:
<div class="geshifilter"><pre class="php geshifilter-php"><span class="br0">{</span>
    <span class="st0">"from"</span><span class="sy0">:</span> <span class="st0">"WABA"</span><span class="sy0">,</span>
    <span class="st0">"to"</span><span class="sy0">:</span> <span class="st0">"{{customer.phone}}"</span><span class="sy0">,</span>
    <span class="st0">"channel"</span><span class="sy0">:</span> <span class="st0">"whatsapp"</span><span class="sy0">,</span>
    <span class="st0">"content"</span><span class="sy0">:</span> <span class="br0">{</span>
        <span class="st0">"contentType"</span><span class="sy0">:</span> <span class="st0">"template"</span><span class="sy0">,</span>
        <span class="st0">"template"</span><span class="sy0">:</span> TEMPLATE
    <span class="br0">}</span>
<span class="br0">}</span></pre></div>
Replace WABA with your WABA phone number and TEMPLATE with your welcome WhatsApp message template. Click Save Changes and Done.
9. Set the Sending behavior to Send Automatically. Click Save.
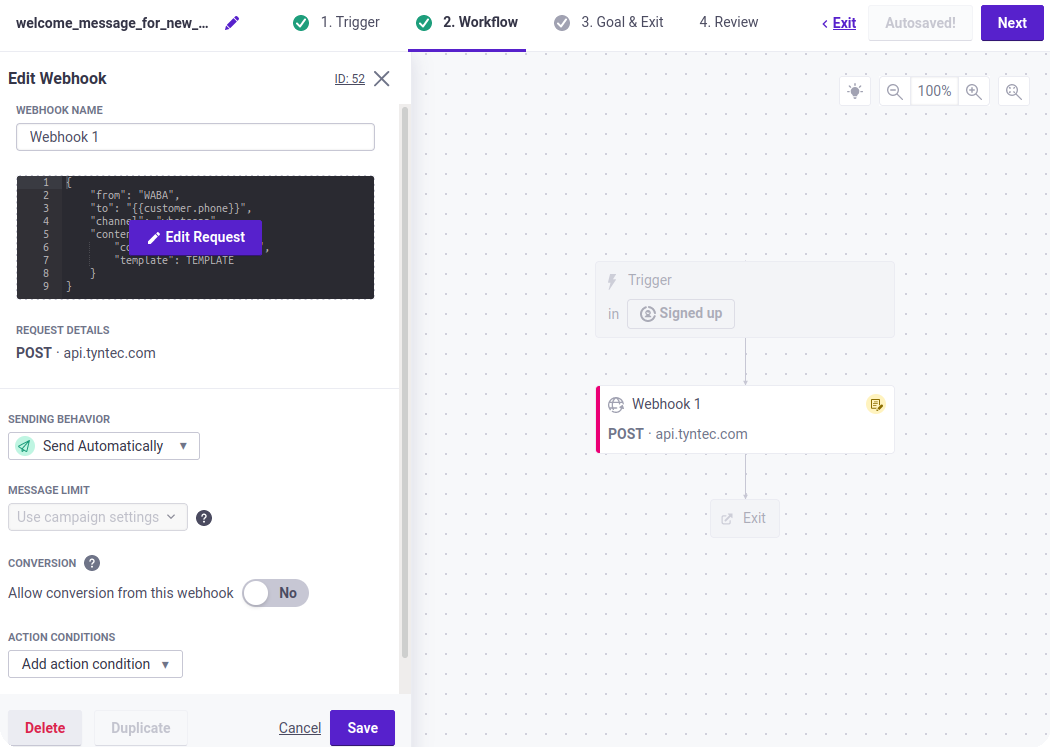
10. Click Next.
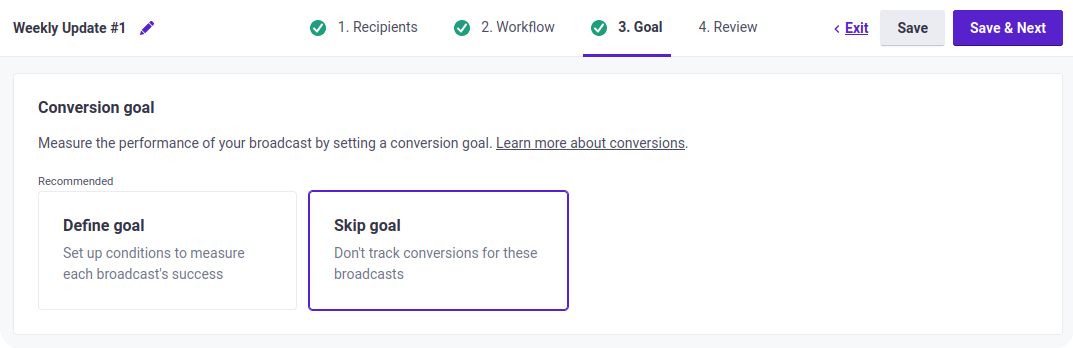
11. Select Skip goal and click Save & Next.
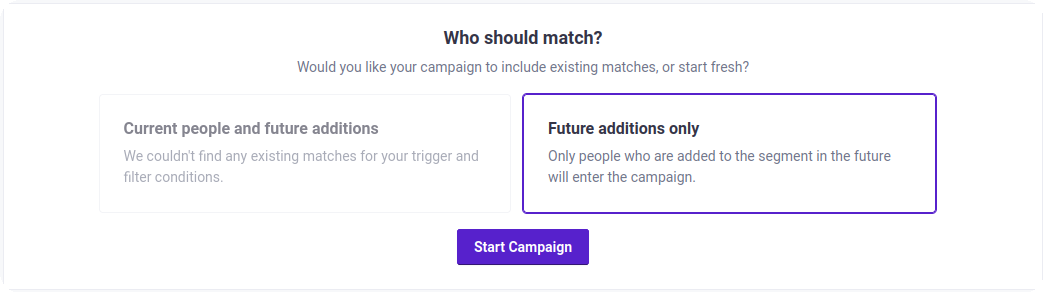
12. Under the Who should match? section, select Future additions only, and click Start Campaign. Click Close.
Now, you have created a new campaign that sends a WhatsApp message to every new customer.
Step Two: Create a broadcast
You will create a message sent to a large group of people at once. (In this case, an API triggered broadcast.).
1. Head over to the Broadcasts tab.
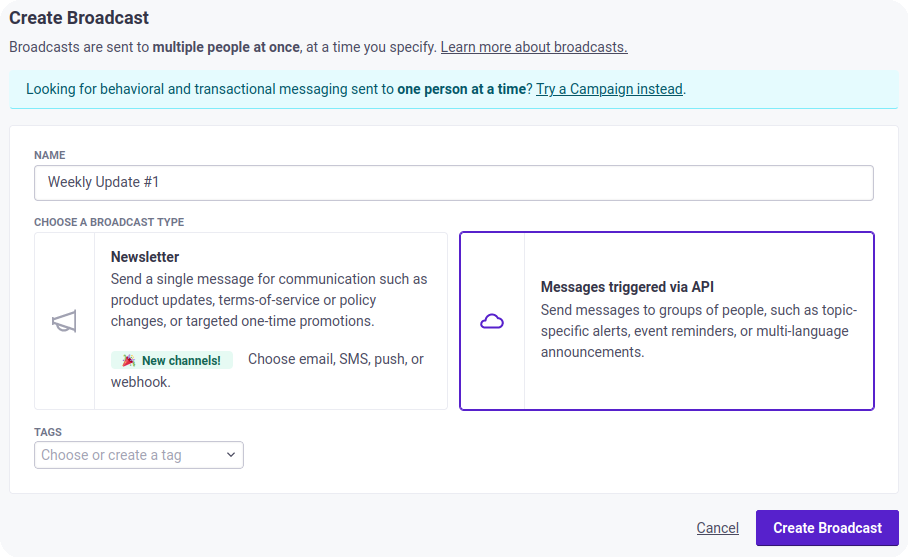
2. Click Create Broadcast.
3. Enter a broadcast name, select the Messages triggered via API type and click Create Broadcast.
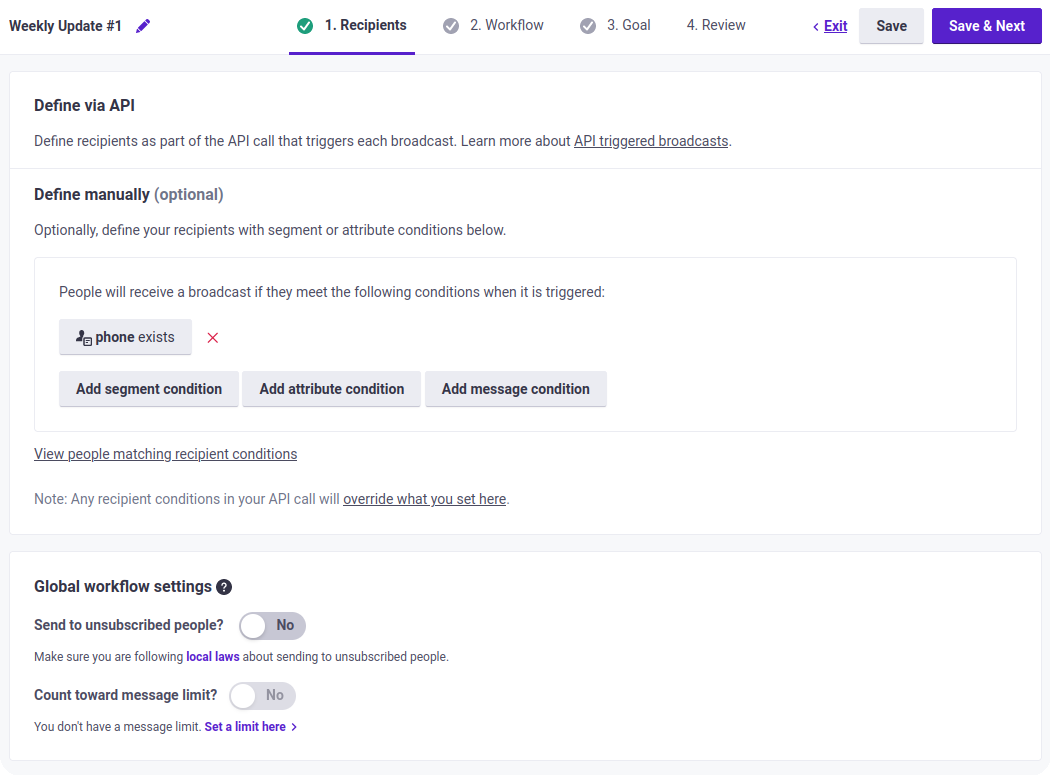
4. Under the Define manually section, click Add attribute condition, type in phone, select exists, and click the checkmark button. Click Save & Next.
5. Drag the Webhook block and drop it in the middle.
6. Select the dropped Webhook block.
7. Click Add Request. Set the method to POST, URL to “https://api.tyntec.com/conversations/v3/messages” and create a header with name apikey and with your tyntec API key as its value. Then set the body to the following JSON:
<div class="geshifilter"><pre class="php geshifilter-php"><span class="br0">{</span>
    <span class="st0">"from"</span><span class="sy0">:</span> <span class="st0">"WABA"</span><span class="sy0">,</span>
    <span class="st0">"to"</span><span class="sy0">:</span> <span class="st0">"{{customer.phone}}"</span><span class="sy0">,</span>
    <span class="st0">"channel"</span><span class="sy0">:</span> <span class="st0">"whatsapp"</span><span class="sy0">,</span>
    <span class="st0">"content"</span><span class="sy0">:</span> <span class="br0">{</span>
        <span class="st0">"contentType"</span><span class="sy0">:</span> <span class="st0">"template"</span><span class="sy0">,</span>
        <span class="st0">"template"</span><span class="sy0">:</span> TEMPLATE
    <span class="br0">}</span>
<span class="br0">}</span></pre></div>
Replace WABA with your WABA phone number and TEMPLATE with your new product showcase WhatsApp message template. Click Save Changes and Done.

8. Set the Sending behavior to Send Automatically. Click Save.
9. Click Next.
10. Select Skip goal and click Save & Next.
11. Click Activate Broadcast. Click Close.
Now, you have created a new broadcast that sends a WhatsApp message to all customers with a phone number.
Step Three: Try it out!
Nothing more is needed to reach your customers through WhatsApp. Now you can test it!
1. Start with adding a new person. Head over to the People tab, click Add People, and Add a Person. Fill in an id or email. Click Create New Attribute, name the new attribute phone and fill in your testing mobile phone number as the value. Click Save Changes.
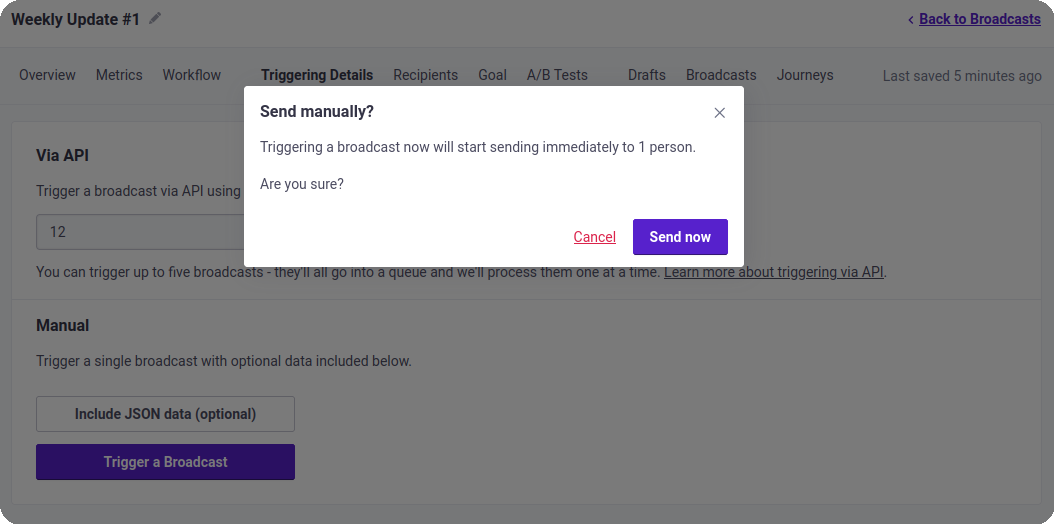
2. Then, trigger the broadcast manually. Head over to the Broadcasts tab, select the API Triggered Broadcasts, and click your broadcast. Go to the Triggering Details tab and click Trigger a Broadcast. Click Send now.
3. Grab your phone. In a few moments, you will see two messages from Customer.io.
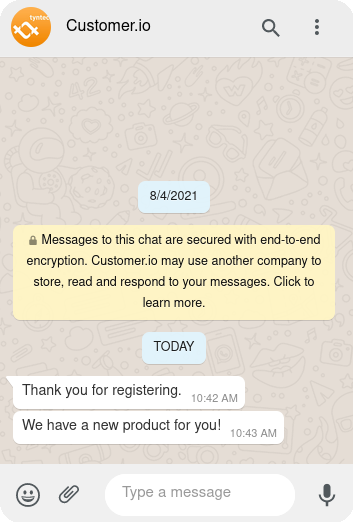
Voila! Your campaigns and broadcasts in Customer.io can now be sent as WhatsApp messages!
More?
People can be added to Customer.io using the REST API. You may want to create a new person when a new user messages for the first time on your business WhatsApp number. For that, you need to deploy a webhook that creates a new person using Customer.io’s /api/v1/customers/{identifier} endpoint. Then, you need to register your endpoint in the tyntec Conversations API so that it calls the endpoint whenever a user sends you a WhatsApp message.
Also, campaigns can be triggered in various ways. For example, they can be triggered by an event, such as a purchase performed. Events can be triggered using the Customer.io’s /api/v1/customers/{identifier}/events endpoint.