WhatsApp Business API | Integration with Microsoft Teams
Hi there!
Would you like to answer customers’ WhatsApp messages right from your Microsoft Teams?
In this tutorial, you will learn how to integrate the WhatsApp Business API with Microsoft Teams. This integration will allow you to receive WhatsApp messages and respond to them in Teams using a custom Teams bot.
You will need
-
- Your tyntec API key from your tyntec account
-
- Your WABA phone number that has been approved by tyntec
-
- A testing Teams Account with administrator privileges
-
- A phone with WhatsApp as a testing customer
-
- An ngrok account with the binary installed and authorized
-
- Node.js installed and your favorite text editor or IDE with JavaScript
-
- Set policies for MS Teams:
- Set policies for MS Teams:
Step One: Get your integration app ready
For your quick start with integrations, we’ve prepared a sample integration app. Let’s have a look at what the code does. You will notice that the code is in several directories:
- server.js creates node.js server
- config.js gets environment variables
- errorHandler.js deals with possible errors
- In the routes folder:
- bot.js works as a router, a middleware function, and ties logic together.
Follow these steps:
1. Clone the api-sample repository and go to the wa-integrations/teamsbot directory.
2. Install dependencies (and the nodemon module if you don’t have it yet).
<div class="geshifilter"><pre class="php geshifilter-php">npm install</pre></div><div class="geshifilter"><pre class="php geshifilter-php">npm install nodemon</pre></div>3. Afterward, you need to create a publicly accessible URL using ngrok. Launch ngrok with the local port 3000 using the command:
<div class="geshifilter"><pre class="php geshifilter-php">path<span class="sy0">/</span>to<span class="sy0">/</span>ngrok http <span class="nu0">3000</span></pre></div>4. Copy the displayed public URL (such as https://936cb7a8cce6.ngrok.io/).
Note: This setup is suitable only for development. For production use, you have to deploy your app properly!
Step Two: Subscribe your webhook in tyntec
Let tyntec Conversation API know where to deliver WhatsApp messages from customers. You’re going to subscribe your webhook via a PUT request in Postman.
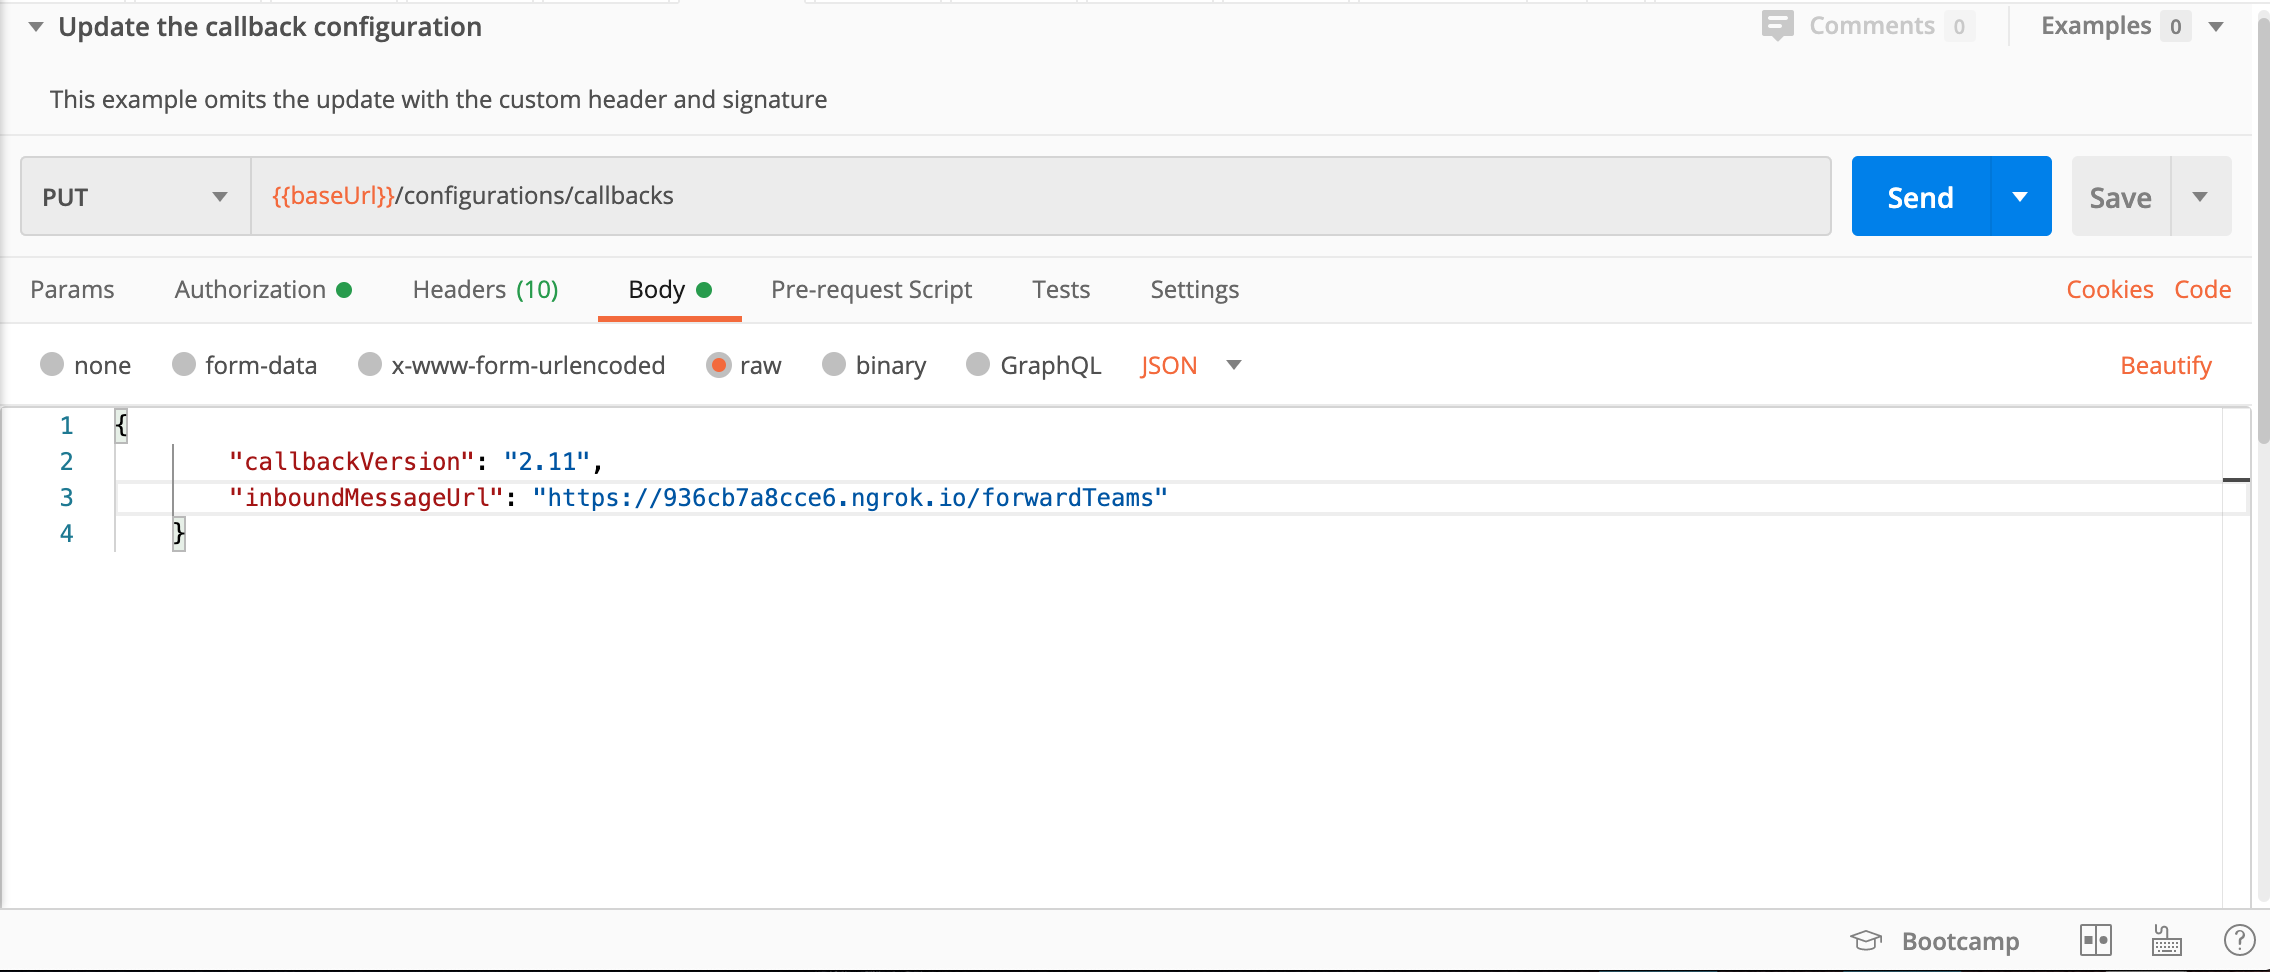
1. In our Postman collection, go to the API Account Configurations folder, and open the PUT Update the callback configuration.
2. In the request body, change the inboundMessageUrl for the MoMessage event to your /forwardTeams ngrok URL (for example: https://936cb7a8cce6.ngrok.io/forwardTeams).
The request body should look like this:
<div class="geshifilter"><pre class="php geshifilter-php"><span class="br0">{</span>
        <span class="st0">"callbackVersion"</span><span class="sy0">:</span> <span class="st0">"2.11"</span><span class="sy0">,</span>
        <span class="st0">"inboundMessageUrl"</span><span class="sy0">:</span> <span class="st0">"https://936cb7a8cce6.ngrok.io/forwardTeams"</span>
    <span class="br0">}</span></pre></div>
3. Now hit Send and you should get the 204 status if everything was okay.
Check out our video guide where we explain how to set up tyntec webhook correctly.

Step Three: Get your Microsoft Teams ready
After subscribing your webhook to Conversations API, you are going to create a custom Teams bot that will handle receiving new WhatsApp messages and sending Teams messages.
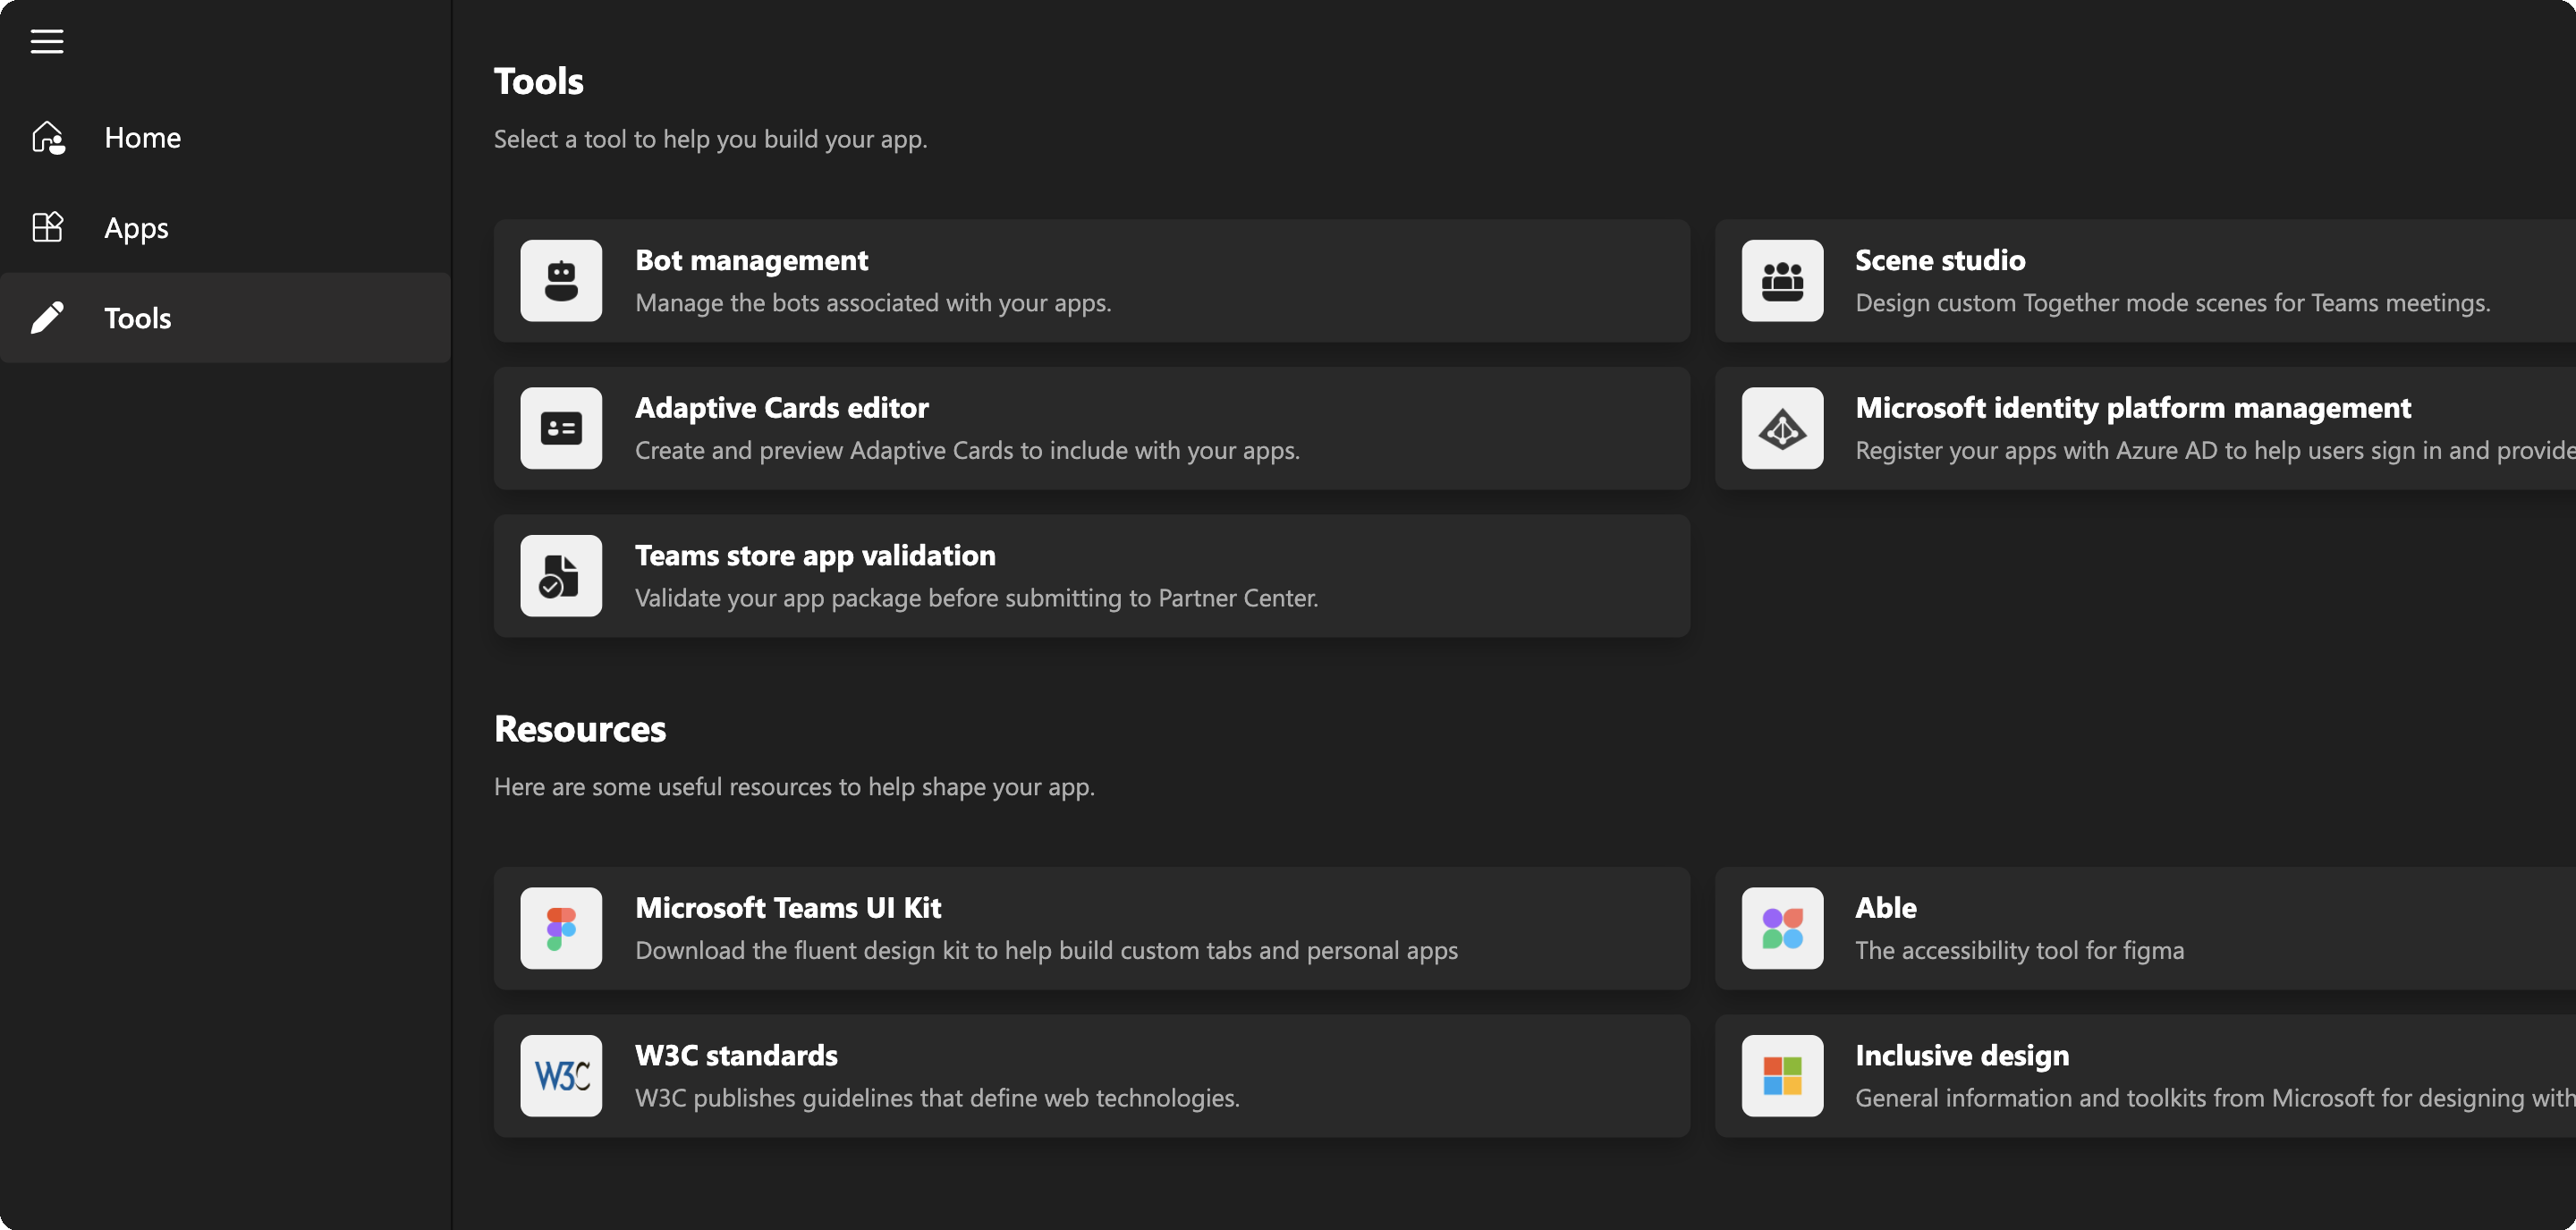
1. To create a new bot, you need to open the Teams Developer portal.
2. On the left side, select the Tools button. Open the Bot management button.
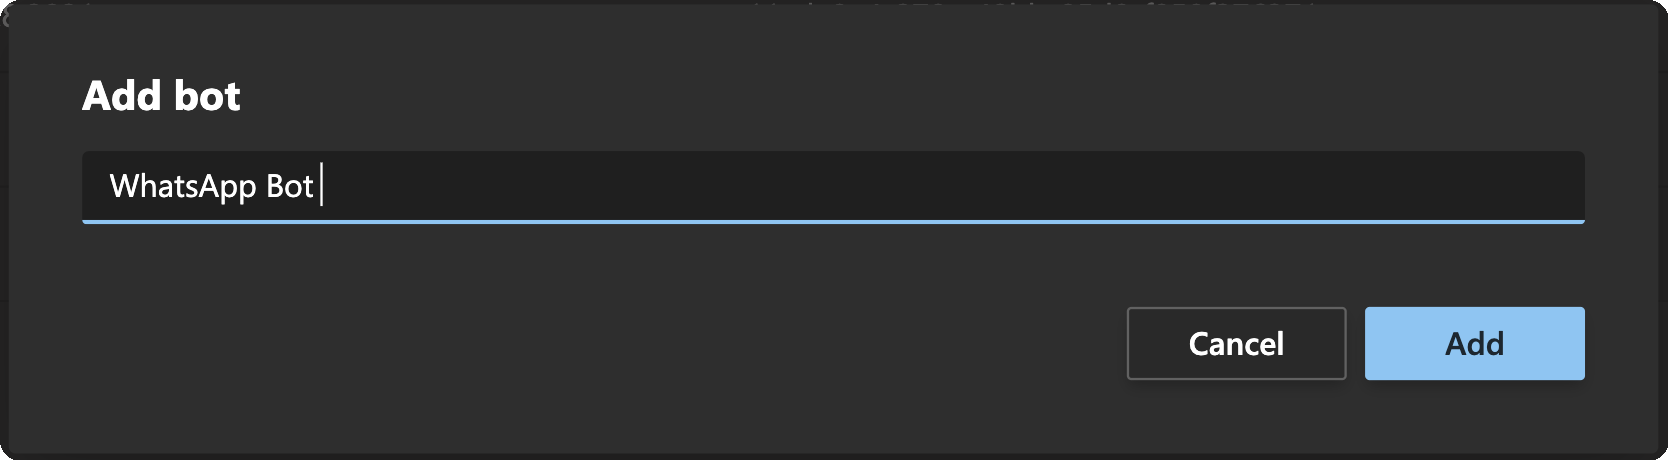
3. Click + New Bot. Name it appropriately and continue by clicking Add.
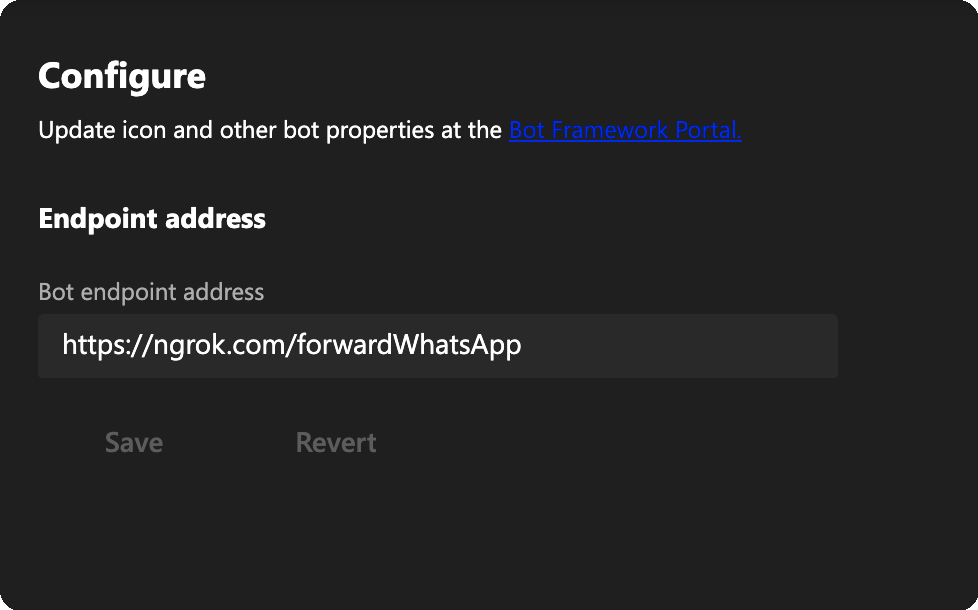
4. In the configuration page, type https://<YOUR_SERVER>/forwardWhatsApp into the Endpoint address. Then click on Save.
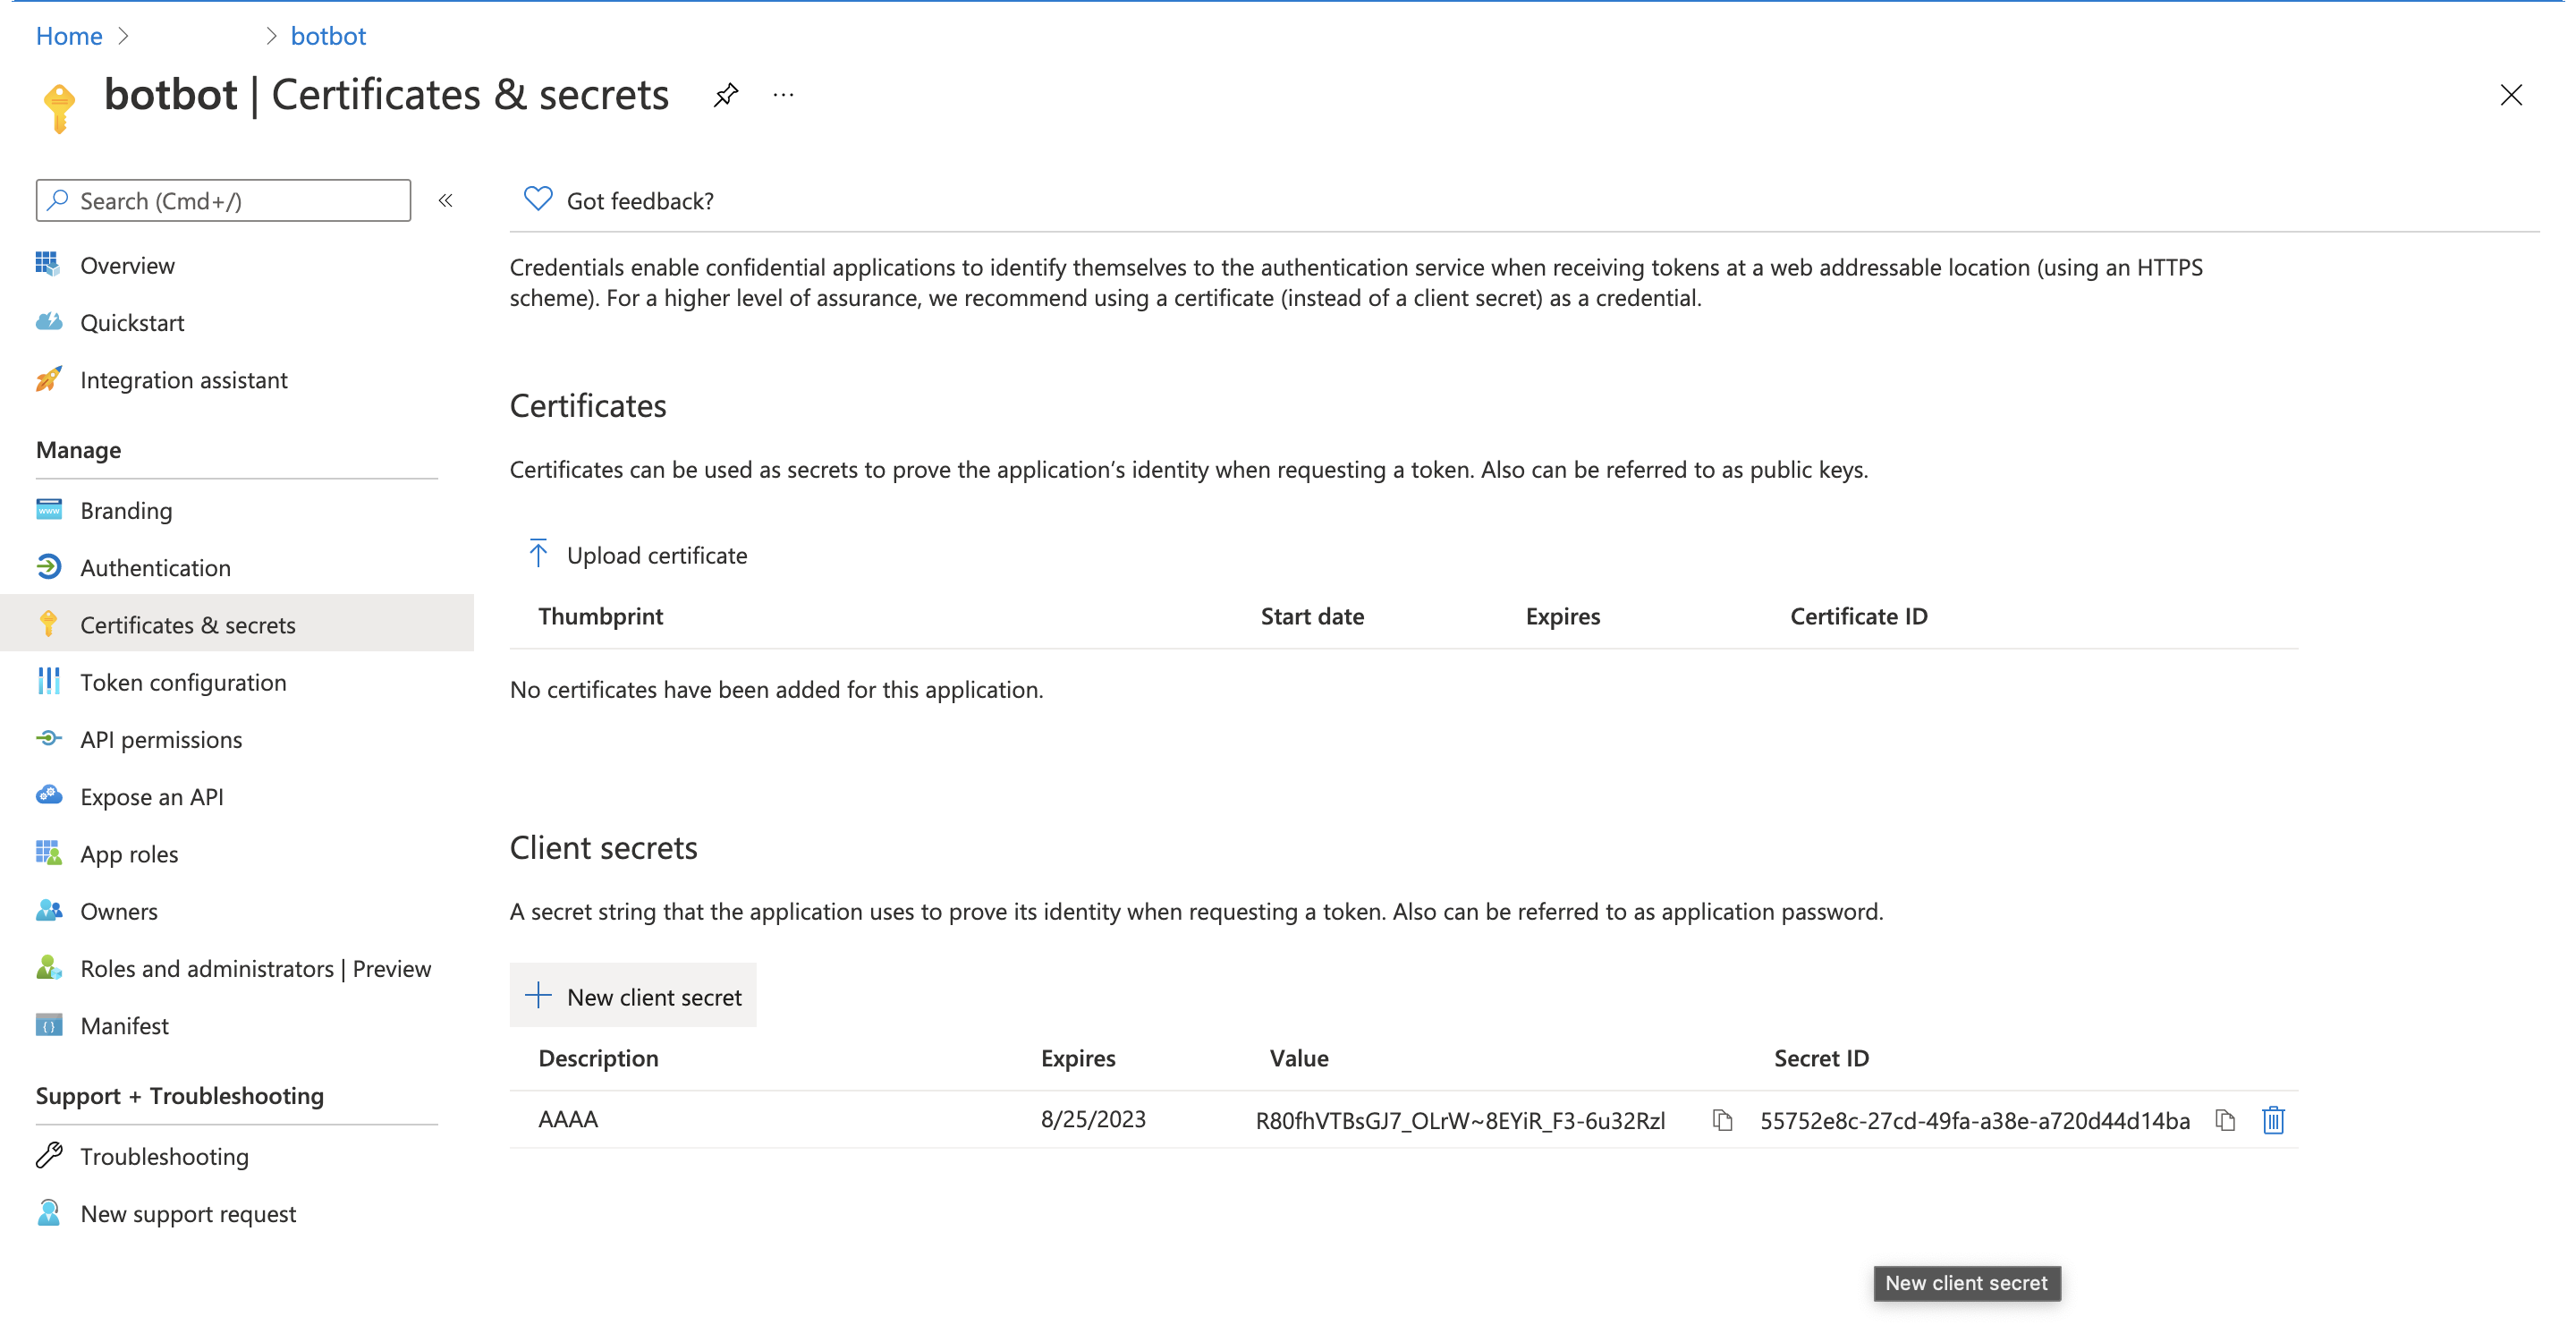
5. In your bot, select Client secrets. Then, click on Add a client secret for your bot. If you are logged into your Azure Active Directory, then the Client Secret is generated inside the Developer portal.
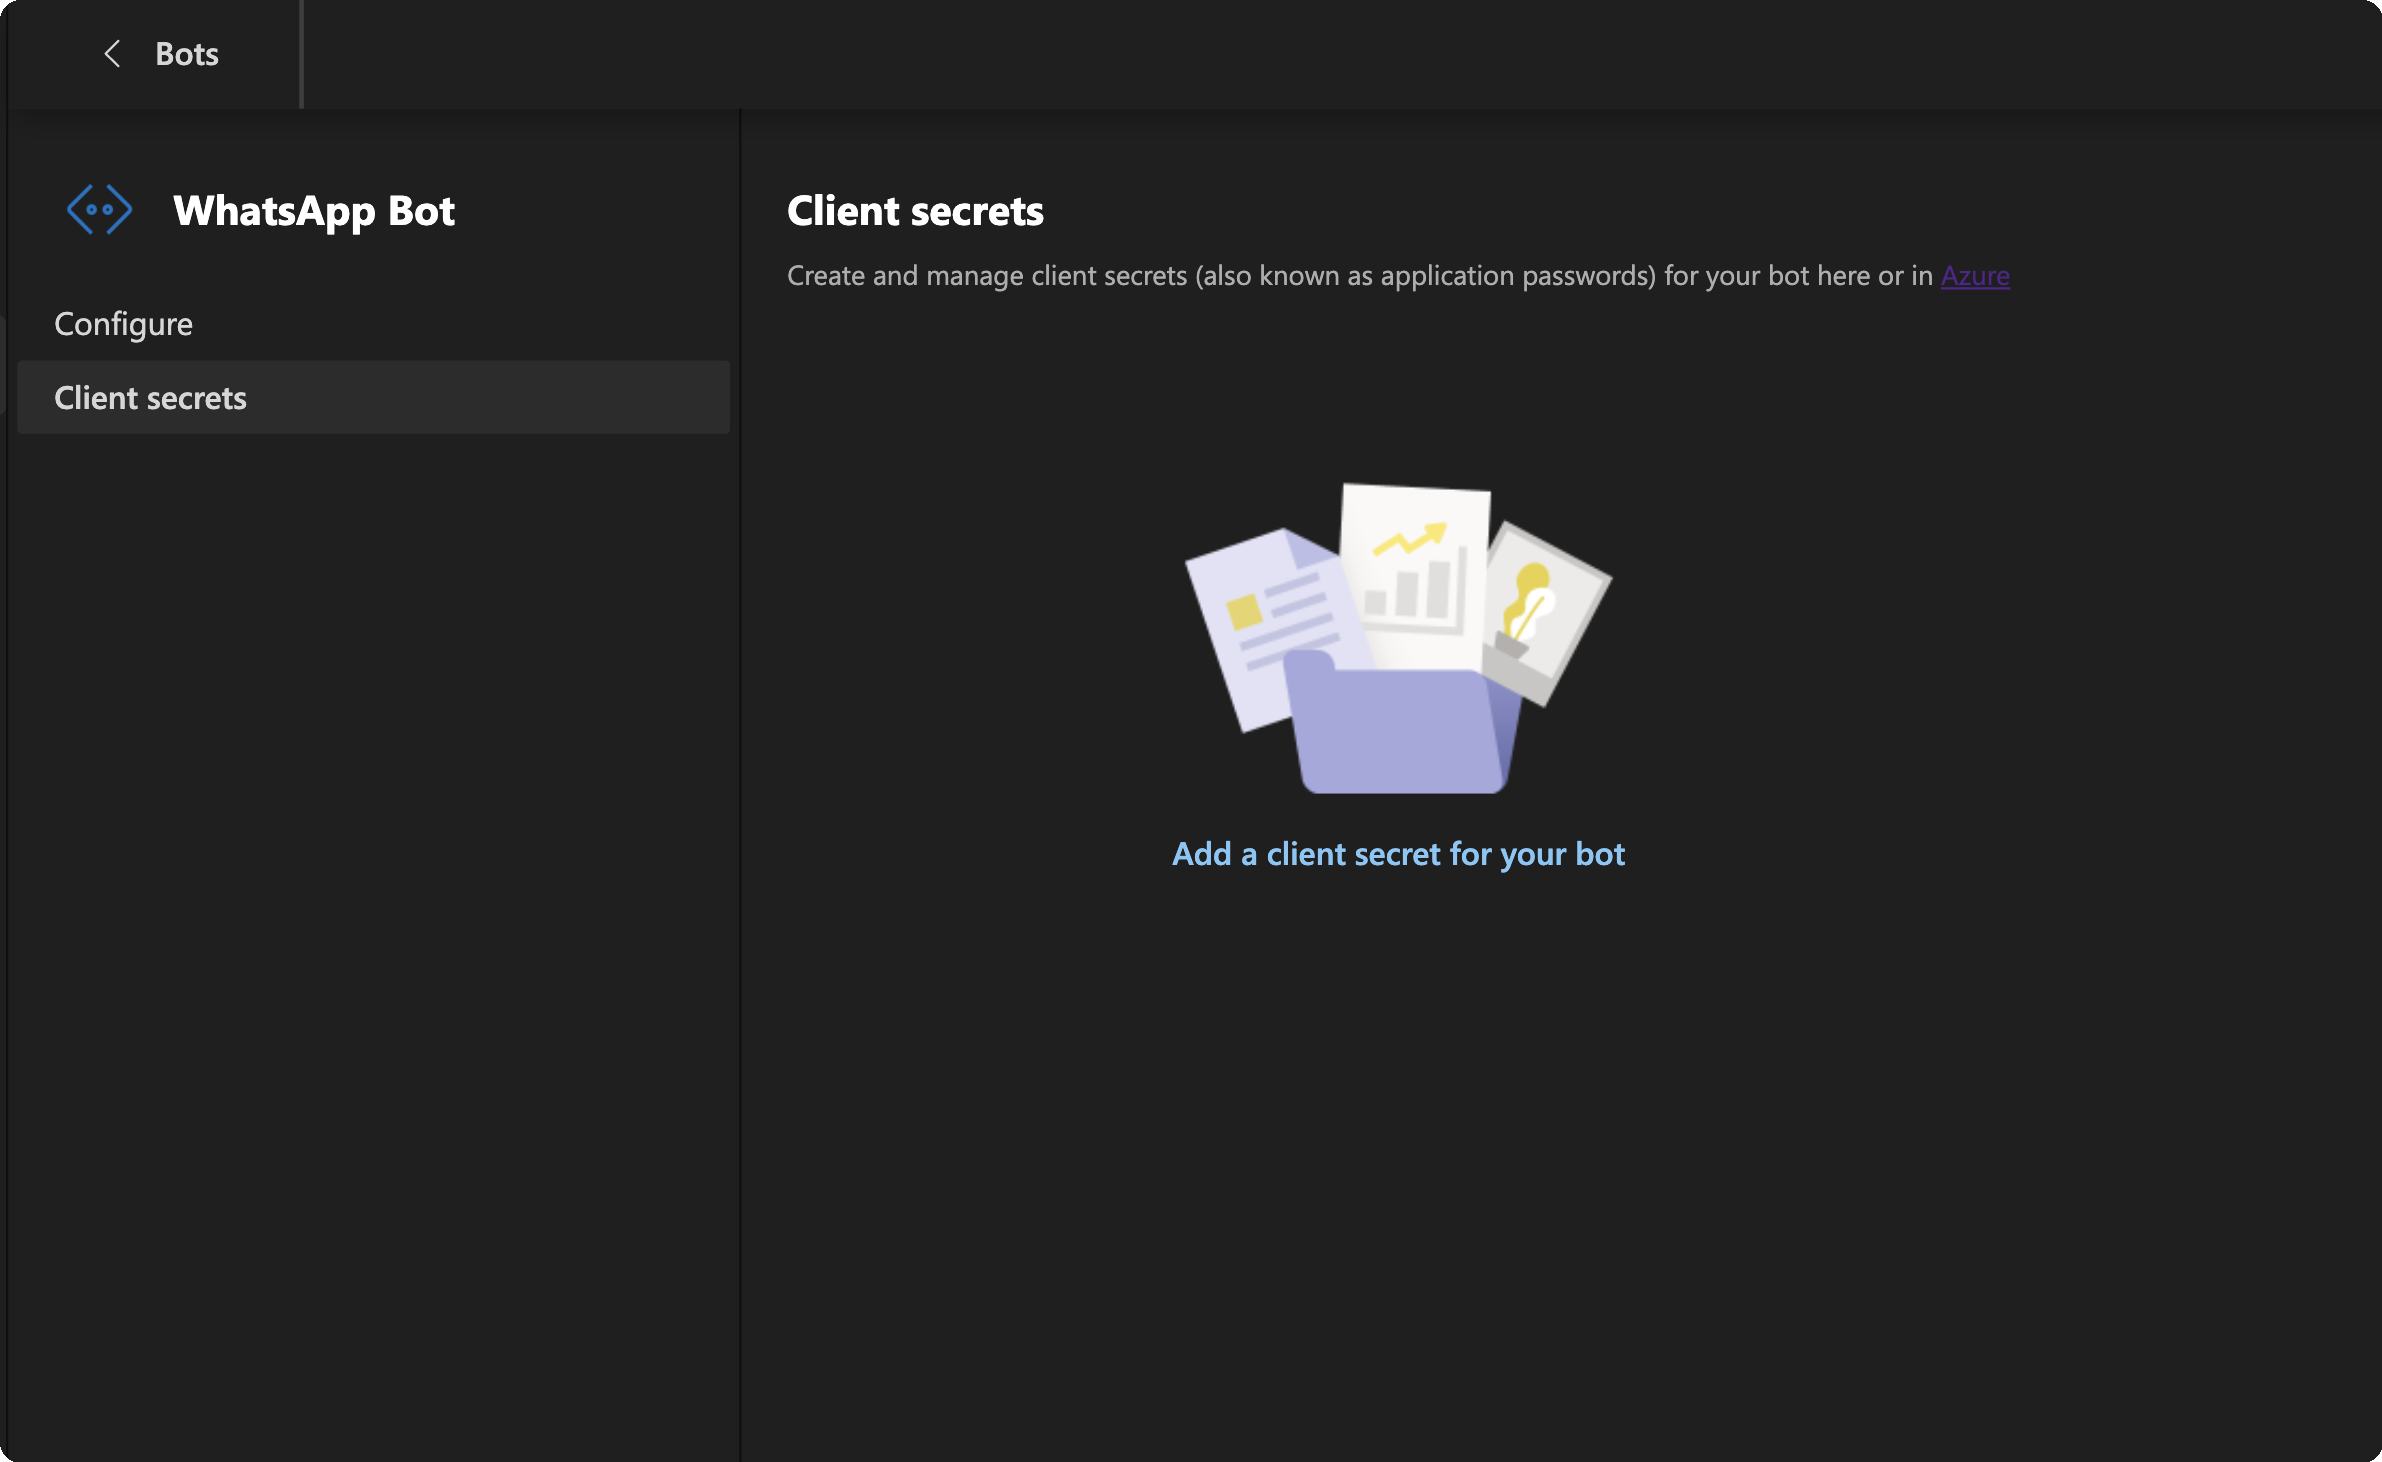
Copy it, you will need it later. Otherwise, Azure opens. You can create your secret in Manage>Certificates & secret by clicking the + New client secret.
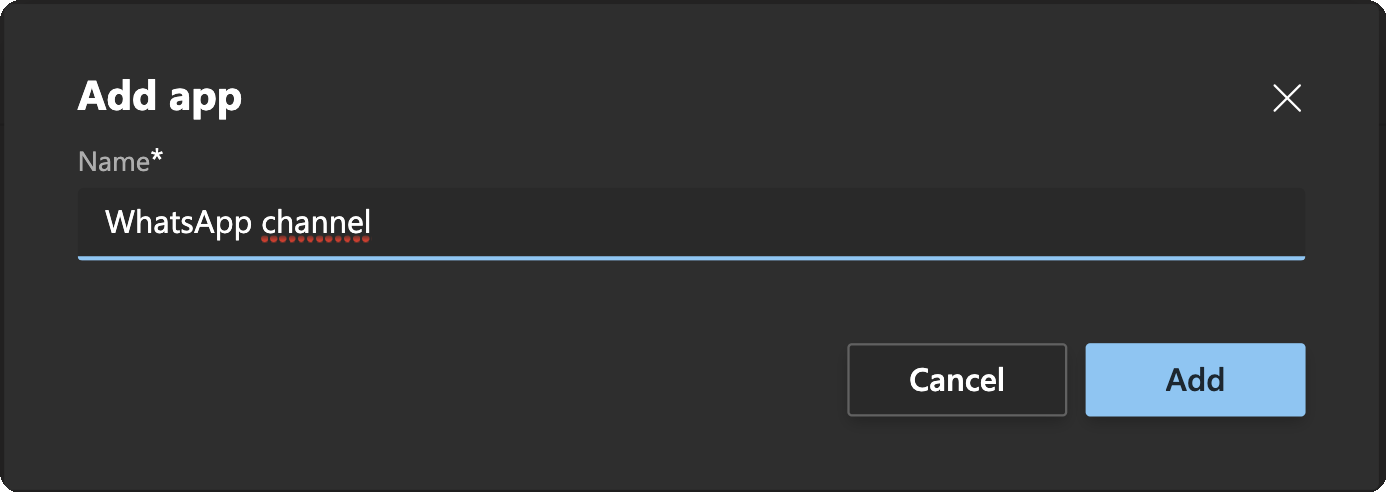
6. With your Bot and Bot secret ready, it is now time to create an App that holds your Bot. On the left side, select Apps.
7. Click on + New App. Name it appropriately and continue by clicking Add.
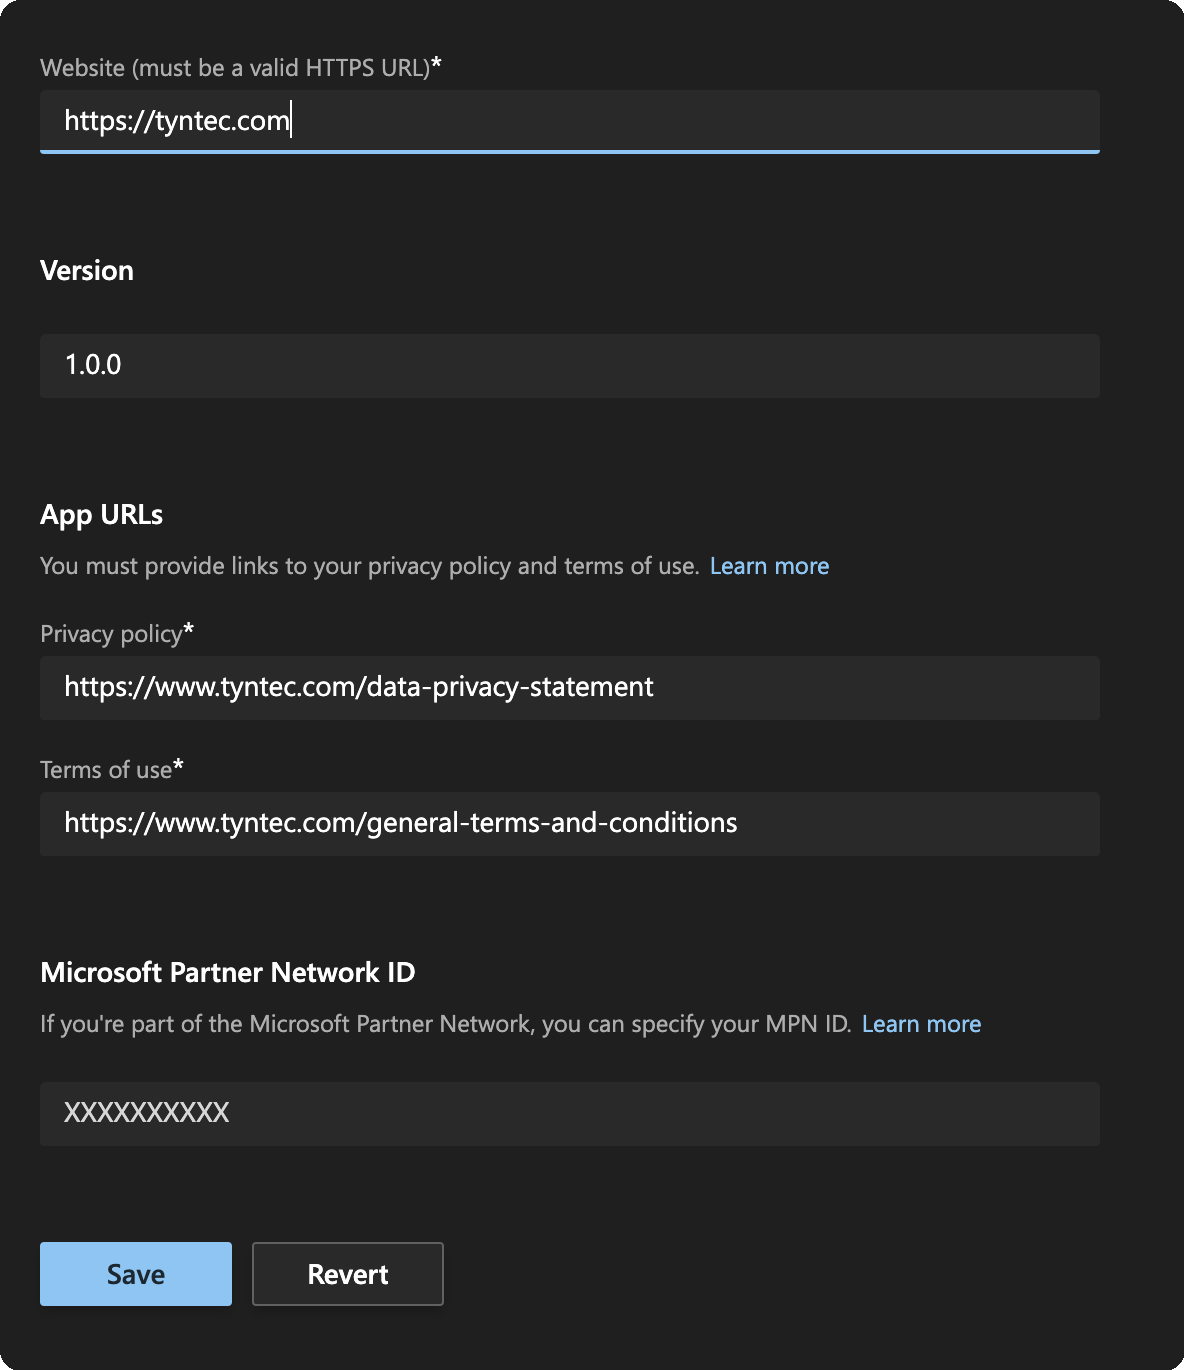
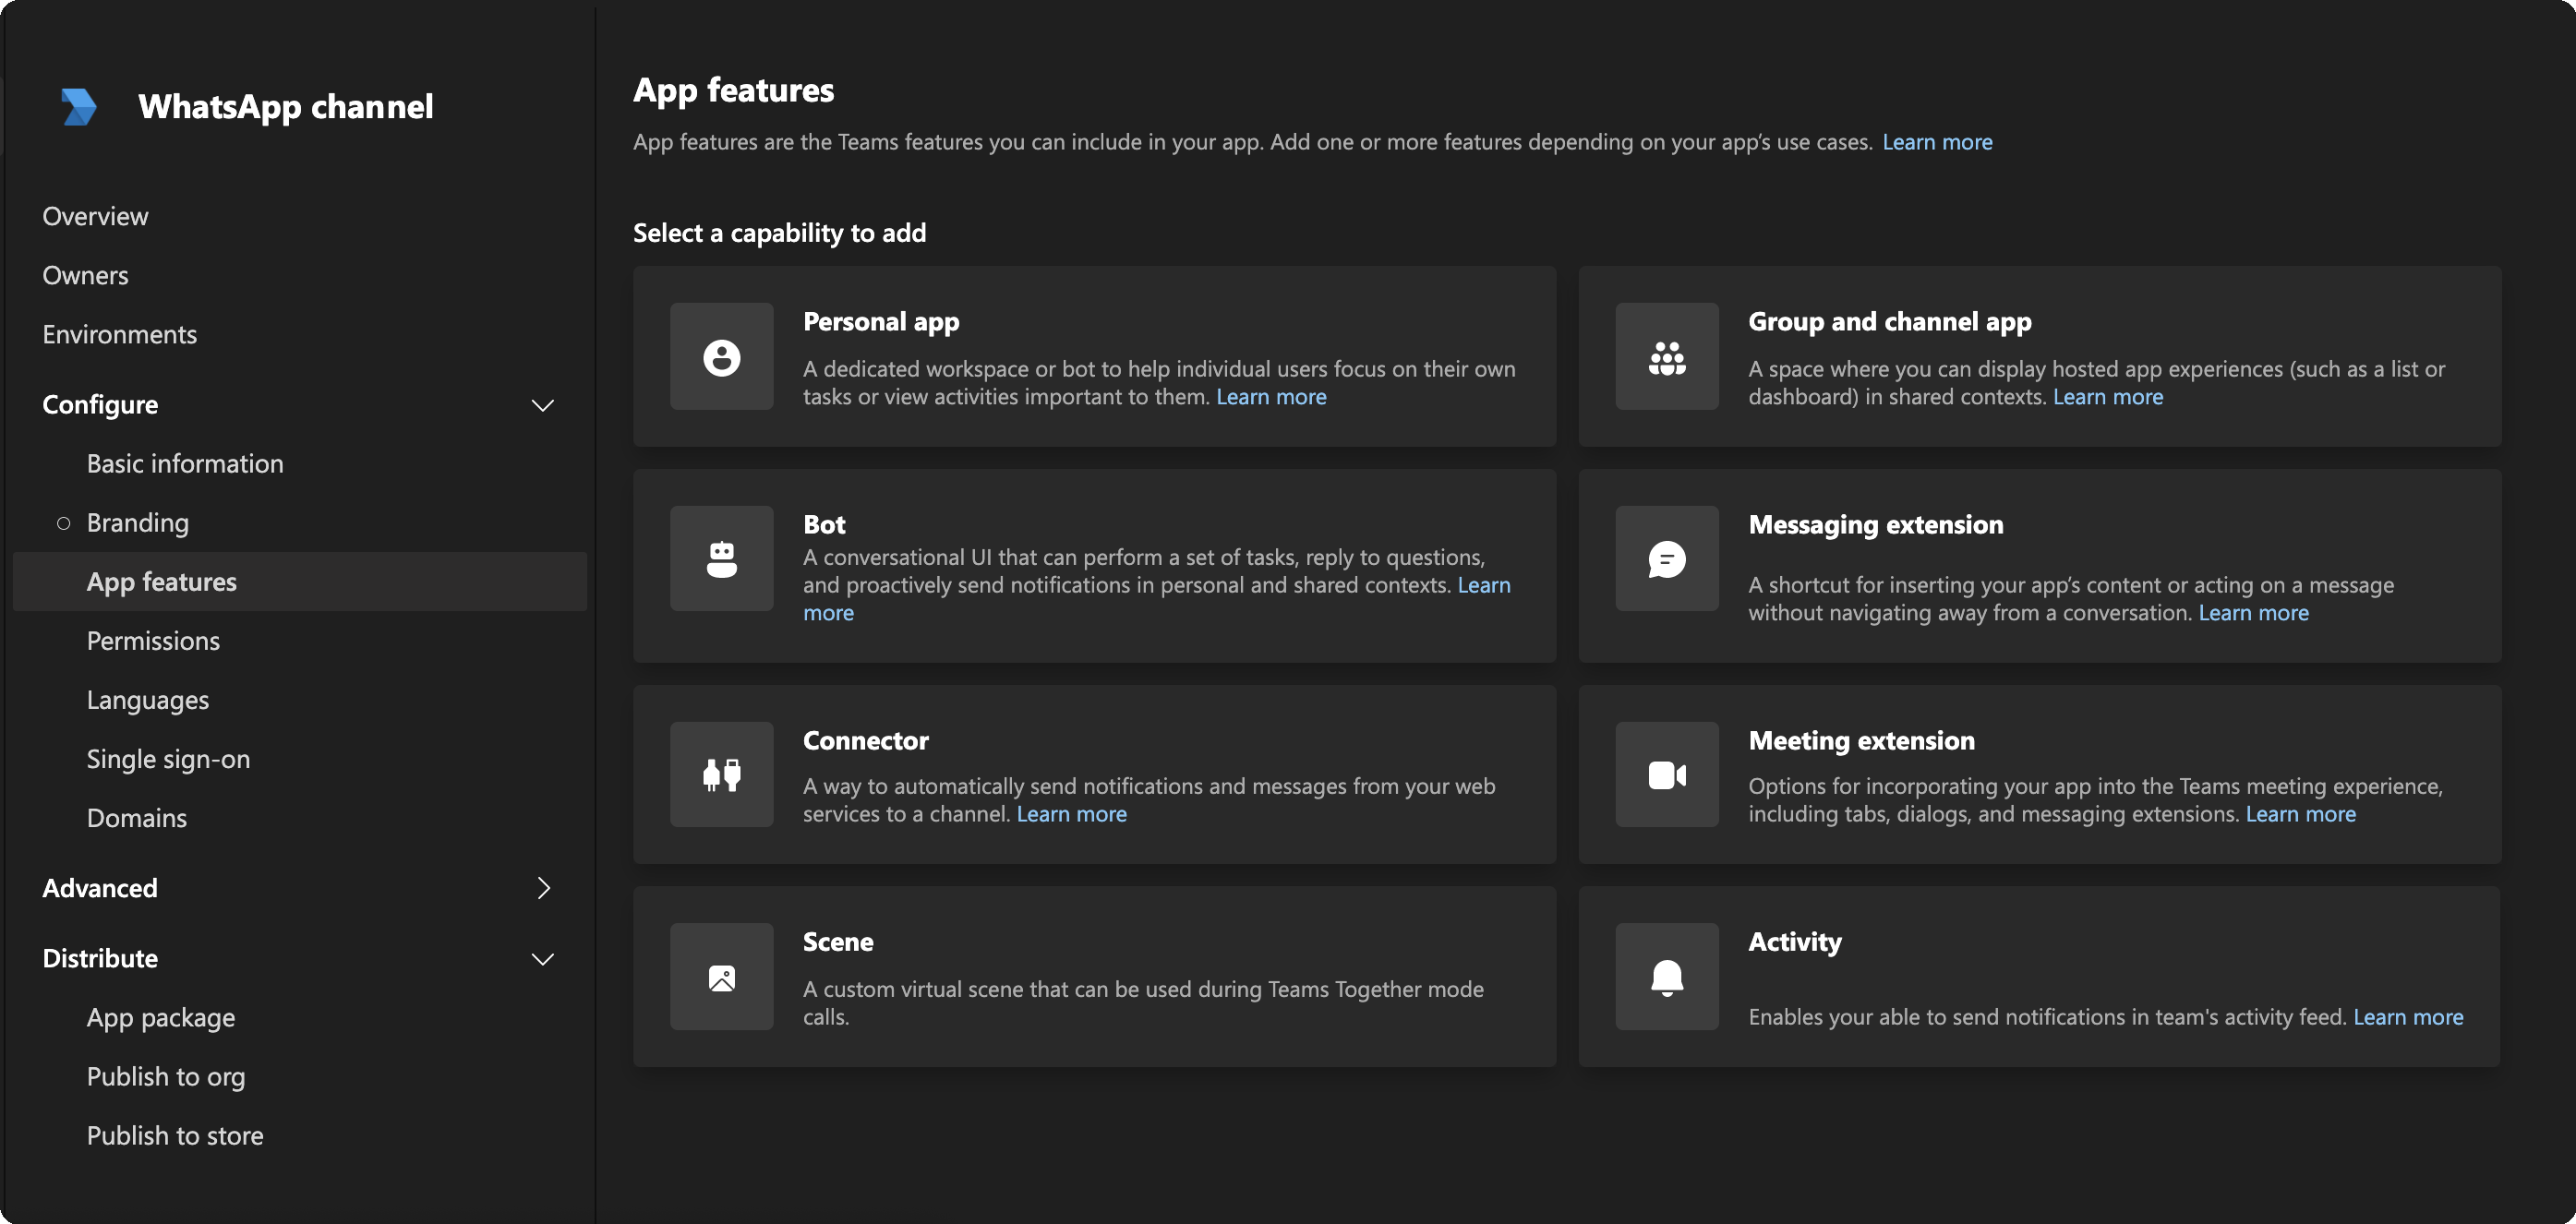
8. On the left, select Basic information. Fill in the required details like Short description, Developer information, and App URLs. When you finish, click on Save.
9. On the left, select App features. Then select Bot.
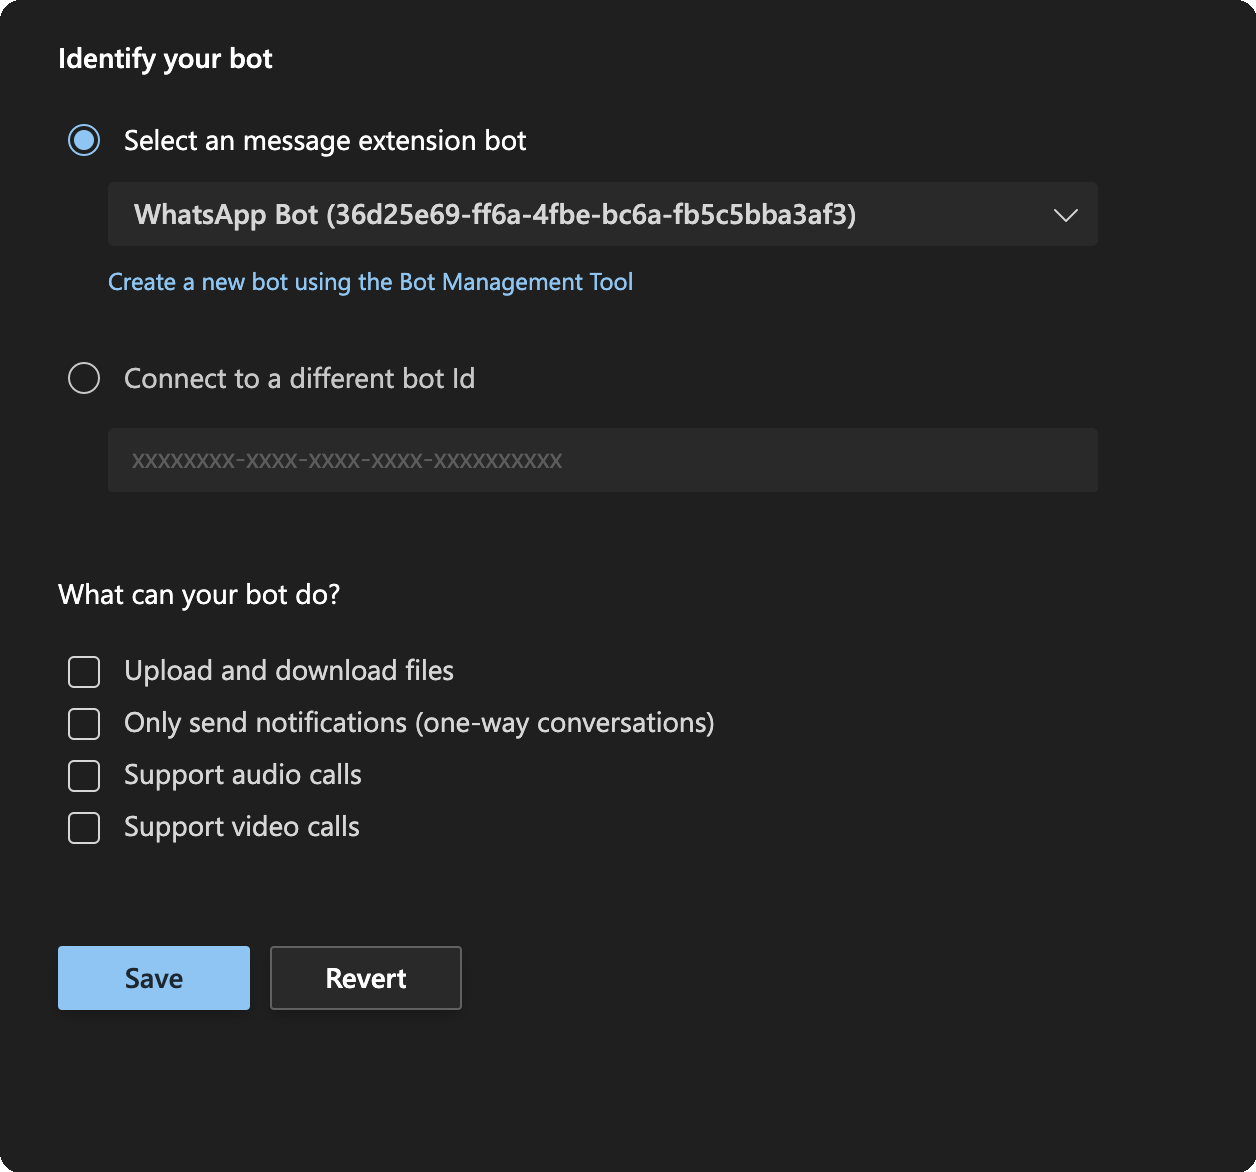
10. In the Bot settings, pick the Select a message extension bot and select the Bot you’ve created. Then click on Save. If you want to quickly check your bot, you can click on the Preview in Teams button to see it in action.
11. Now the only part left is to install your Bot into your Teams. On the left side, select Publish to your org. Click on Publish your app.
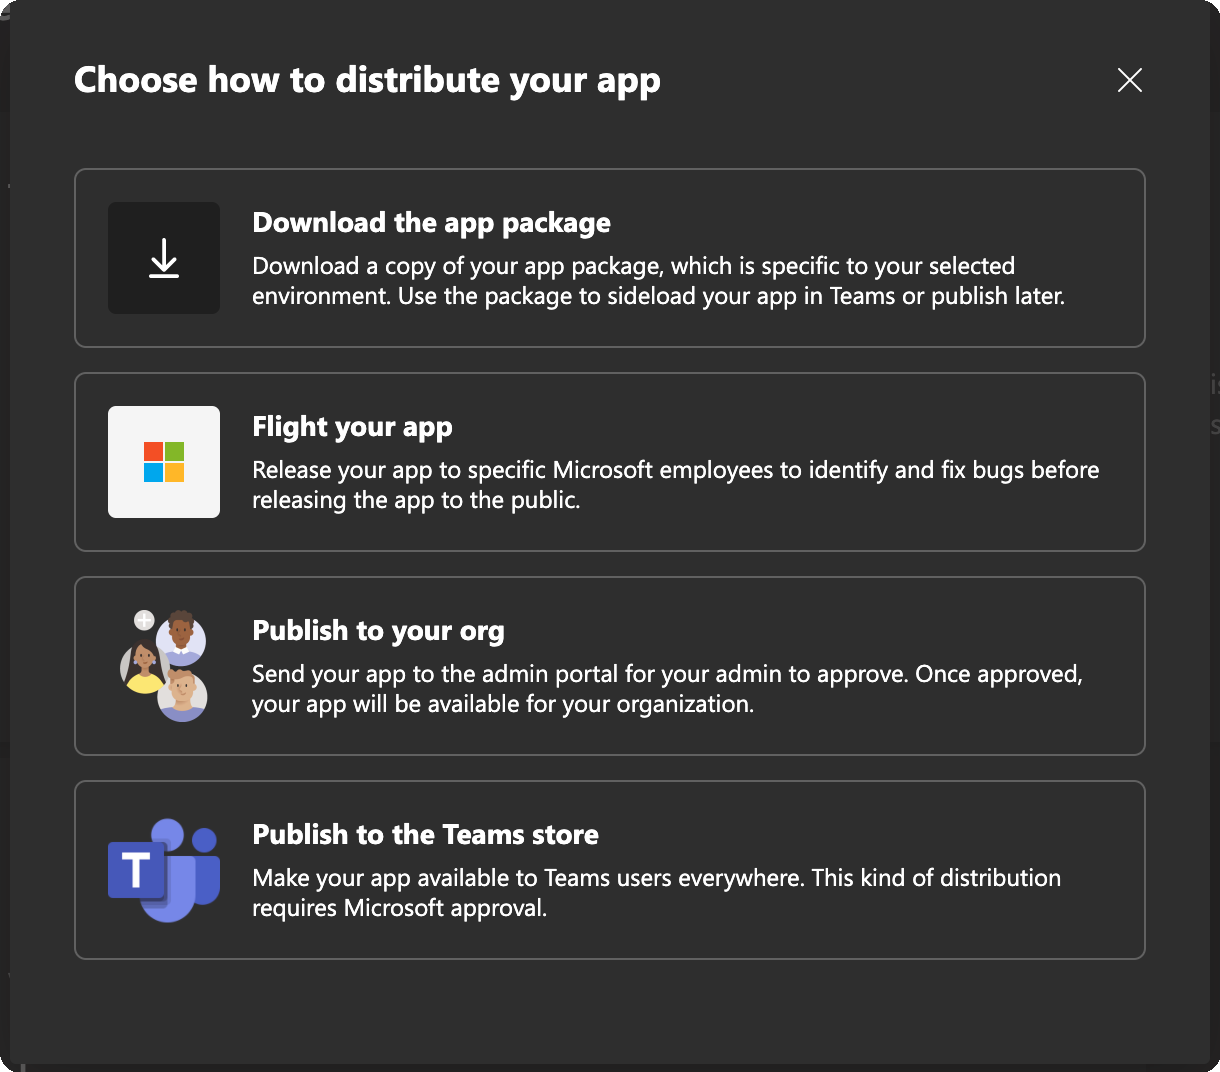
Alternatively, in the top right corner is the Distribute button. Clicking on it brings a pop-up that allows you to publish your app in your org.
As soon as your Teams Admin approves your app, you can find it in Teams under Apps > Built for your org.
Step Four: Configure and run your app
After setting up your Teams bot, the last thing you need to do is to configure your sample app.
1. Copy the .env-example file to .env and set environment variables in .env:
- TYNTEC_WABA_NUMBER – your WABA number in the international format without the leading 00
- TYNTEC_API_KEY – your API key from tyntec to authenticate calls to Conversations API
- PORT – optional server port (defaults to 3000)
- MICROSOFT_BOT_ID – your Teams bot ID
- MICROSOFT_BOT_PASSWORD – password to your Teams bot
2. Start the app in another terminal:
<div class="geshifilter"><pre class="php geshifilter-php">nodemon server<span class="sy0">.</span>js</pre></div>Everything is now up and running. Good job!
Step Five: Try it out!
It’s testing time!
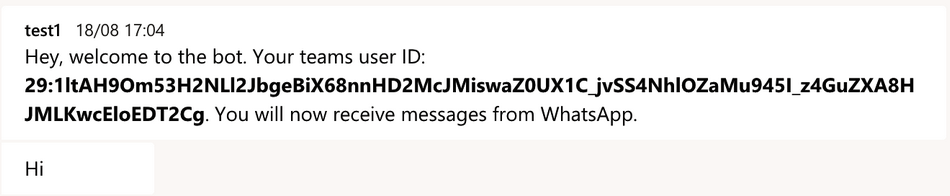
1. Go to the Chat with your custom Teams bot and initiate a conversation.
Your first message just flags you as a free agent. After sending any text message, the custom Teams bot informs you that you will now receive messages from WhatsApp.
2. Grab your phone and send a warm WhatsApp message to your WhatsApp Business Account number.
3. Look back to the Chat with your custom Teams bot
You will receive the WhatsApp message and you can reply to it in Teams. Try it.
4. Afterward, go back to your testing WhatsApp phone.
You should see your reply. Voilà!
Congratulations on your integration!
More?
You may want to use Microsoft Teams as an omnichannel for all your communication. To enhance Teams conversation capabilities, you should consider:
- Adding support for multiple conversations at once. To support multiple conversations you would need to change the scope of your custom Teams bot. Alternatively, you could store information about your customers in the messages as a prefix.
- Adding support for agent handovers. If you want to use Teams as an omnichannel dashboard, supporting agent handovers is crucial. You would need to change the scope of your custom Teams bot to support group chats.
- Flagging yourself unavailable. The current version informs users about unavailable Agents (if no Agent has messaged the custom Teams bot). One of the possible solutions is to add custom Command to the custom Teams bot which would change your status to Unavailable.
- Using tyntec Conversations API to support Viber and SMS messages as well. You can implement these two channels together with adding support for multiple conversations.