
Conversations Inbox | First Steps
Congratulations! You’ve probably already set up your Conversations Inbox. Now it’s time to take the next steps, like invite your colleagues and learn how to use the Conversations Inbox.
Login
You’ve also received an invitation link for your Conversations Inbox during the setup. If you have only registered with tyntec so far, please follow the instructions to set up your Conversations Inbox.

Invite colleagues
After setting up your Conversations Inbox, log in to your Conversations Inbox and navigate to the ‘Agents’ tab under ‘Organization’. Here you see all agents in your organization. As administrator, you are able to edit and delete agents, or reset passwords, if needed.
On the top of the page you can search for agents and add new ones.
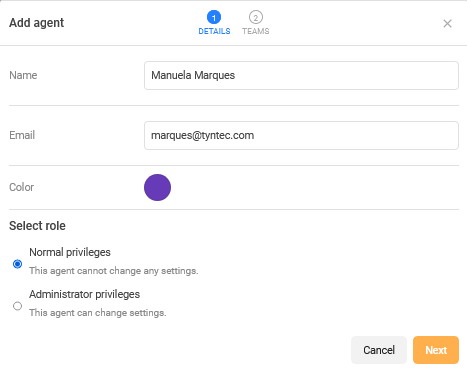
- Select the orange ‘Add’ button on the top to add new admins and agents.
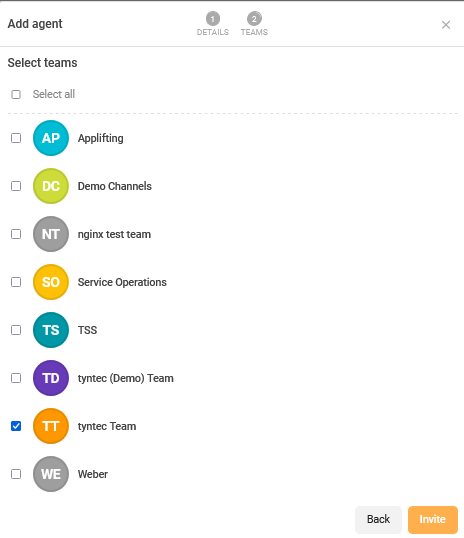
- Fill in the details for the agent and select the role you want to assign. Select ‘Next’ to assign the new agent to a team.
3. Select ‘Invite’ to add the new agent.
Your colleagues will receive an invitation email to activate their account. You can check their enrollment status on the left. If they didn’t receive their invitation email, select the agent and then resend the invitation email.
Create your team
‘Teams’ are typically used to differentiate either between specialized departments, like sales or support in your company. You can also use the teams feature to differentiate by geographic location or pretty much any other criteria. Different teams can either have access to the same channels, or only selected channels. This way you can set up for example a team per country or time-zone, which can only access the channels you’ve assigned to them.
Therefore, ‘Teams’ is an easy and flexible way to organize your agents – and your customer conversations. It helps you manage where the conversations should be routed: if a customer in the Netherlands gets in touch, the conversation should be routed to the right team to continue the conversation.
What you can do with ‘Teams’:
- Each team can be assigned an email address, so your team doesn’t miss out on important notifications, in case the team is offline.
- Team channels allow you to assign only certain channels, so that team members can only receive and send messages on their assigned channel. This flexibility allows you to set up for example one WhatsApp Business Profile per team.
The admin decides who belongs in each team and can do changes directly on the Conversations Inbox.
✉️ If you wish to receive email notifications for each of your teams, please get in touch with us at support@tyntec.com
1. Teams Management
Head over to ‘Teams’ in the menu under ‘Navigation’. Here you see all teams that are already setup.
2. Add a new team
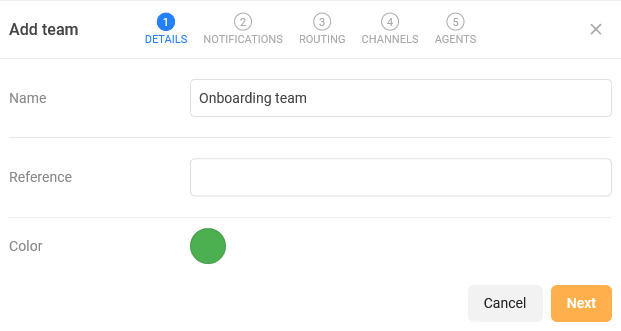
Select the orange ‘Add’ button on the top.
3. Team details
In the first step, fill in the details about your team, such as name and reference (if applicable).
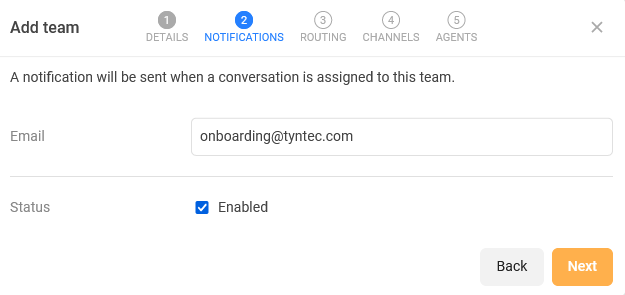
4. Notifications
Allow notifications to a team email (if applicable).
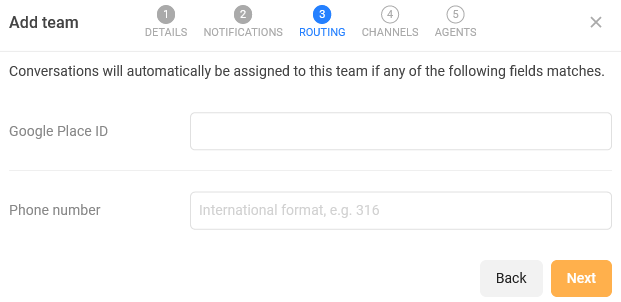
5. Routing
Select routing information, such Google Place ID (for location-based teams) or phone number (if applicable).
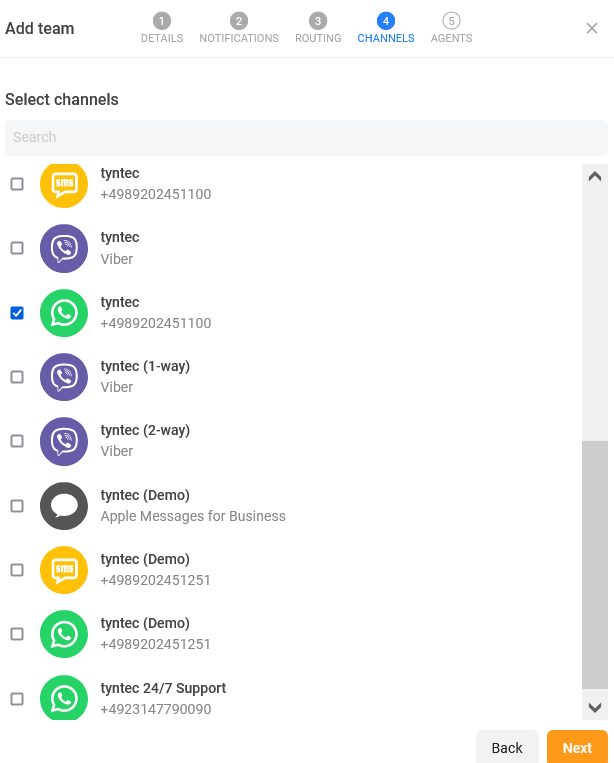
6. Channels
Select the channels your team is assigned to. Note that only those channels will be visible to the team.
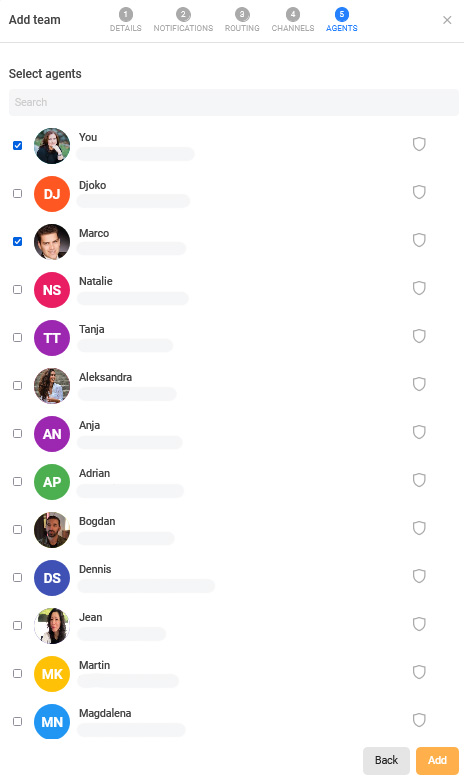
7. Team members
Select the agents you want to assign to the team. Then click on the Add button and your team is created 🎉
Channels
The Conversations Inbox supports a variety of channels. Follow the instructions for each channel to enable them for your Conversations Inbox.