
Conversations Inbox | Tutorials | Labels
Labels are an easy way to classify and prioritize a conversation with a customer. Every business can create their own labels to manage and mark conversations.
Labels are typically used by businesses to identify the type of conversation or prioritize it. Both can be achieved with labels. For example, you could create a label named ‘Urgent’ for conversations that should be prioritized by your agents. Another example could be to define the department with a label, e.g. ‘Sales’.
Create a new label
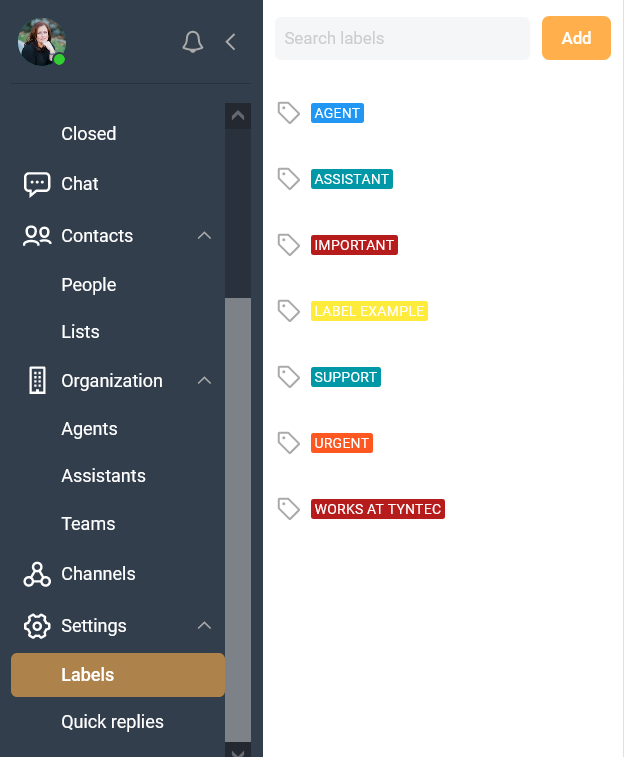
1. Navigate to Settings in your Conversations Inbox and open the menu
2. Select Labels
3. Select the orange Add button at the top.
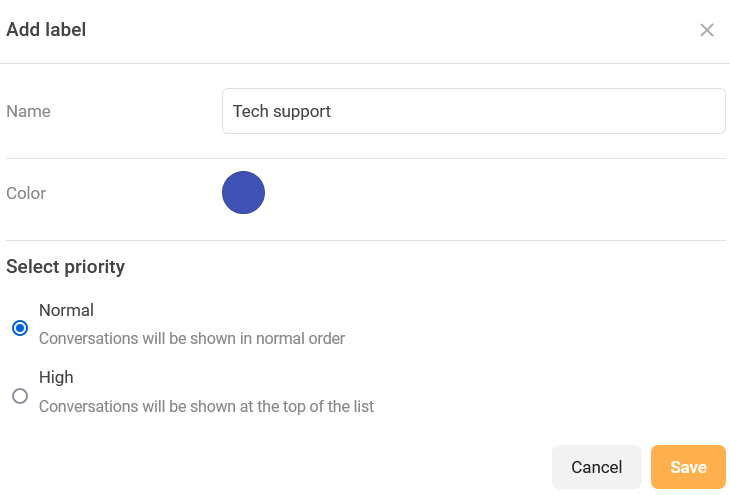
4. Choose a name for your label and select the color.
Tip: You can also choose the Priority for your label. If the priority is set to Normal, it won’t affect the order of a conversation in your inbox. If you set the priority to High, it will automatically push a conversation with your new label to the top of your inbox.
5. Save your new label.
Your label is now available in your Conversations Inbox 🎉
Use a label
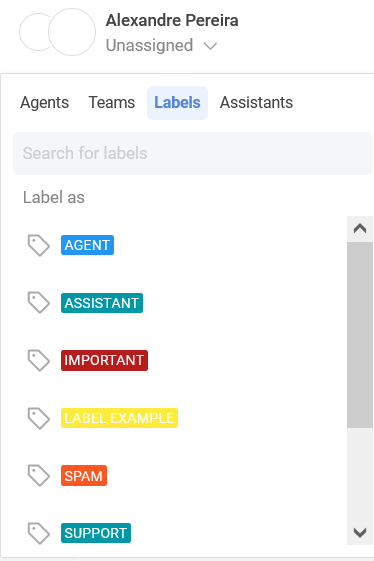
Open any conversation with a customer. Click on the arrow underneath the customer name in the top of your screen to open the menu. Select Labels from the menu and assign one or more labels by selecting them. The label will show up directly next to your customer’s name.
You can always de-select a label by following the steps and selecting the label again.
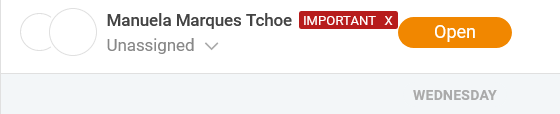
Once a conversation has been assigned to a label, it will be displayed next to the contact’s name at the top.
ℹ️You can assign up to 3 labels in a conversation.