Conversations Inbox – User Guide
Thank you for choosing tyntec Conversations Inbox to communicate with your customers and teams on the messaging channels they prefer. This user guide is to help you get started faster with easy-to-follow steps to customize your settings, create conversations, and access messaging channels, customer data, and content – all from one simple, unified interface.
This guide is for the users (agents) of Conversations Inbox. If you’re an admin, please check out this guide.
What are key features of tyntec Conversations Inbox?
Here are key features you can access right from the Conversations Inbox toolbox:
Omnichannel Communications
Send and reply to digital messaging channels such as SMS, WhatsApp and Viber, all communications from a single dashboard.
Customer Data
Add contacts and lists within the tool or access/sync with CRM for customer data.
Automation
Scale faster while freeing up agent’s time by setting up Auto Replies and Quick Replies.
Multi-agent
Empower agents to assign cases to other agents, teams, or bots for faster, better handling.
Multi-bots
Connect as many bots as you need to provide self-service for your customers.
Insights
Improve performance by using instant KPI reports within the tool itself.
How to get access to tyntec Conversations Inbox?
Get started: First steps with tyntec Conversations Inbox
Set up name and profile picture
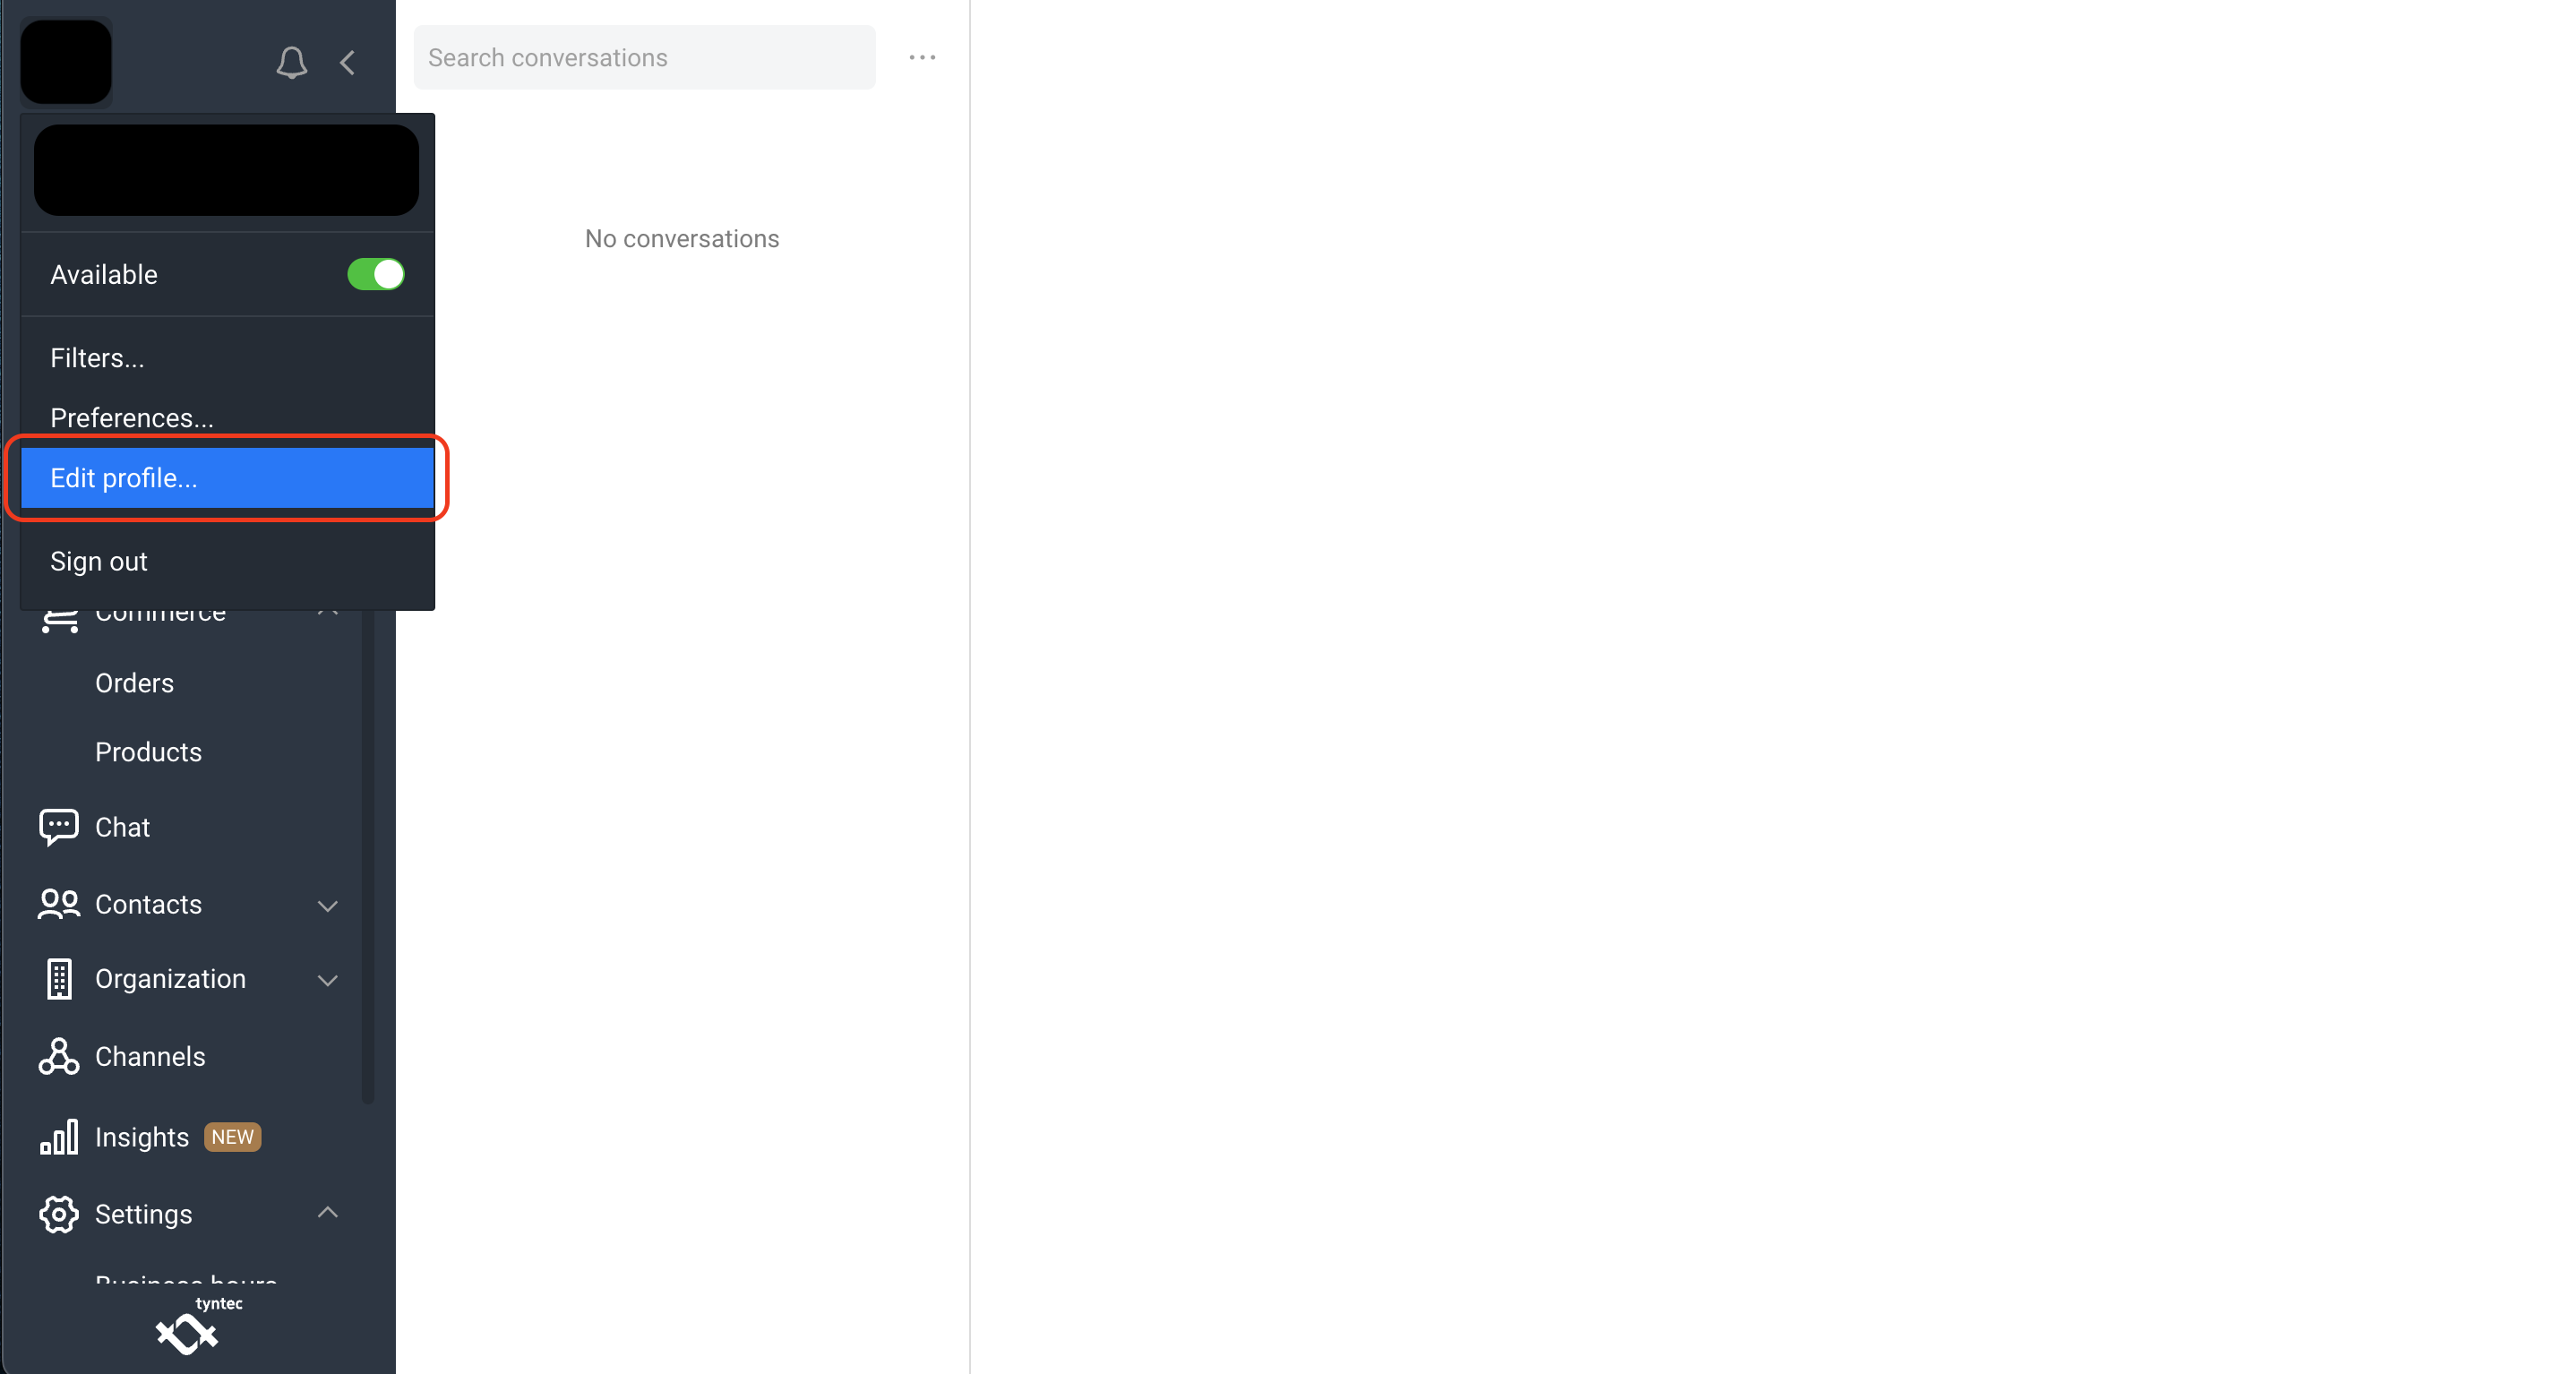
1. Click the icon with your initials and click Edit profile….
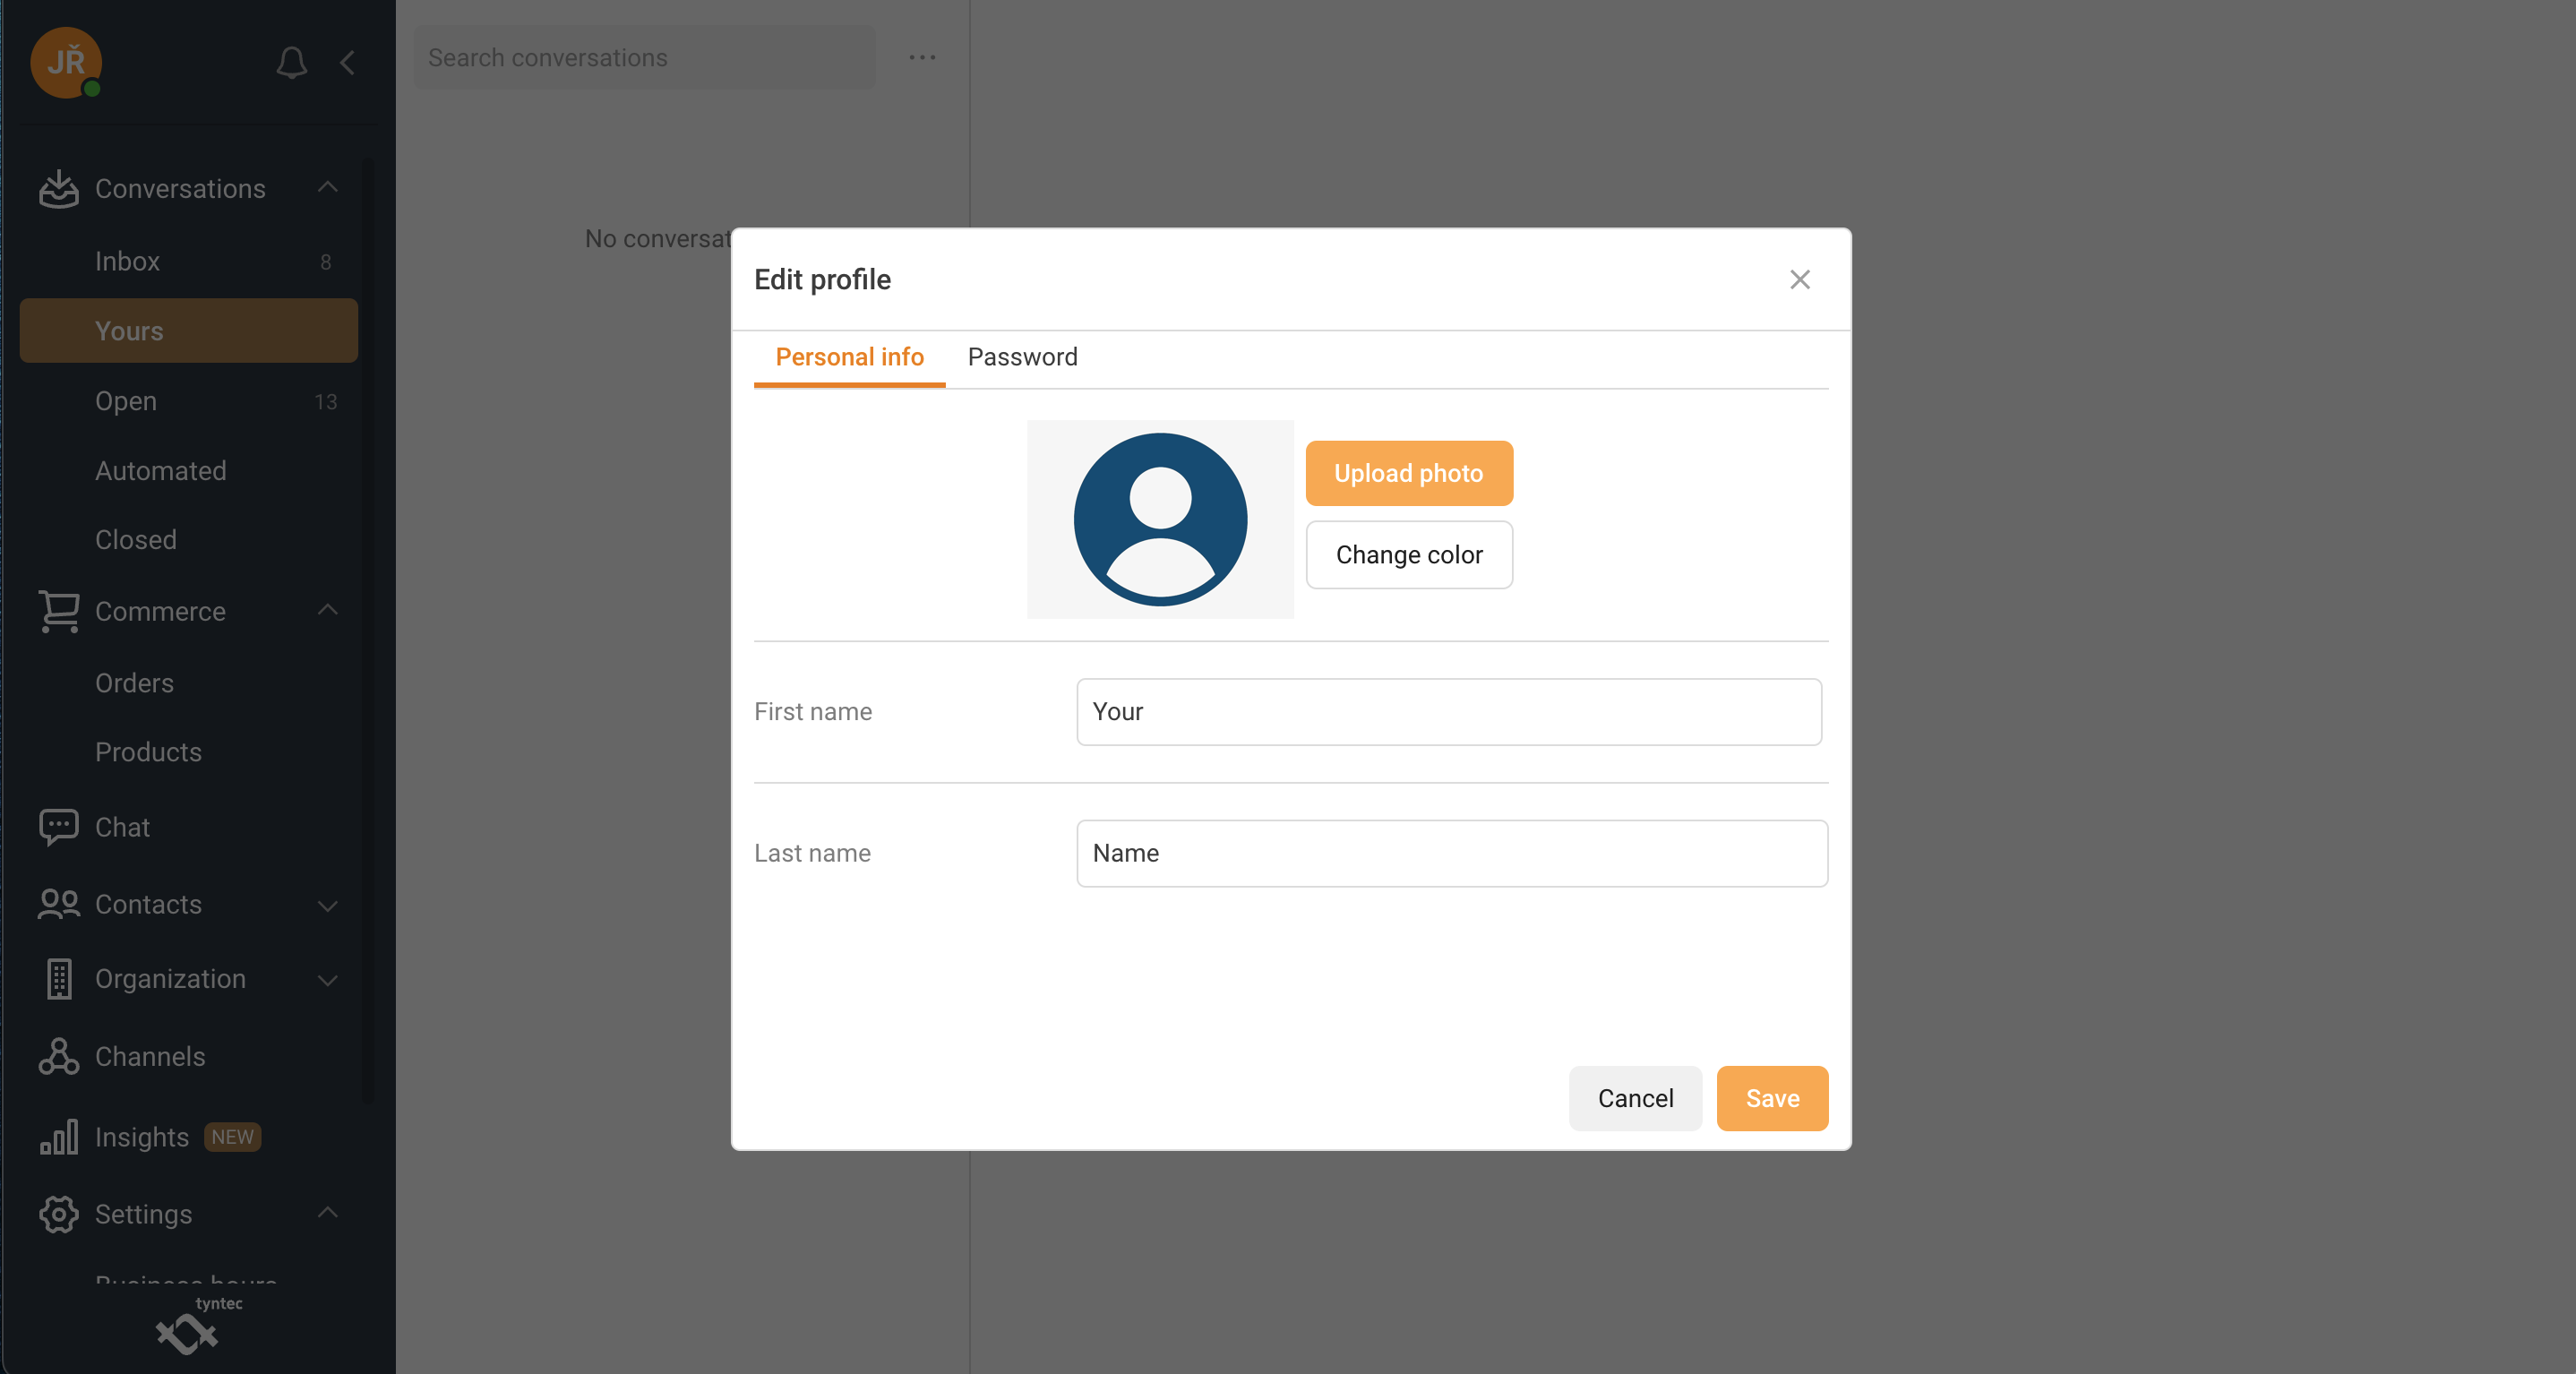
Personalize your profile with first name, last name, change the colour of your icon, or upload your own photo.
1. Click Upload photo to change your current profile picture.
2. Click Change colour to change your current profile colour.
3. Fill in a new First name and Last name if you want to change it.
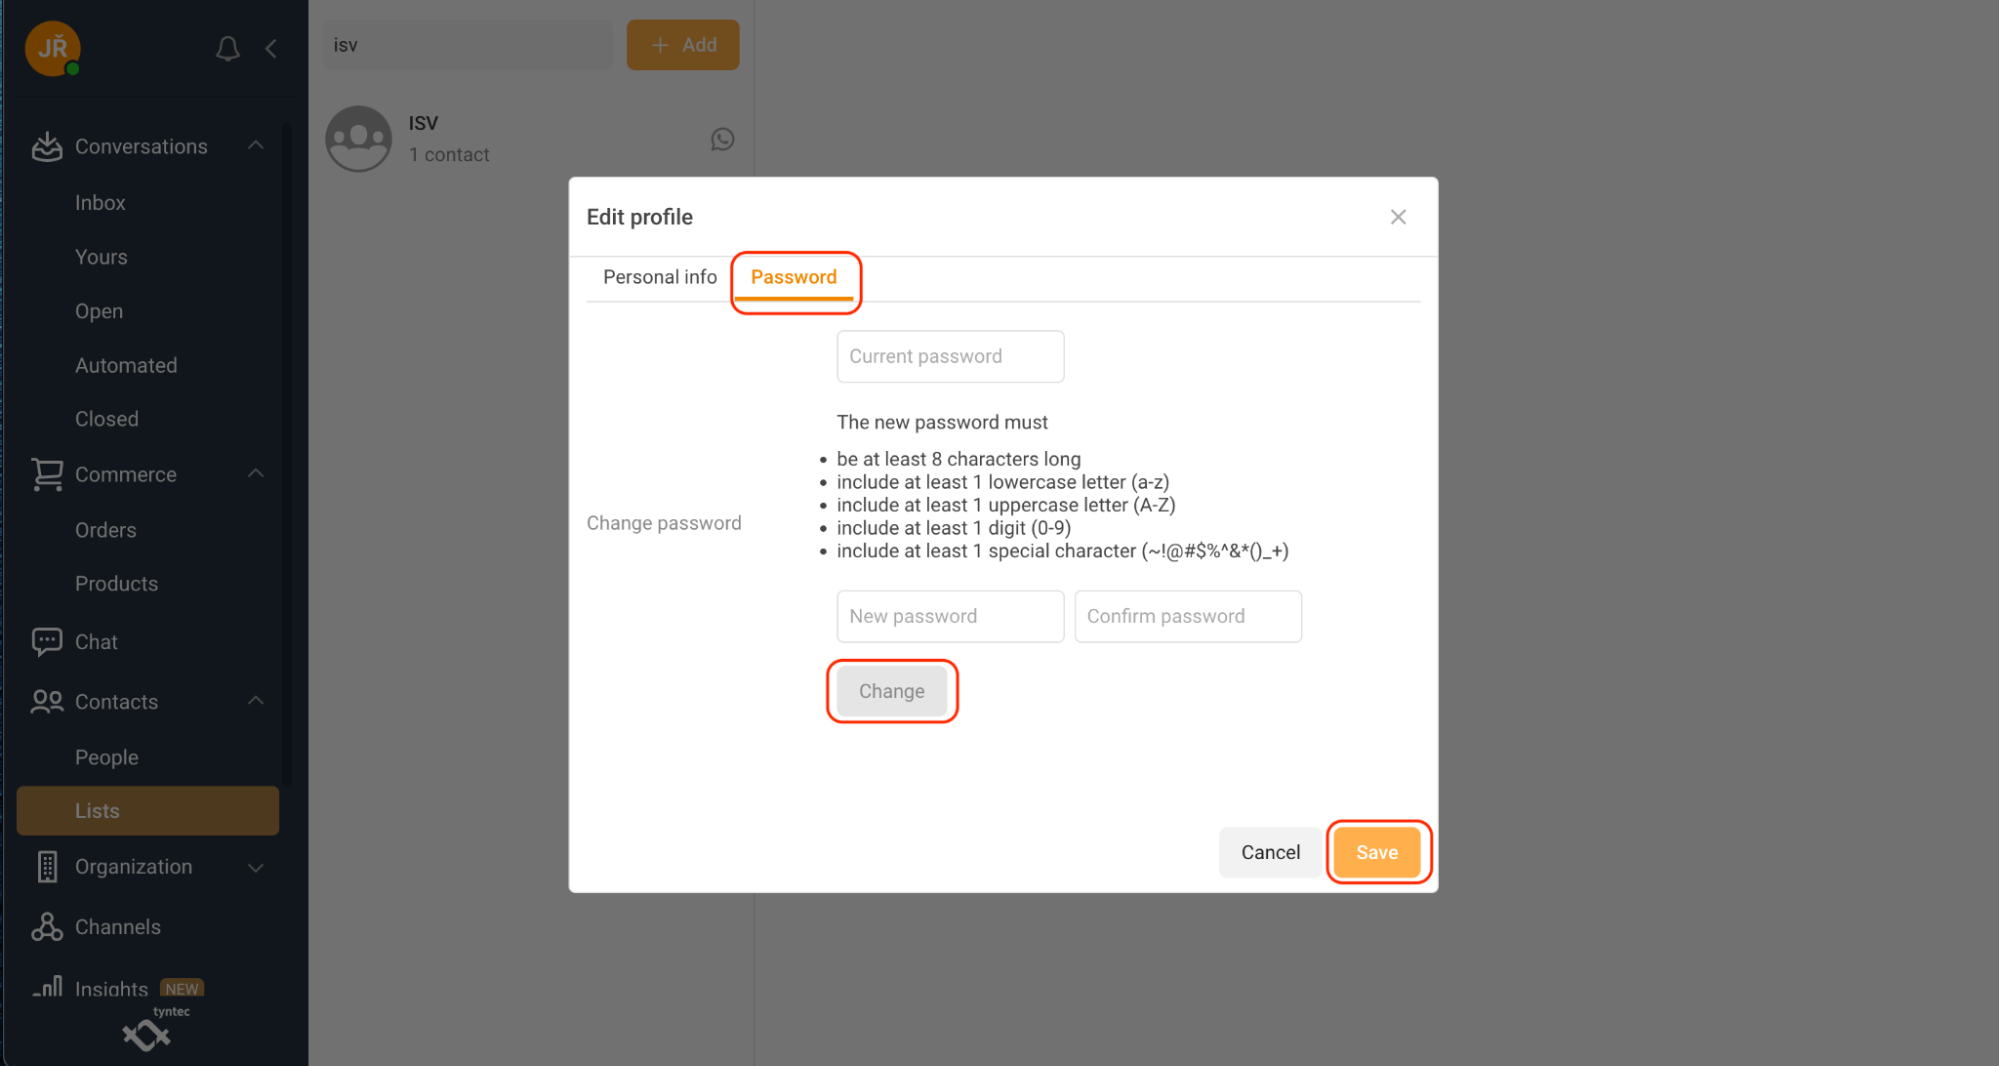
Set up new account password
1. Click the icon with your initials then click Edit profile….
2. Click the Password tab.
3. Fill in your current password and enter a new one.
4. Click Change.
5. Click Save.
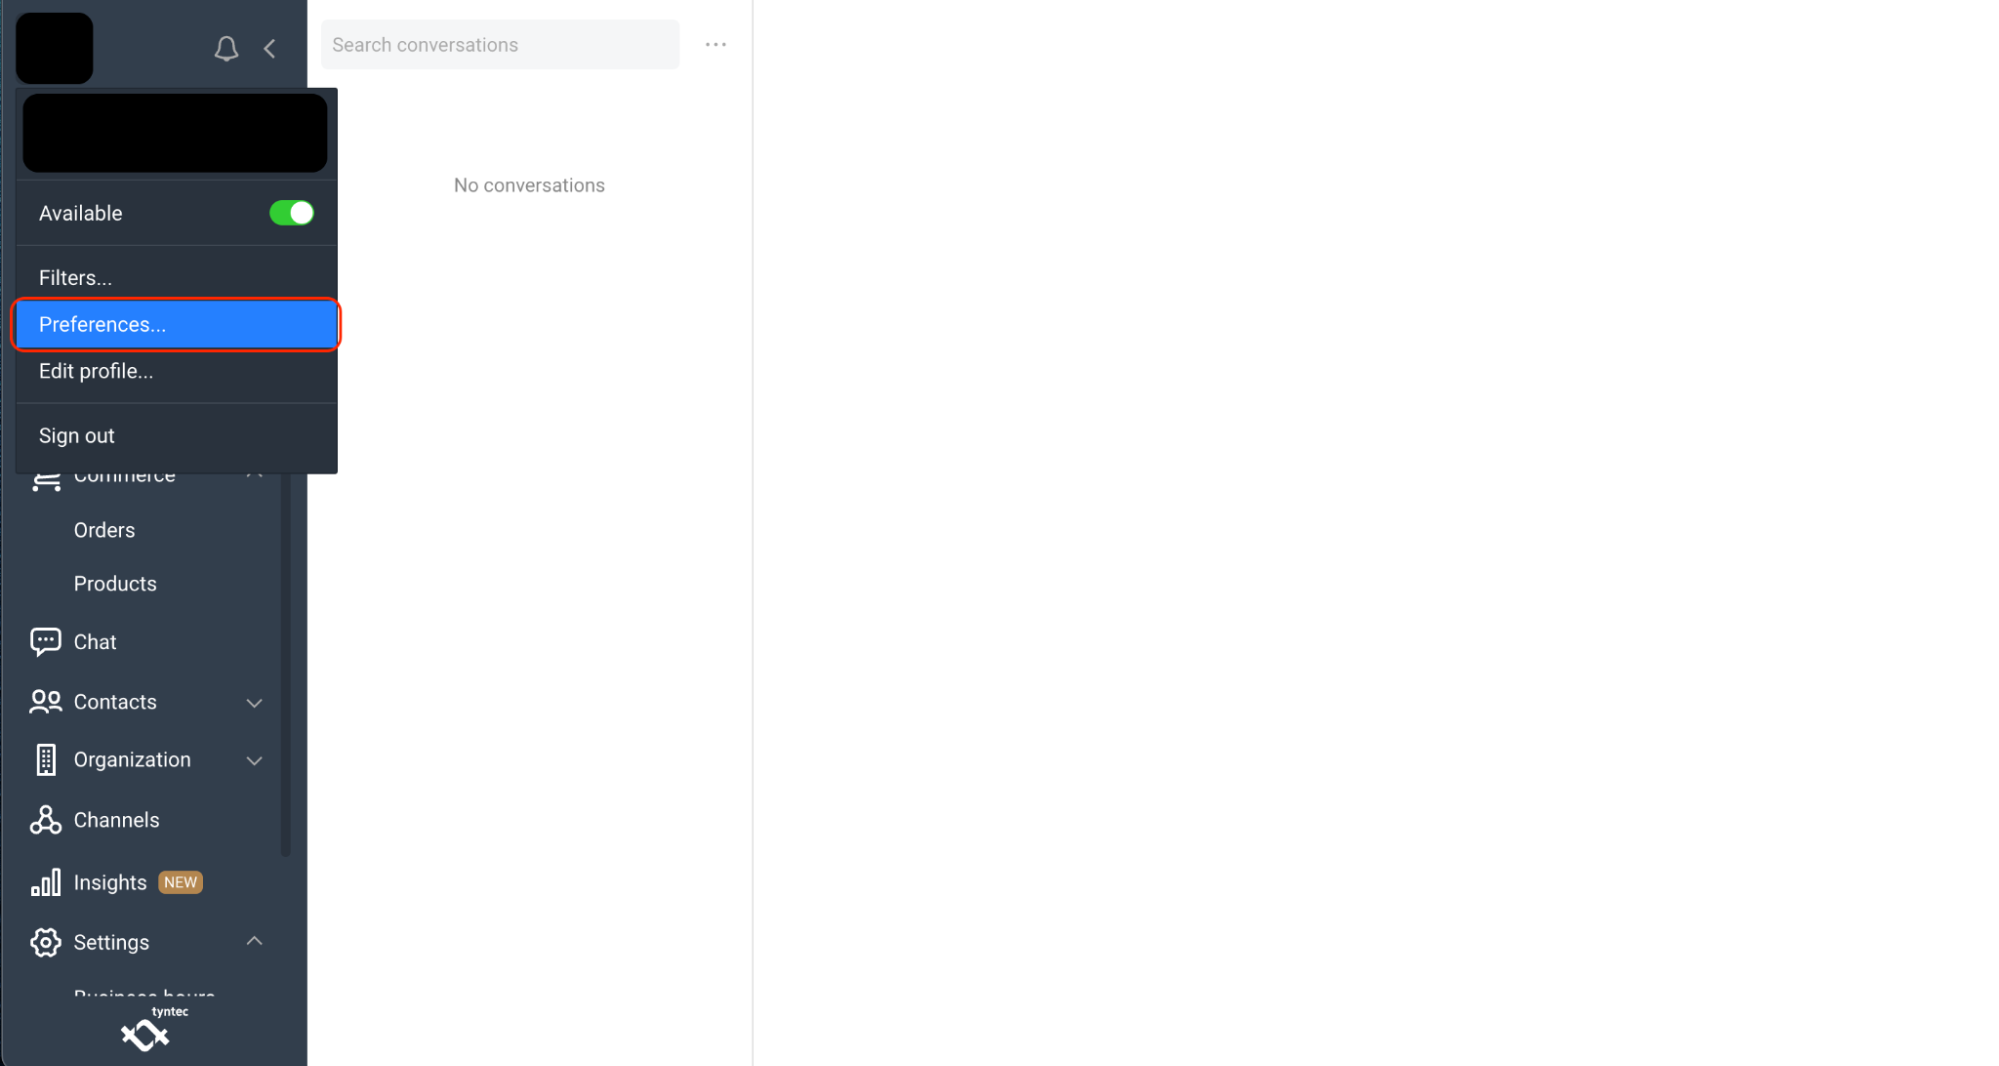
Set up Preferences
In this tab you can set your preferences, email notifications, and date and time display format.
1. Click on the icon with your initials and select Preferences.
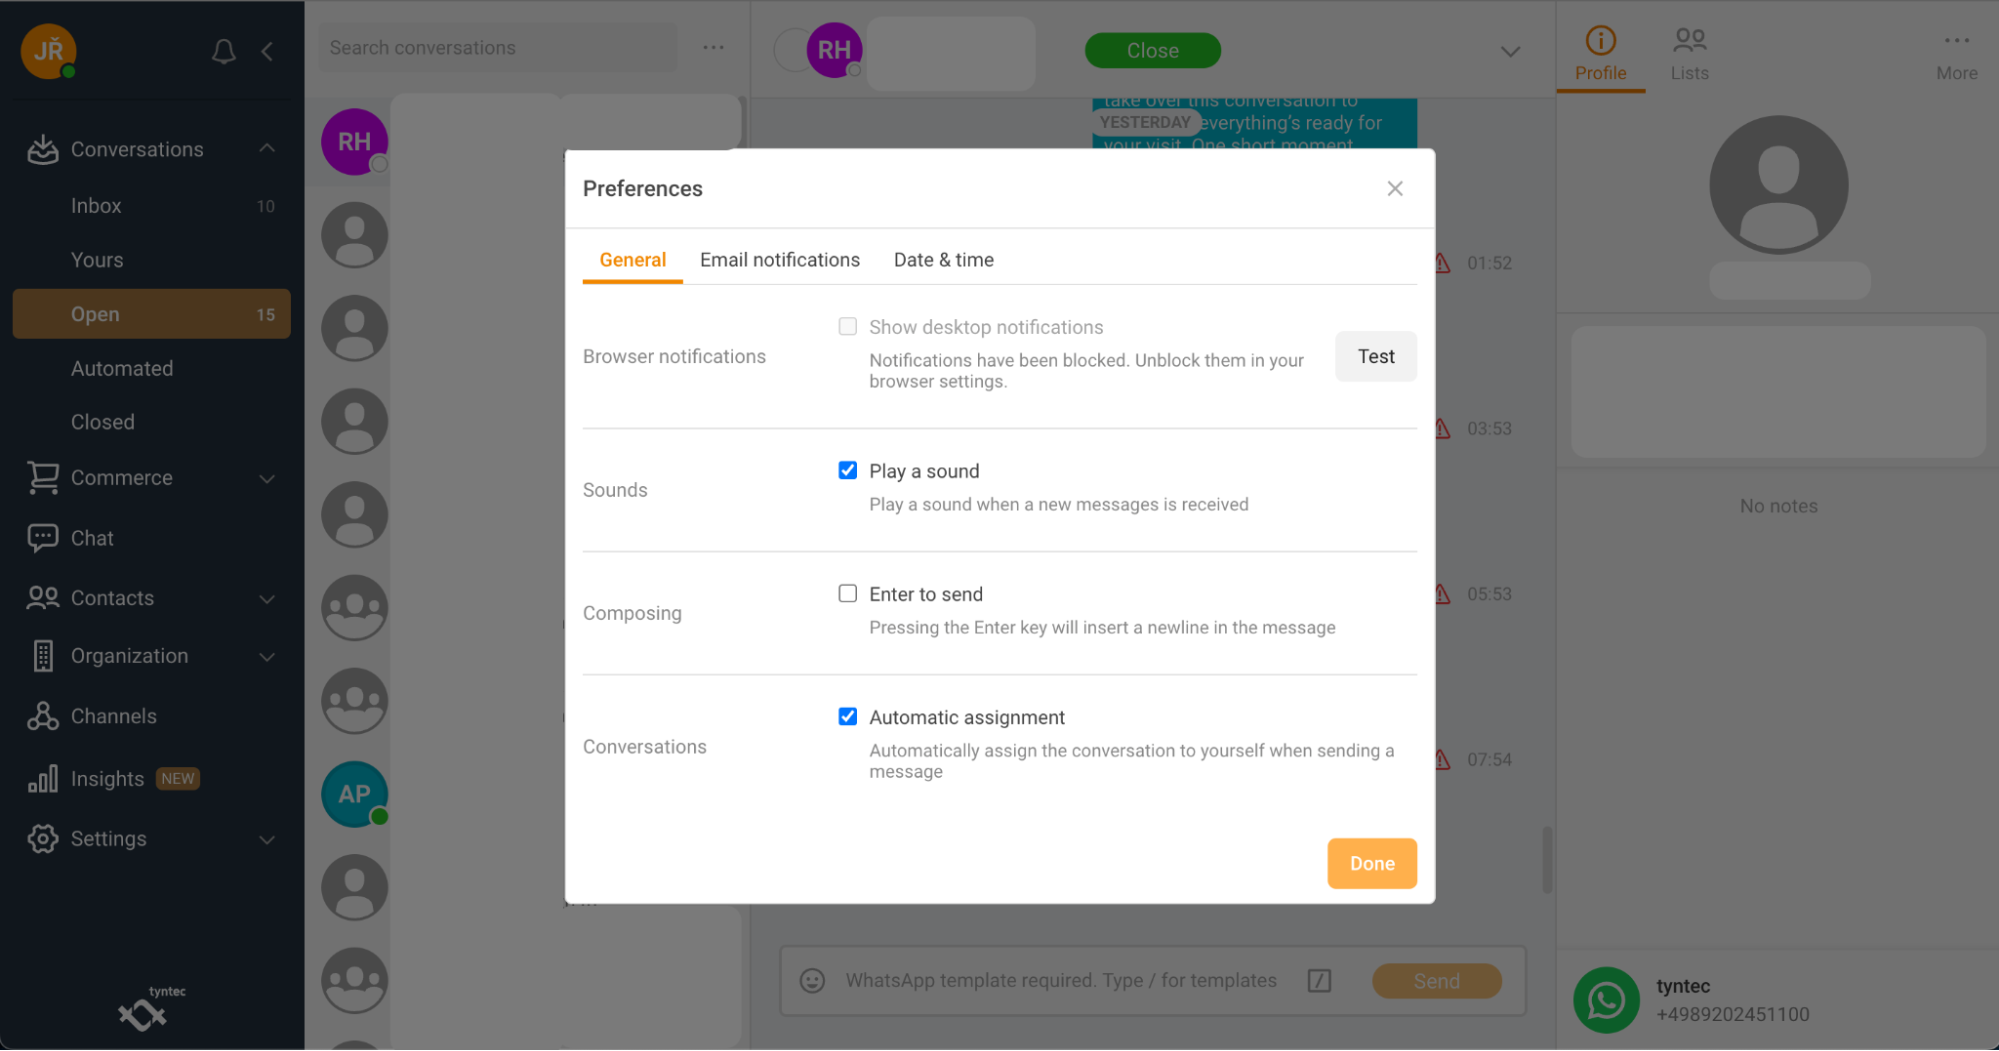
In General Preferences you can enable or disable:
1. Browser notifications.
2. Sound notifications for new messages.
3. Composing options.
4. Automatic assignment.
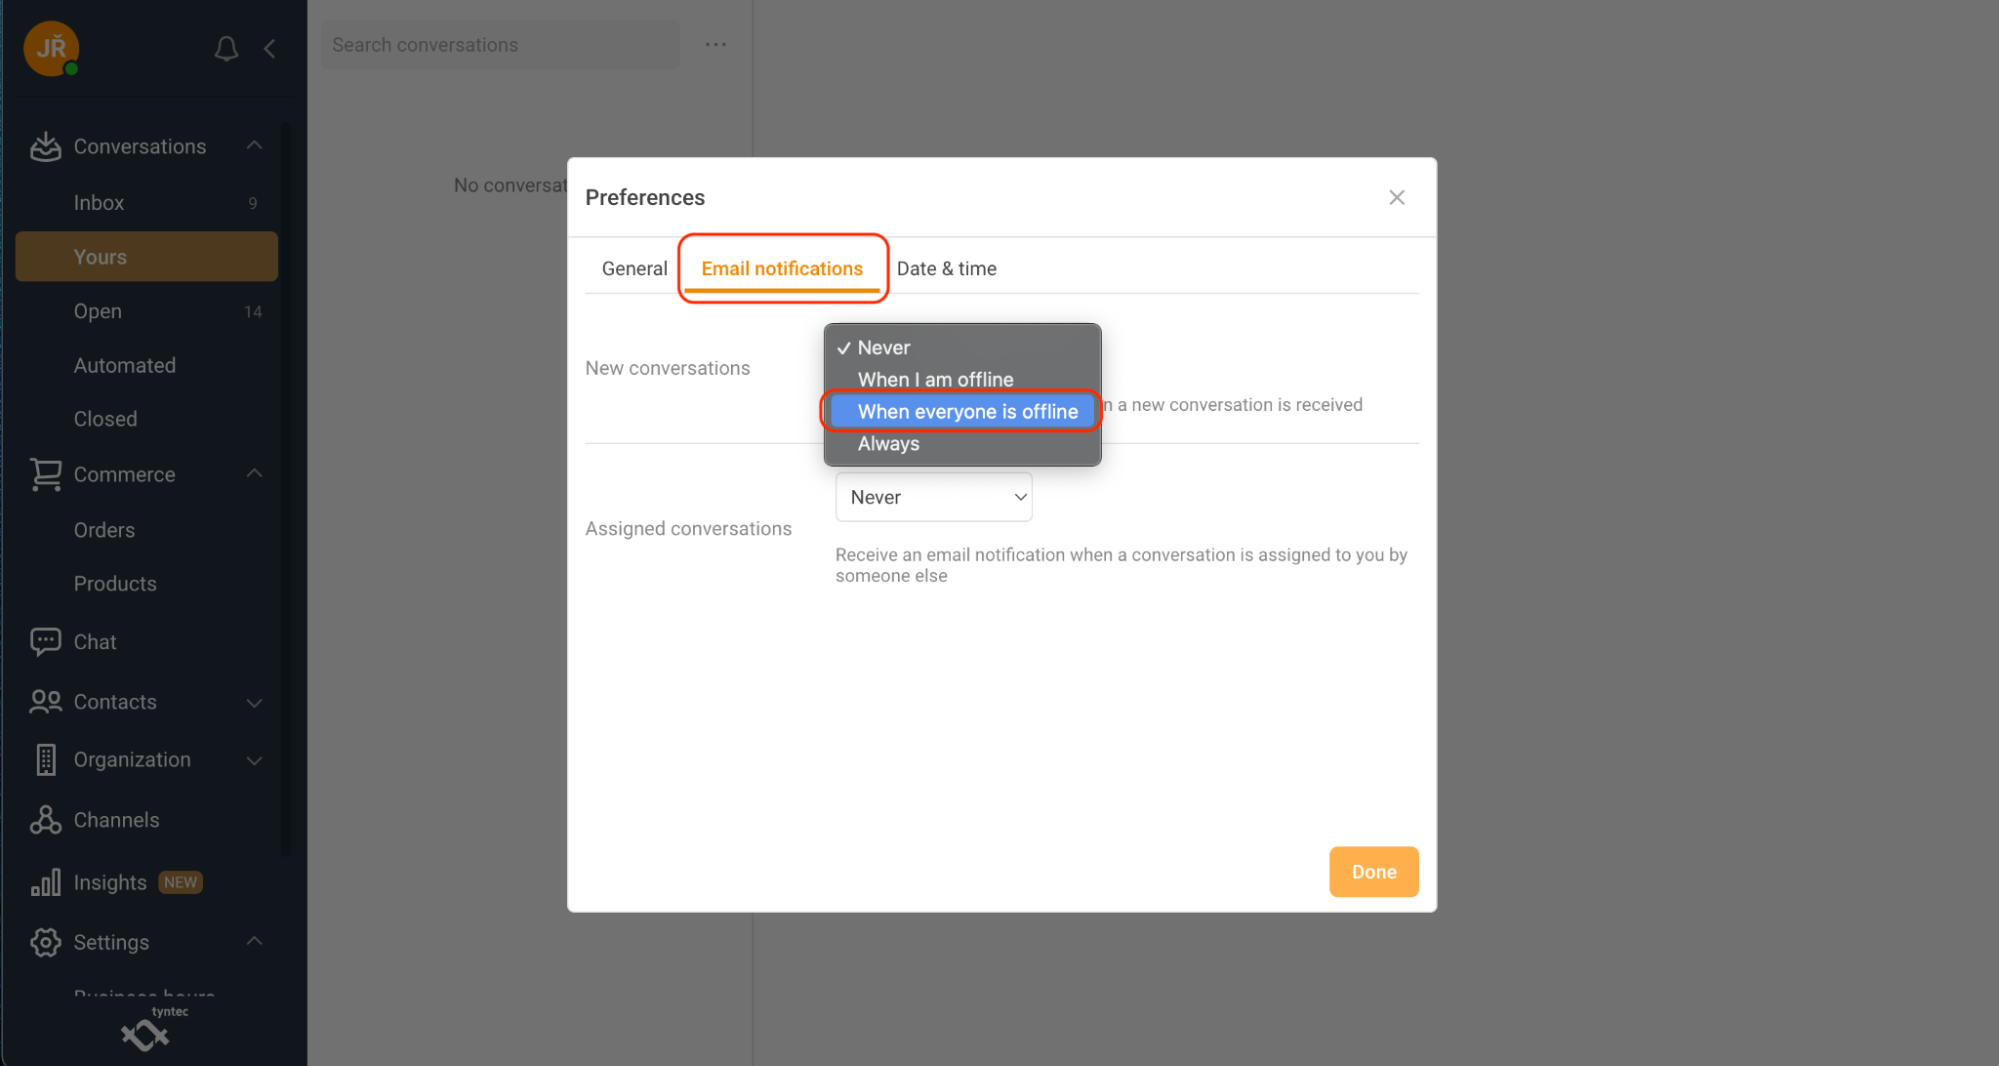
Email notifications
Email notifications settings allow you to set notification types based on your availability. You can set separate notification when:
1. New conversation is received.
2. Someone has assigned a conversation to you.
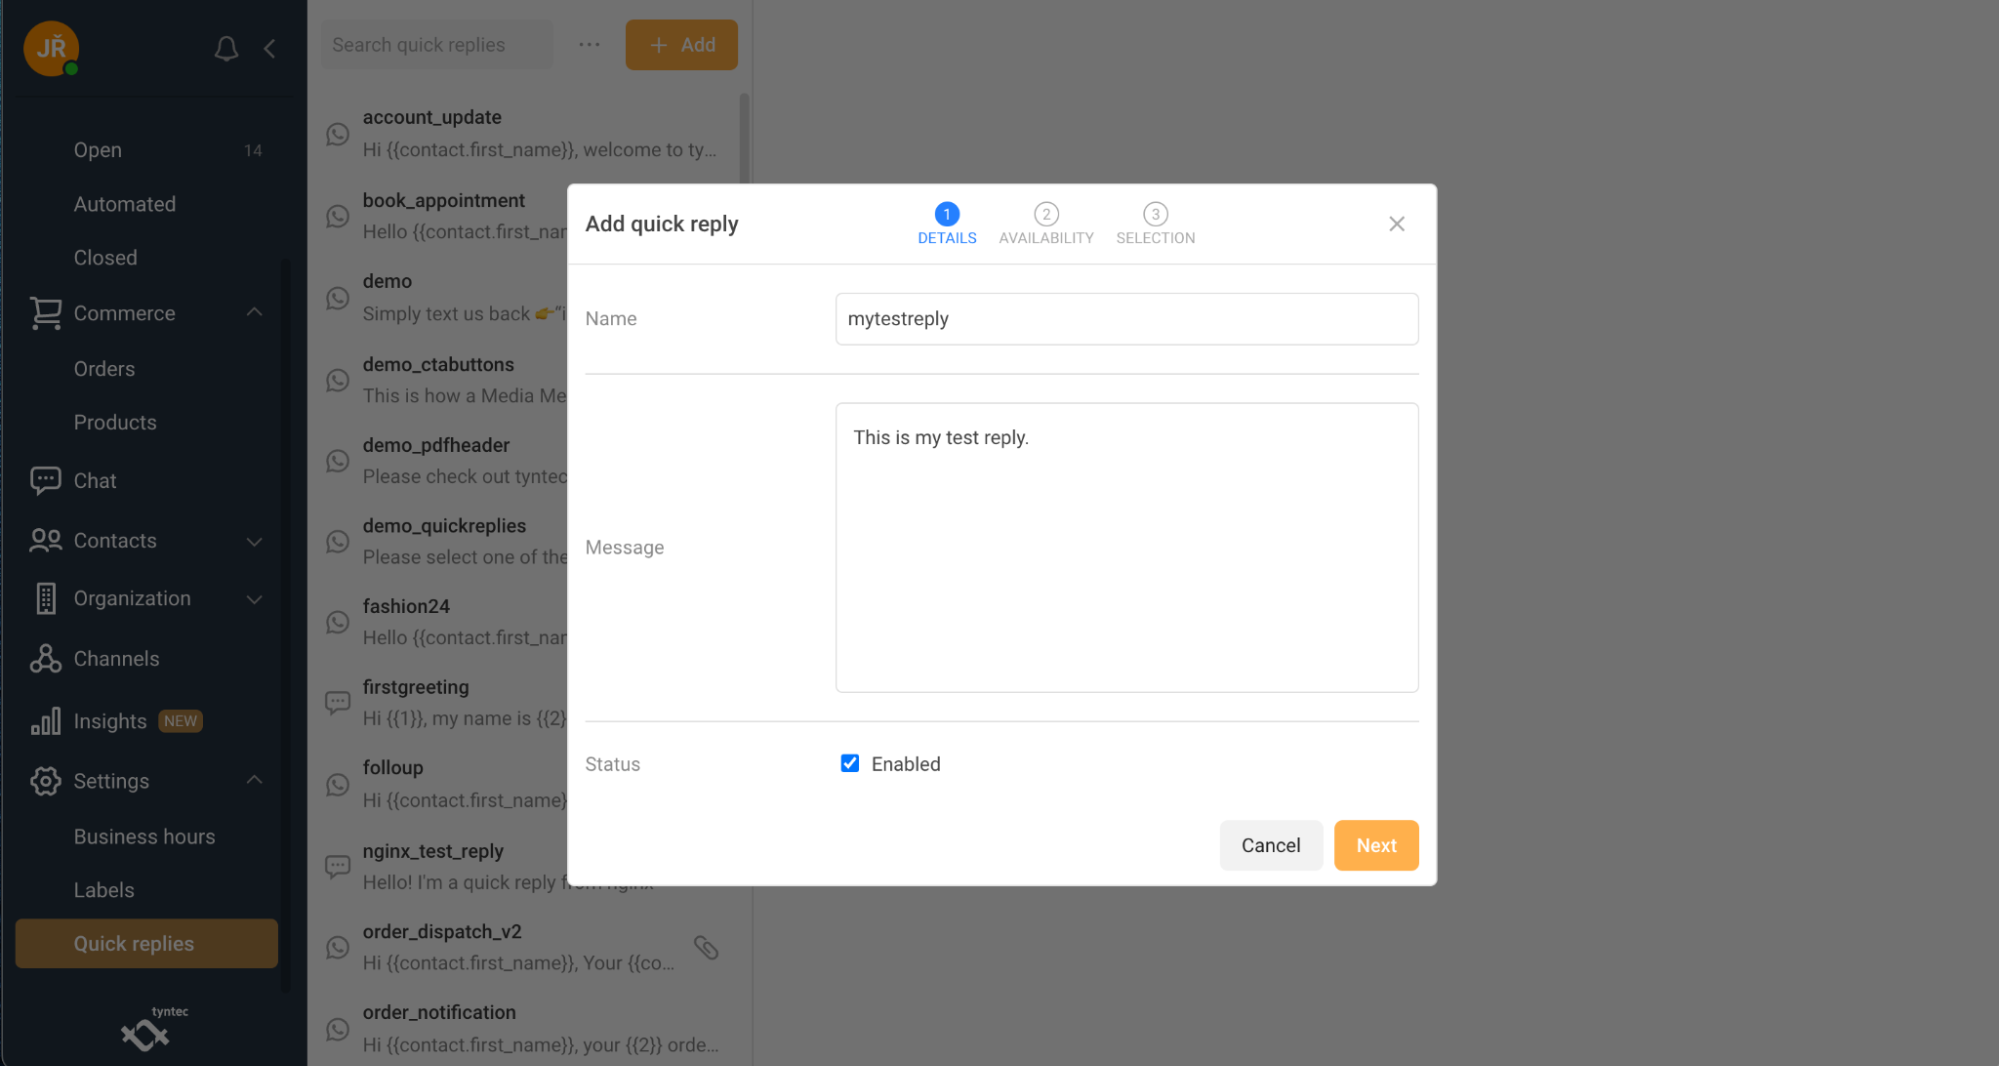
Set up your first Quick Reply
You can provide faster service by setting up Quick Replies.
1. Select Settings.
2. Click Quick replies.
3. Click Add.

4. Name your Quick Reply and fill out the Message.
5. Select status of your Quick Reply.
6. Click the Next button.
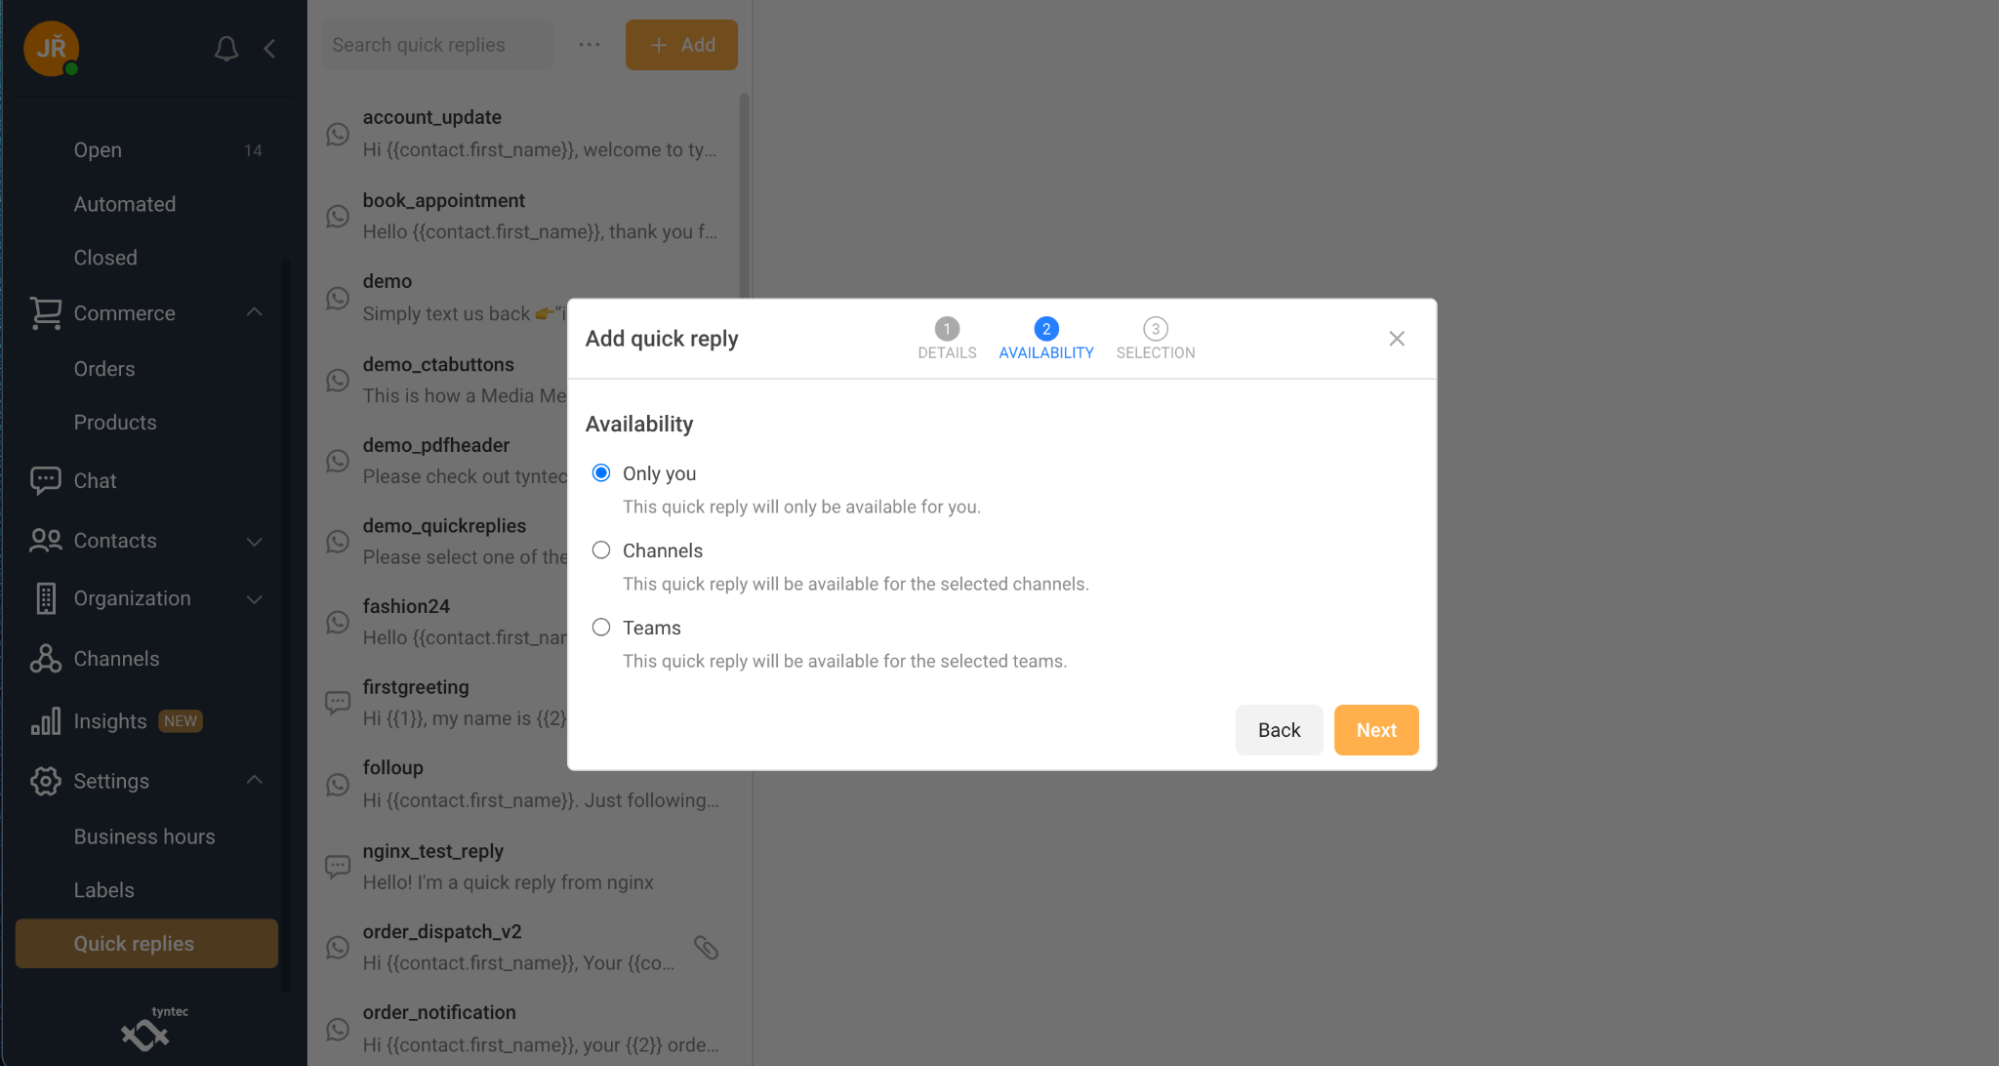
7. Select your availability preference.
8. Click the Next button.
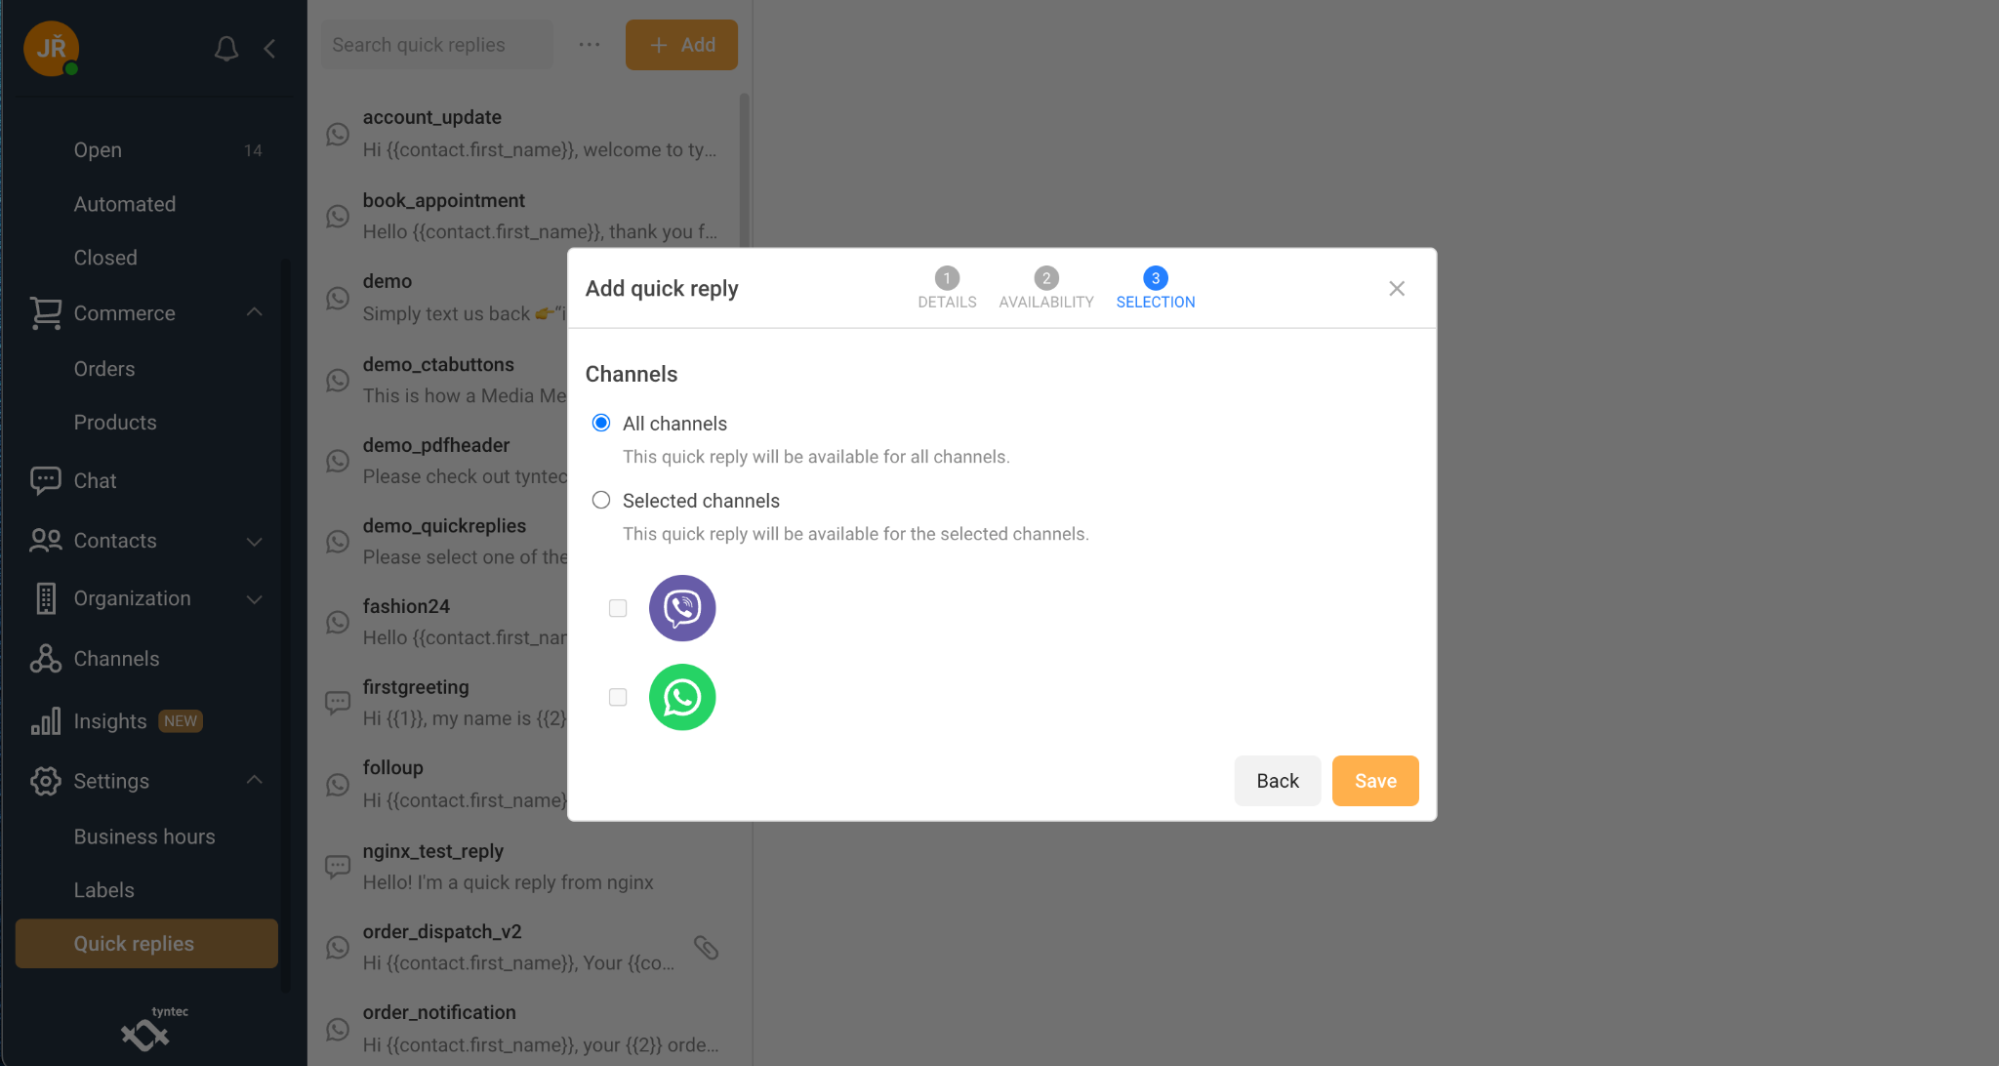
9. Select the channels you want to see your template in.
10. Click the Save button.
Now you can use your Quick Reply in Conversations.
Check out our video to see how you can use Quick Replies here.
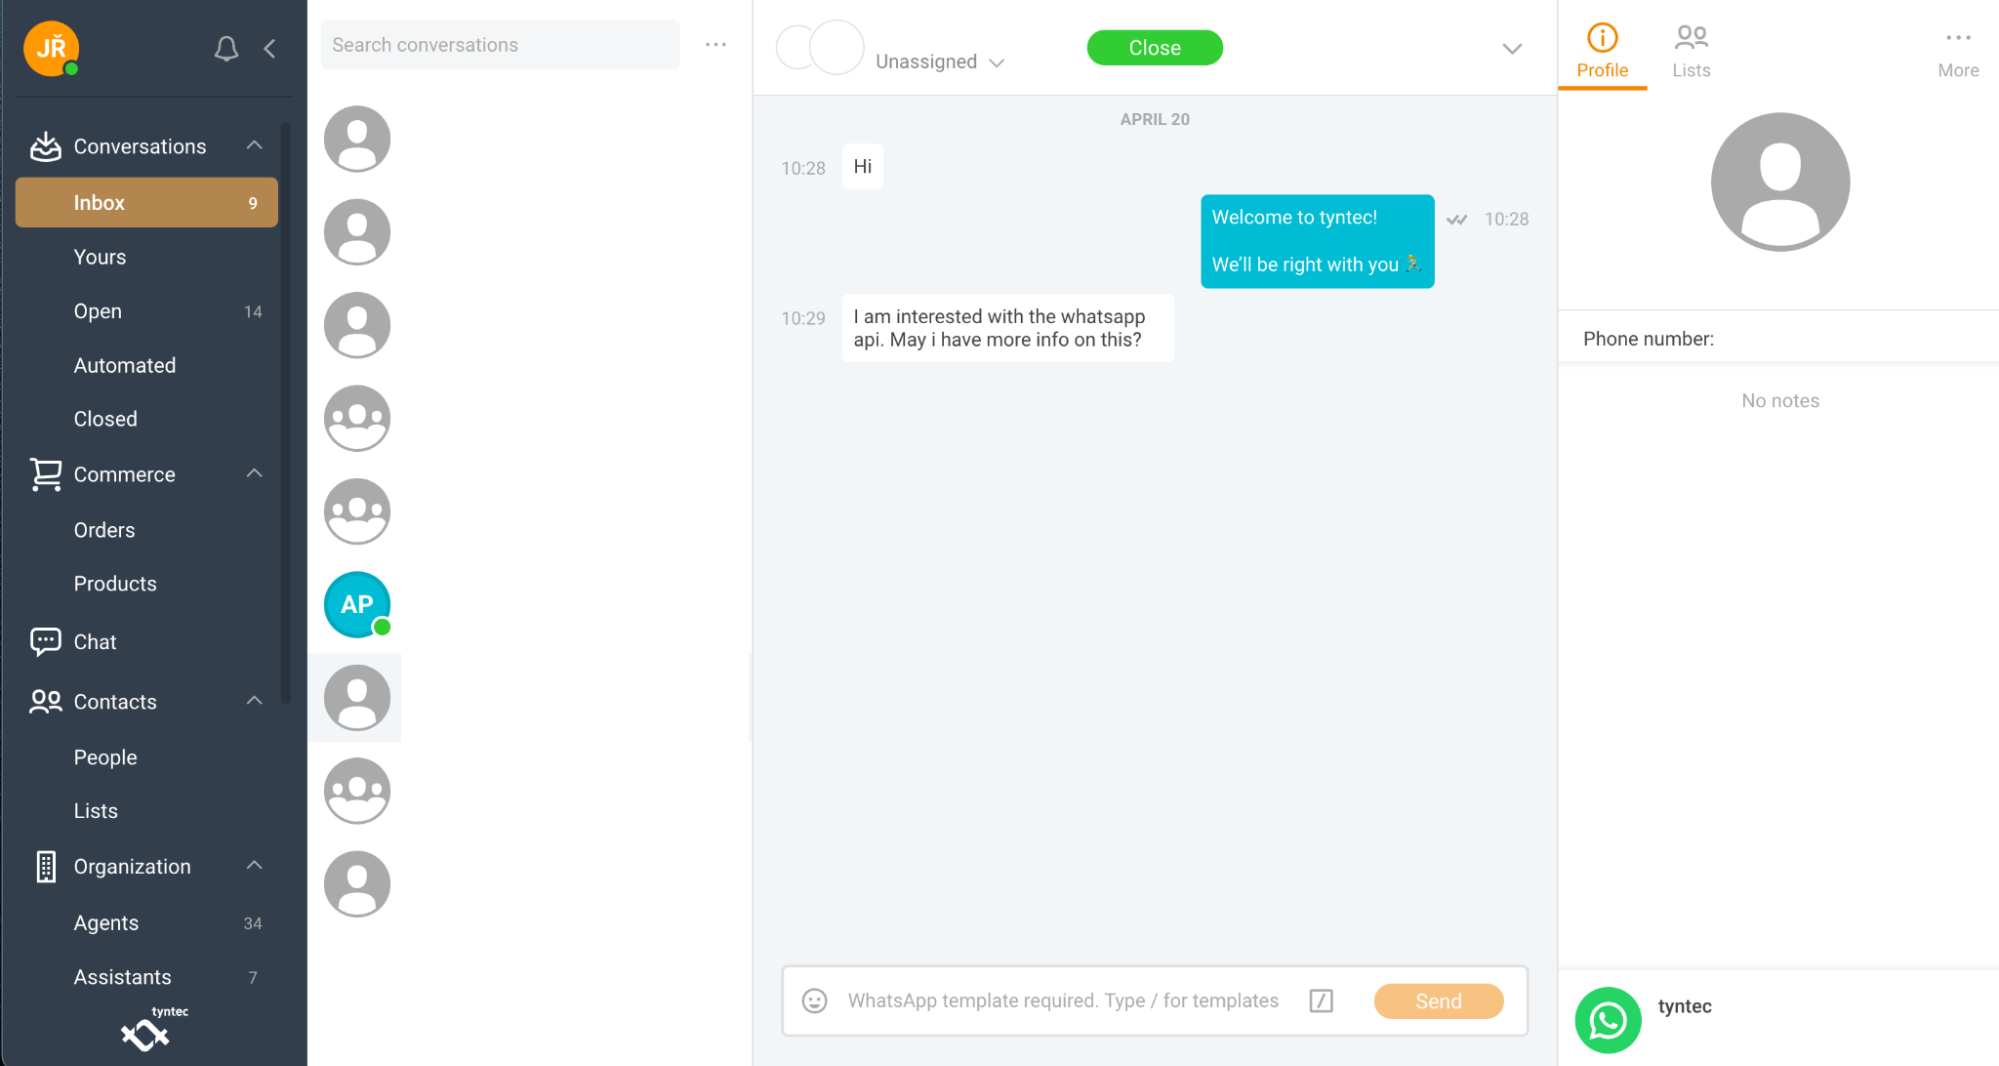
Using Conversations
In Conversations you can find all conversations you had with your customers via all the channels you have connected to your account. The Conversations Inbox allows you to initiate a conversation with your customers or reply to customer-initiated messages.
We divide the Conversations into 5 categories:
Inbox
All new conversations land in your ‘Inbox’, which is visible to all your support agents. An agent just needs to pick a conversation and reply to it.
Yours
Conversations that are specifically assigned to you will be shown in Yours, until you close the conversation.
Open
Any agent can access all messages in Open to check which conversations are currently active. This enables collaboration among agents as they can quickly pick the conversations to handle from Open conversations.
Automated
All ongoing conversations between your chatbot(s) and customers will be shown here. An agent can always check to see if an intervention by the agent is required.
Closed
Here you will find all conversations that were closed either by one of your support agents or automatically closed by your chatbot.
TIP: After selecting a conversation, you can directly answer the customer, add templates, save contacts and much more.
Using Commerce
In Commerce you can find everything about your products and orders.
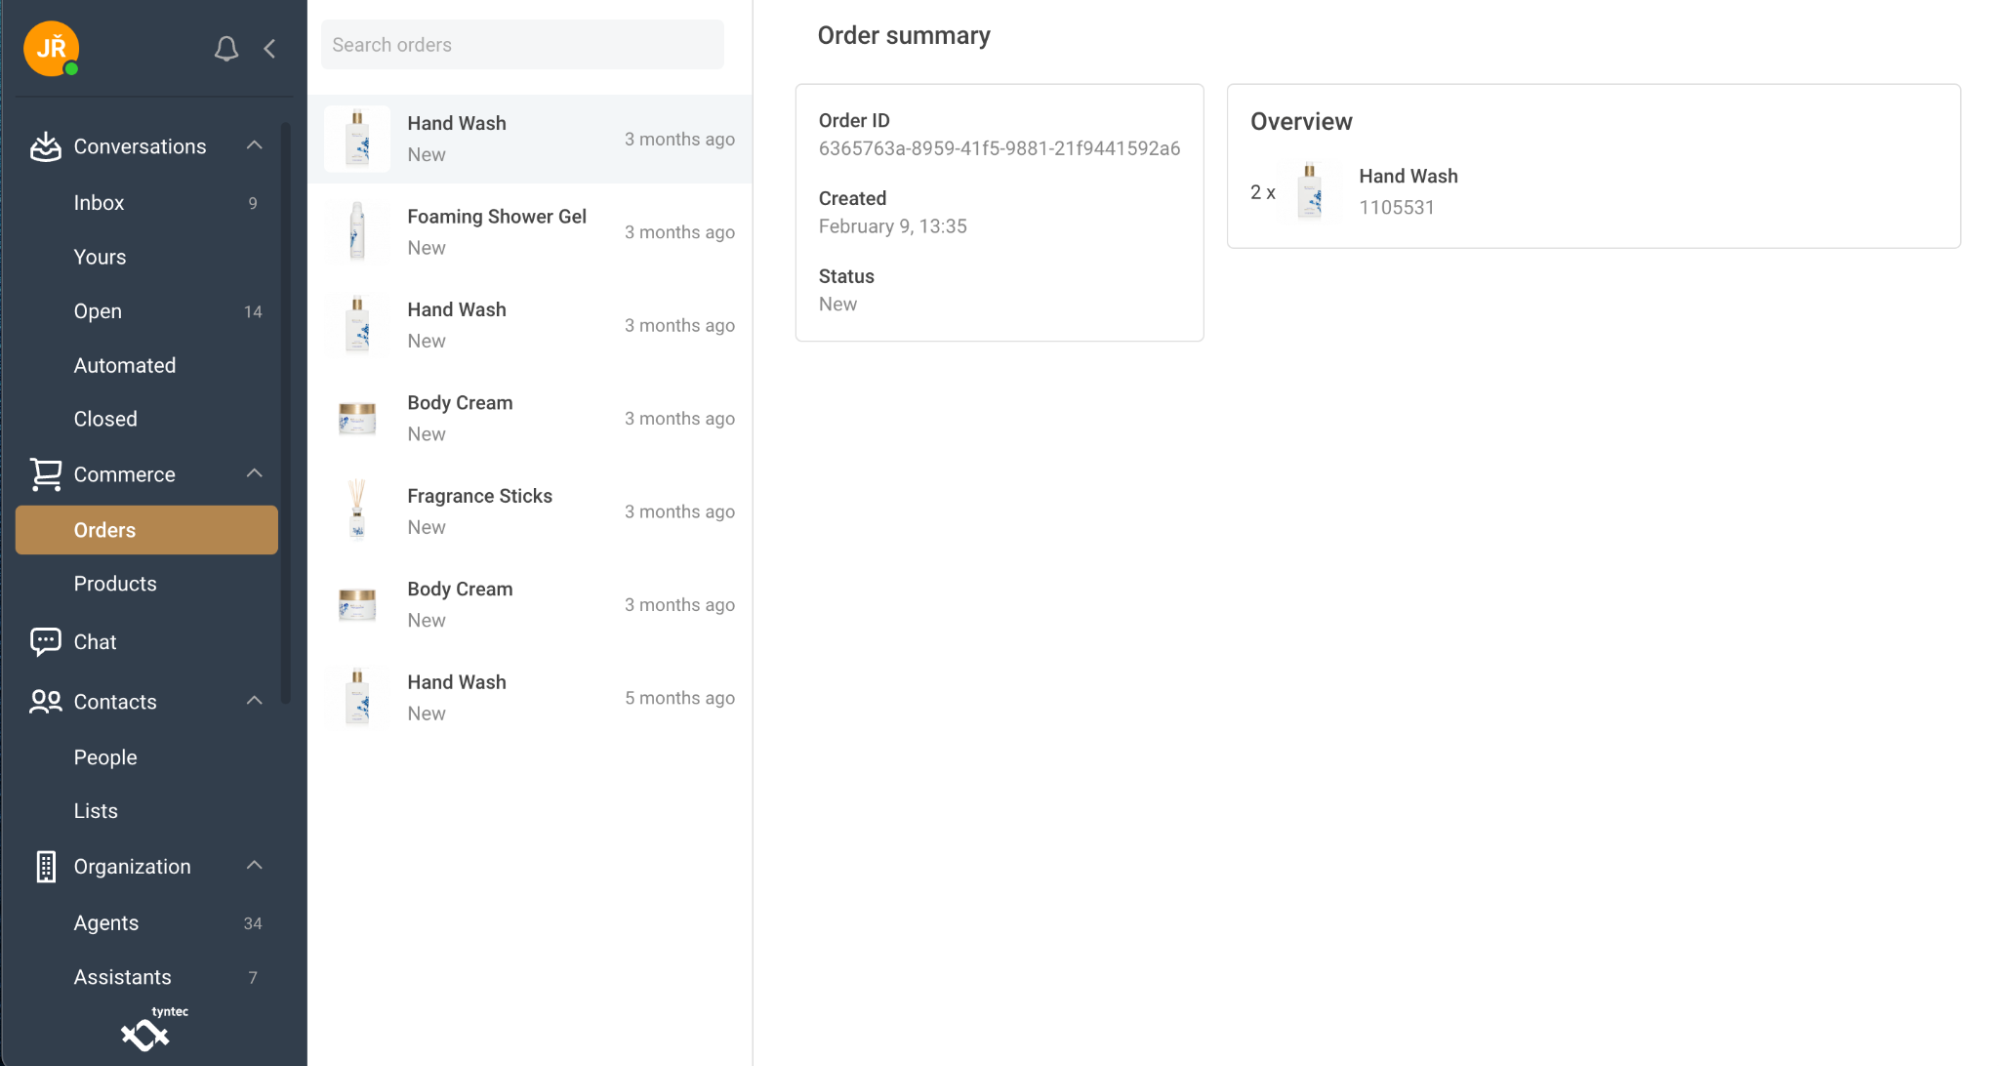
Orders
You will see all your orders that have come to you using your linked accounts here.
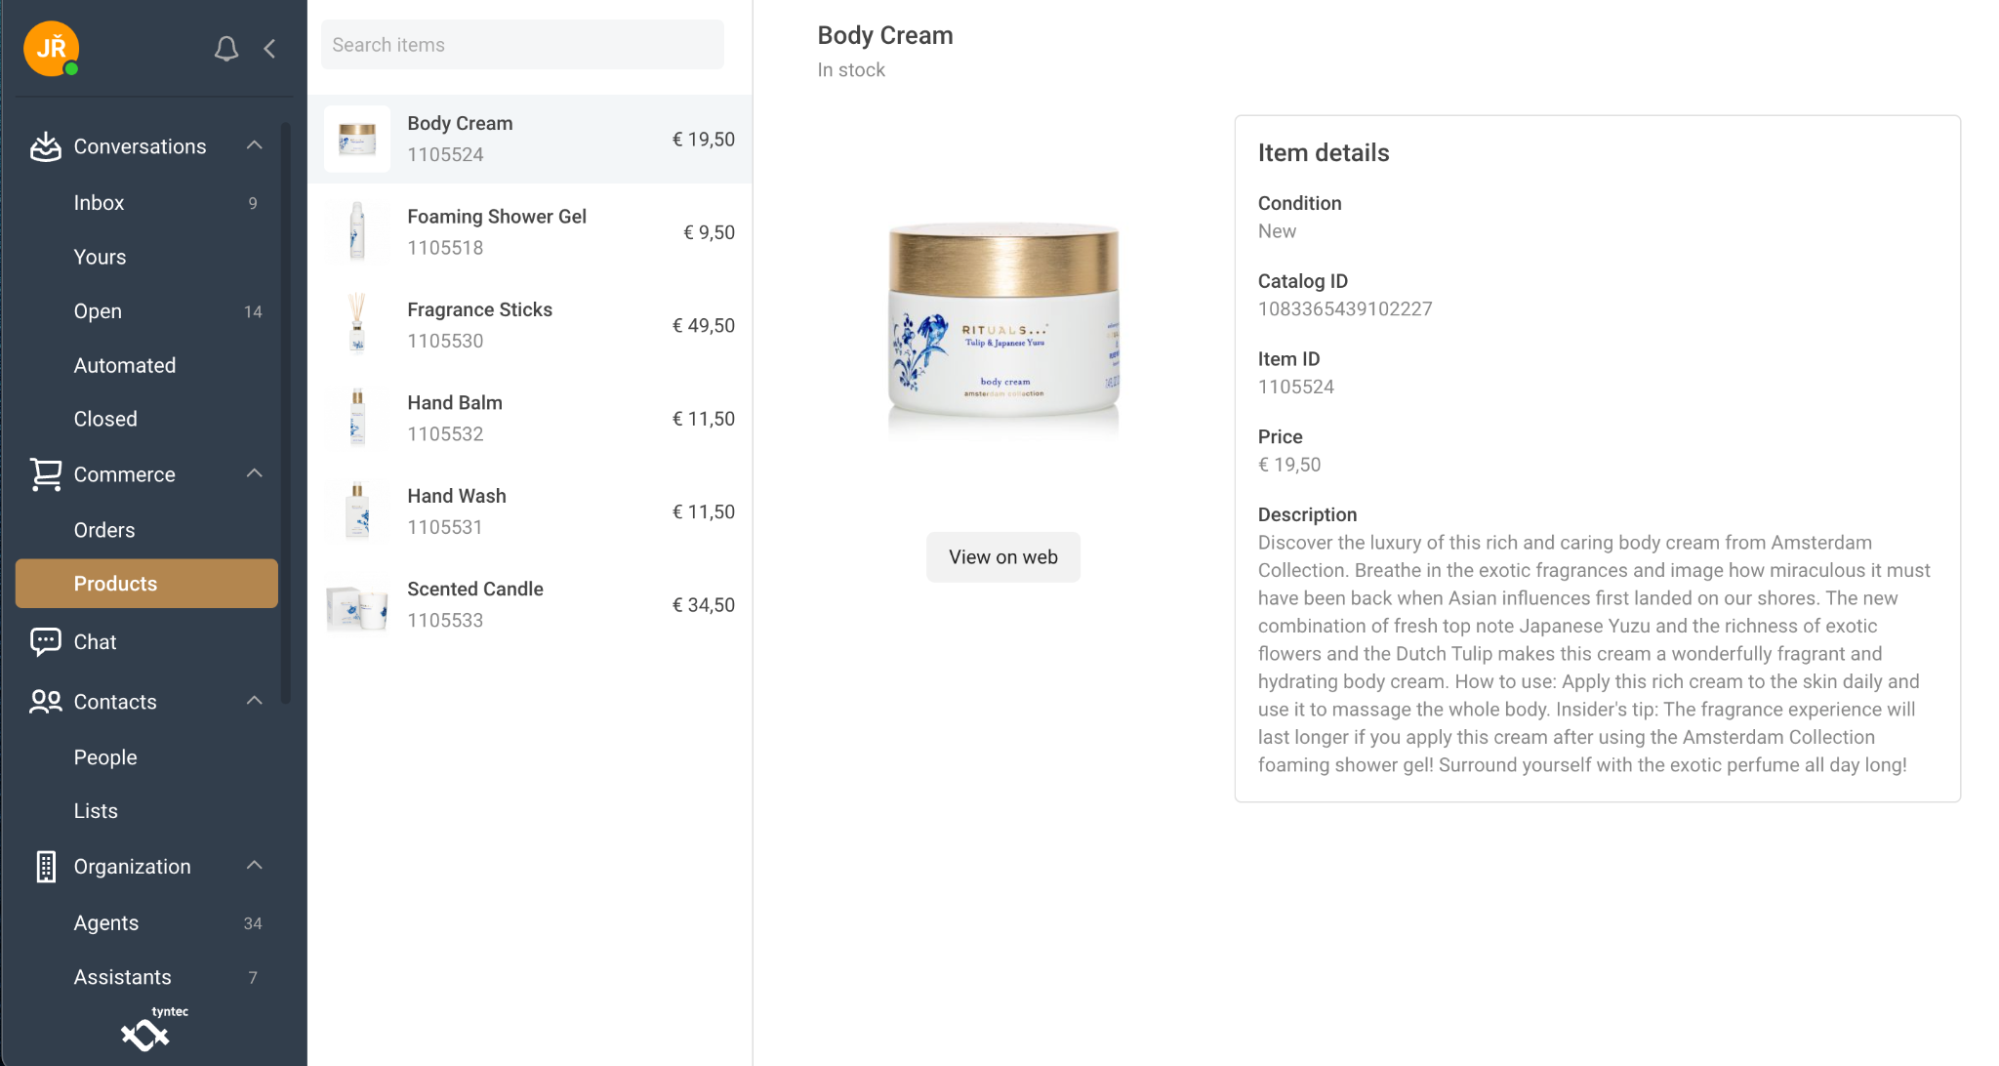
Products
You can see all the products you currently display on your linked channels here. Click the product you want to see more information on.
For each product, you can see its parameters such as unique ID, price, description, and other information.
Using Chat
In chat you can chat with any fellow agent in your organization, as well as with an entire team.
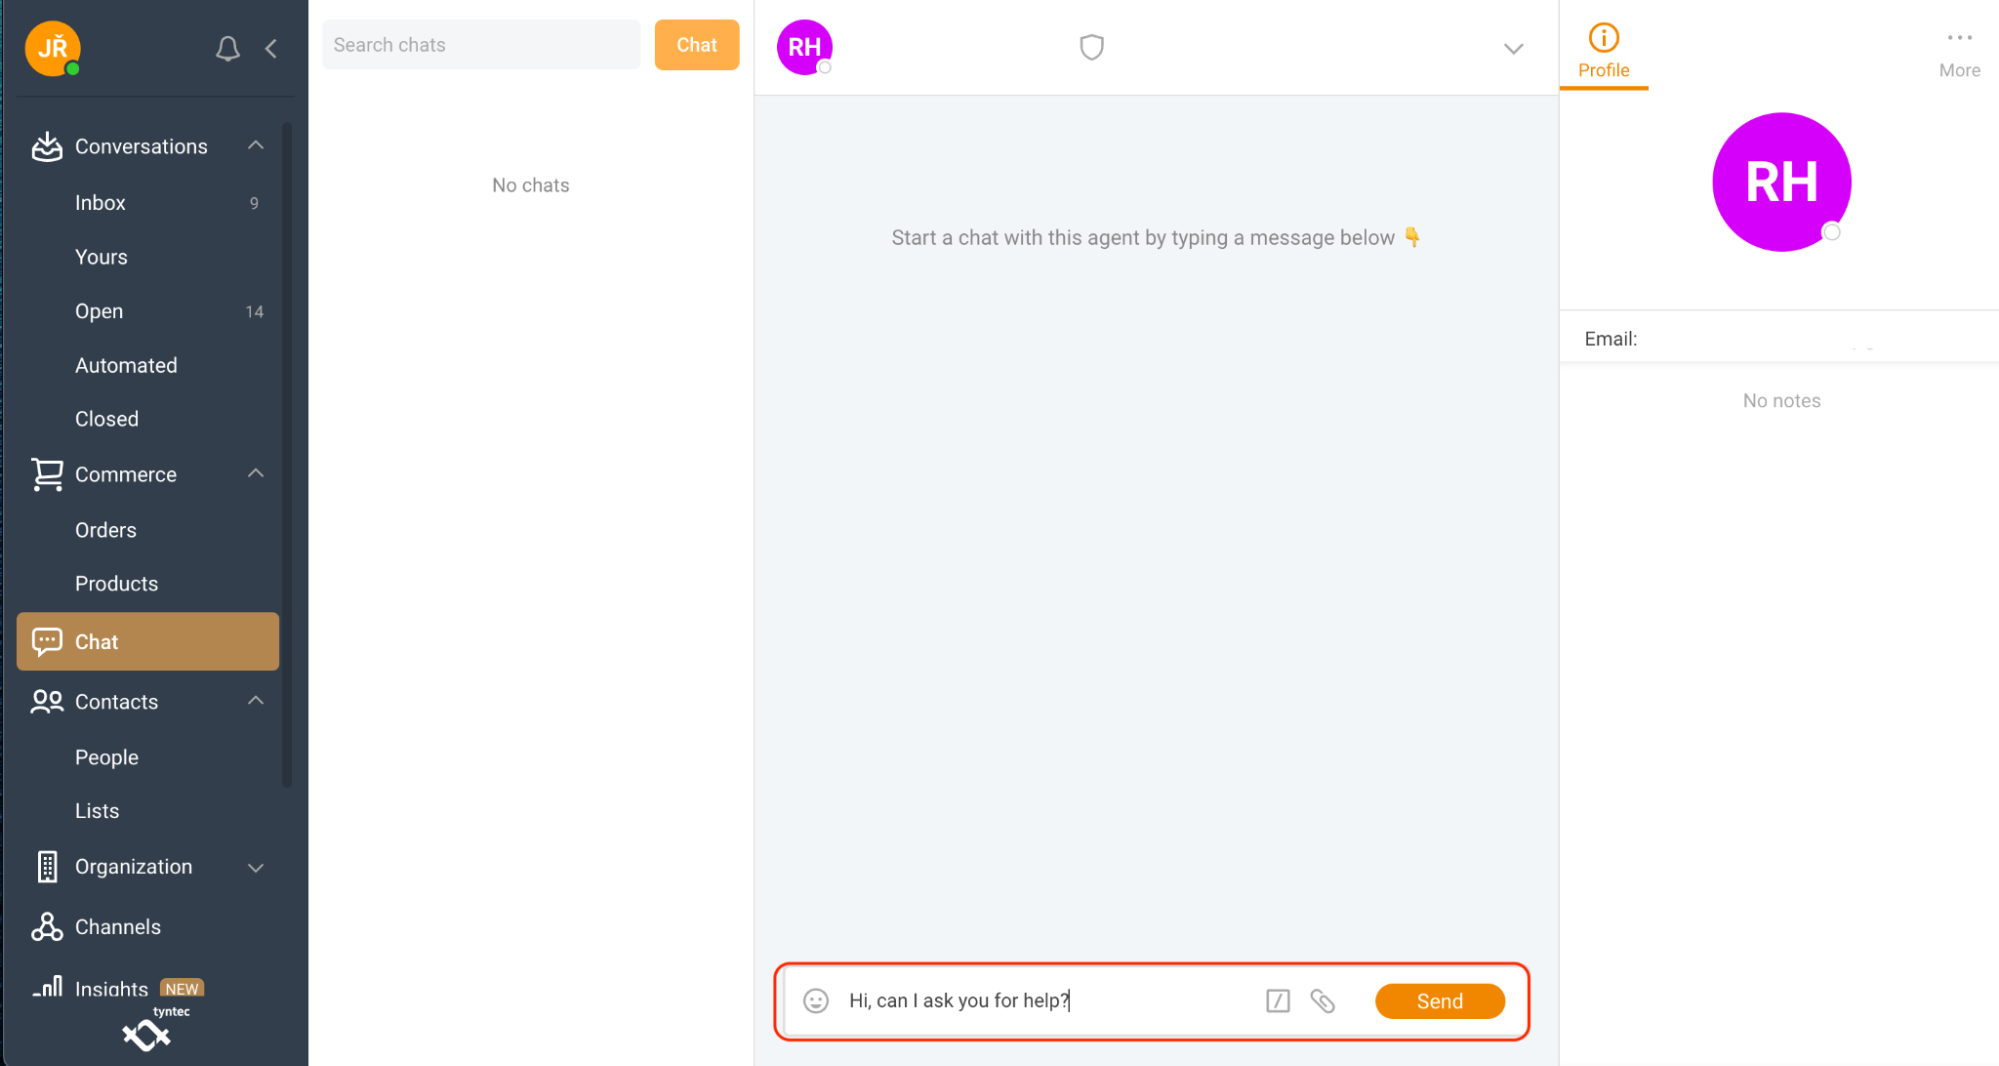
Chat with your fellow agent
1. Select the Chat tab.
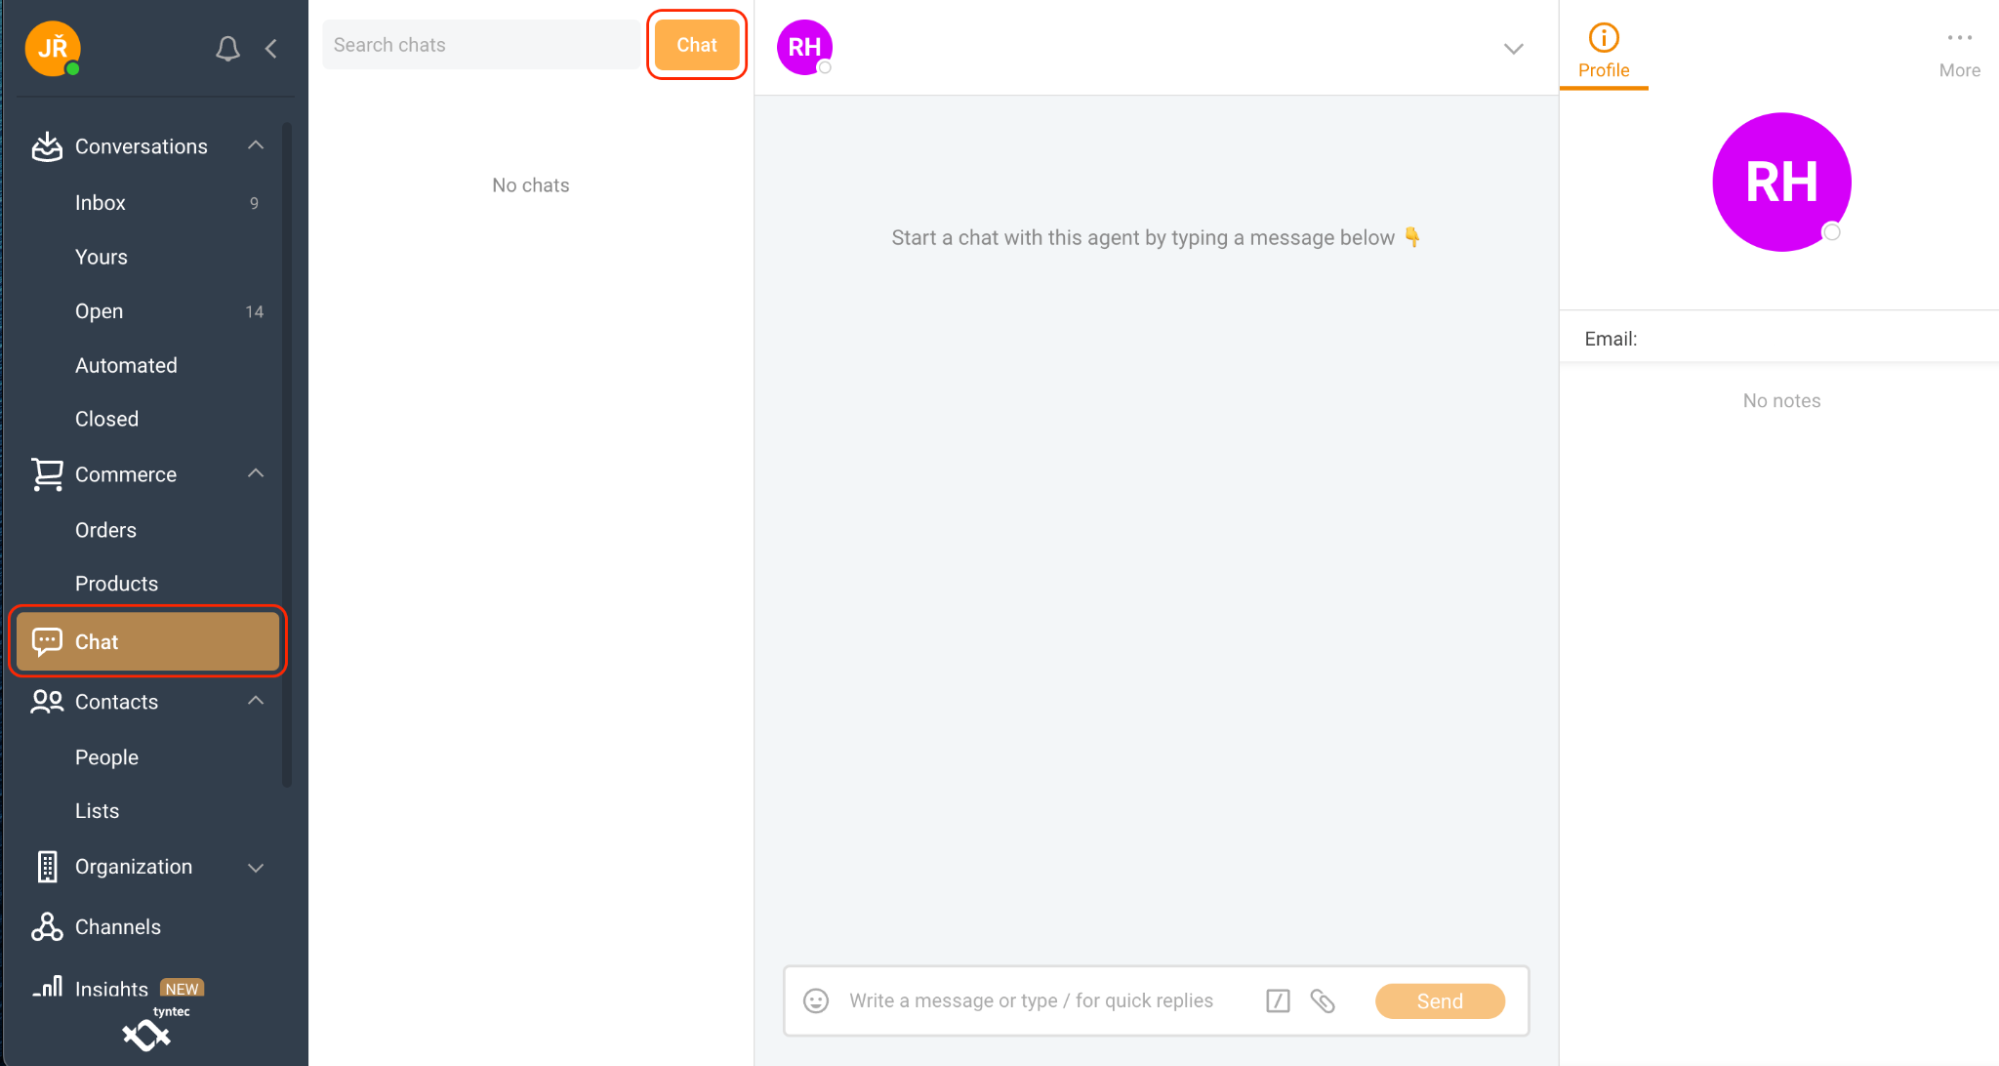
2. Click Chat..
3. Select the Agents tab.
4. Select the agent you want to chat with.
TIP: You can use a text filter (Search chats) to find agents.
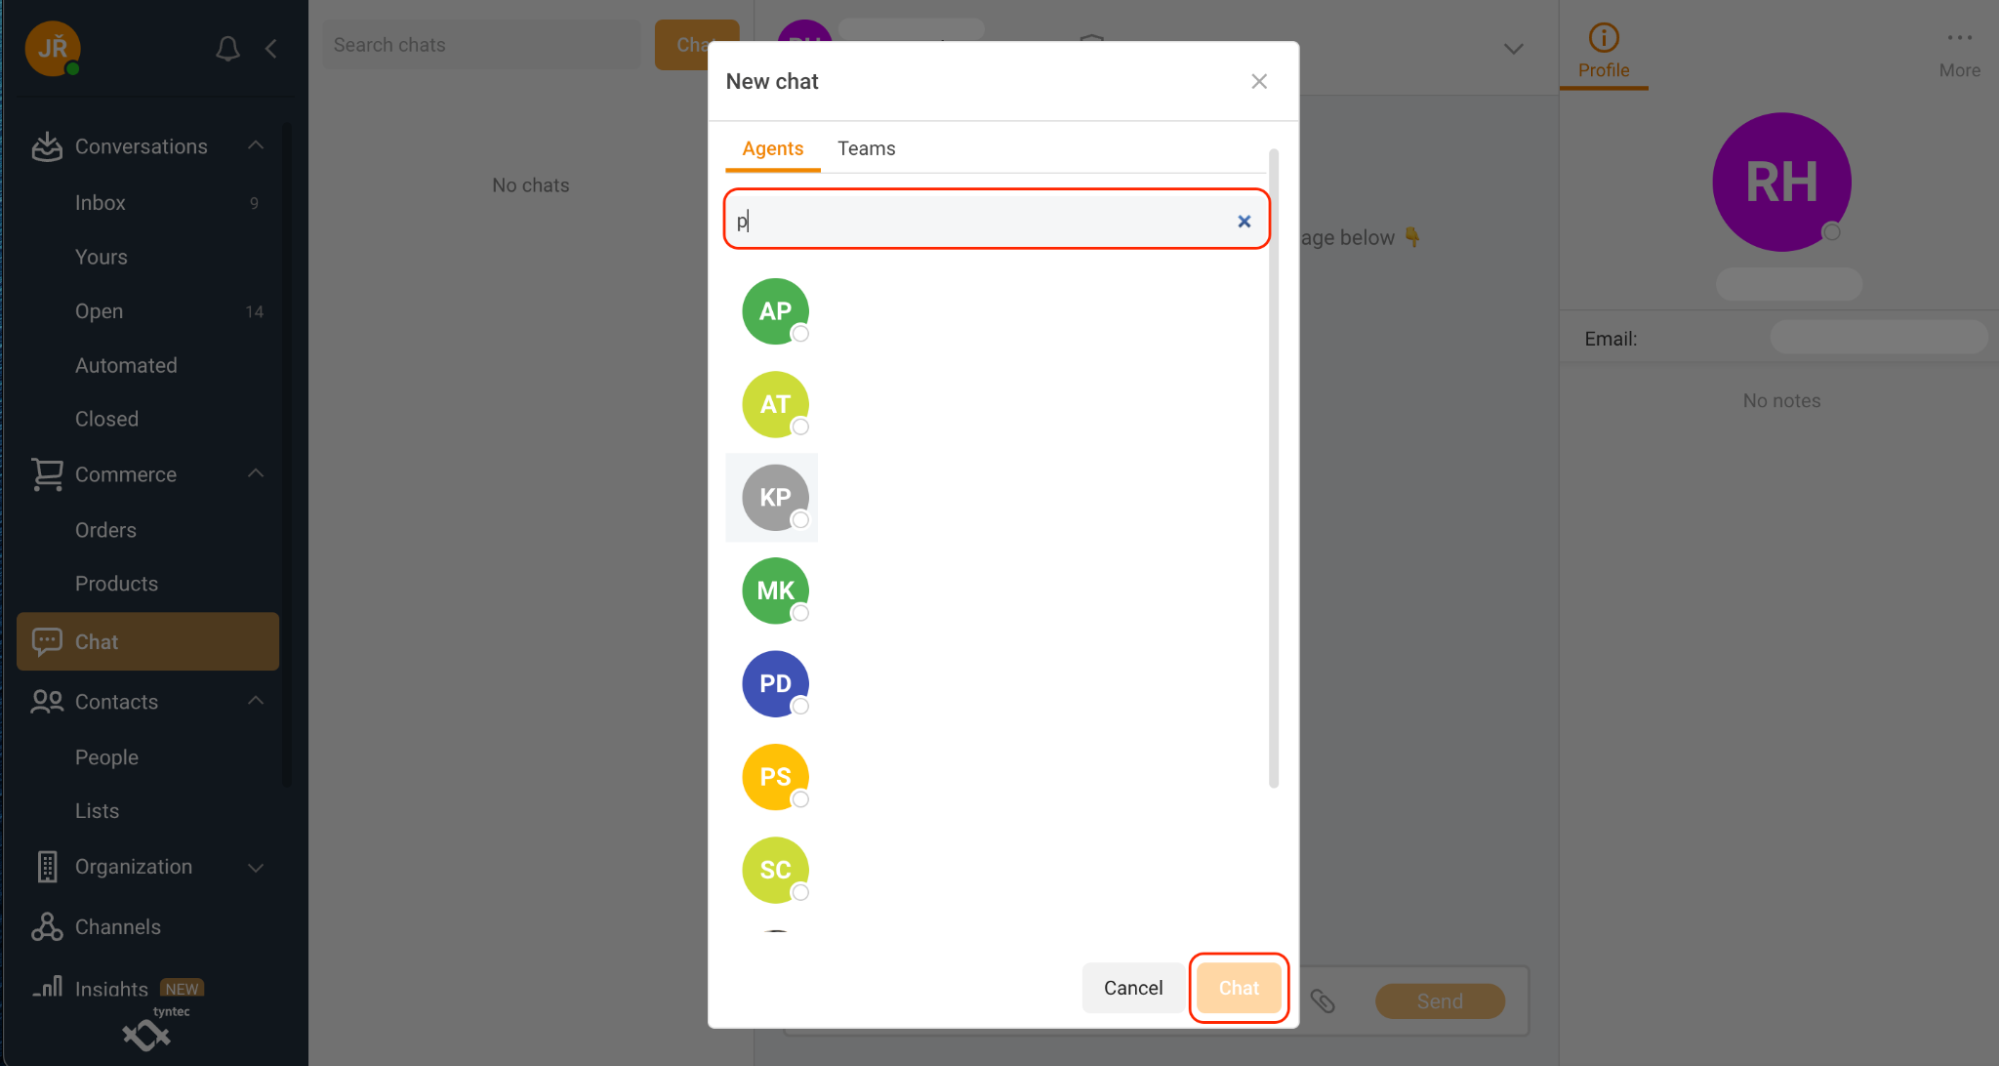
5. You can now start chatting with your selected agent.
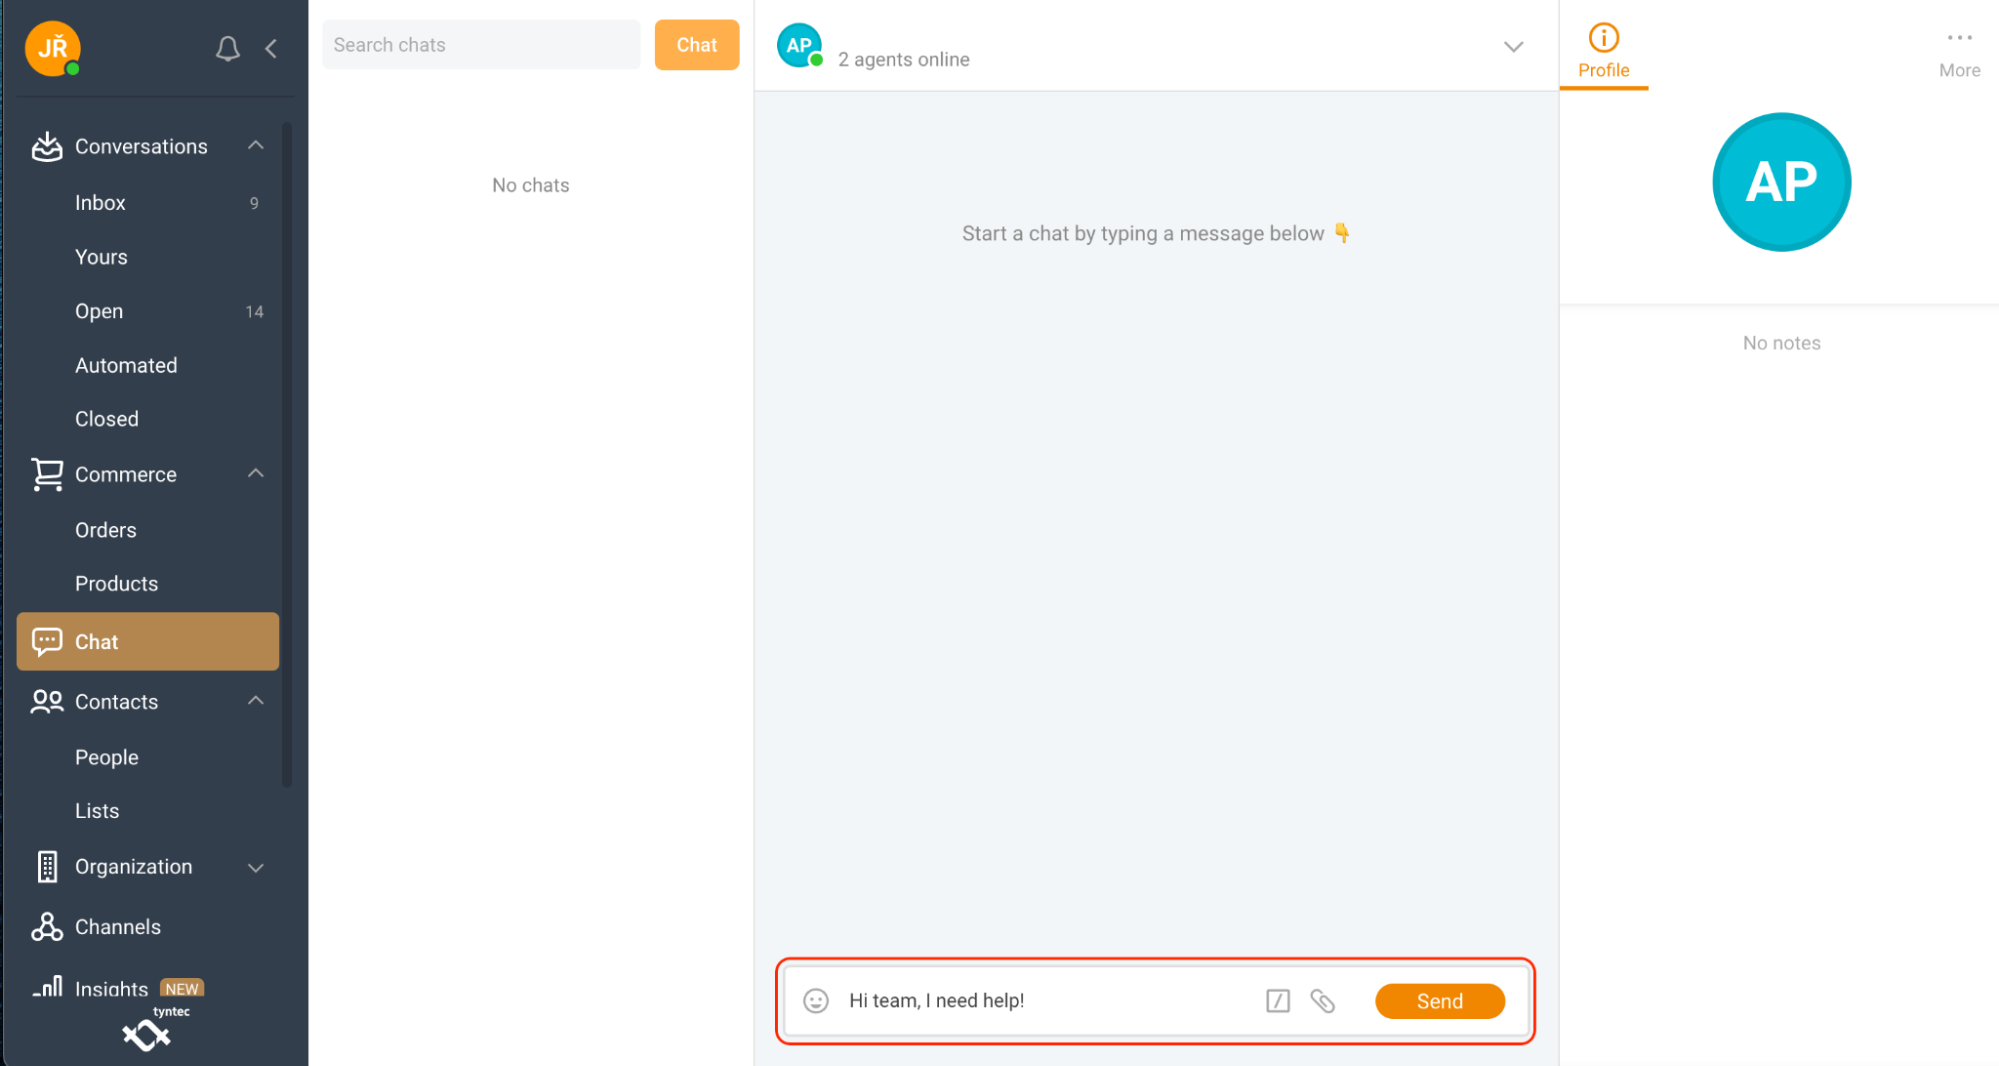
Chat with a team
1. Select the Chat tab.
2. Click Chat.
3. Select the Teams tab.
4. Select the team you want to chat with.
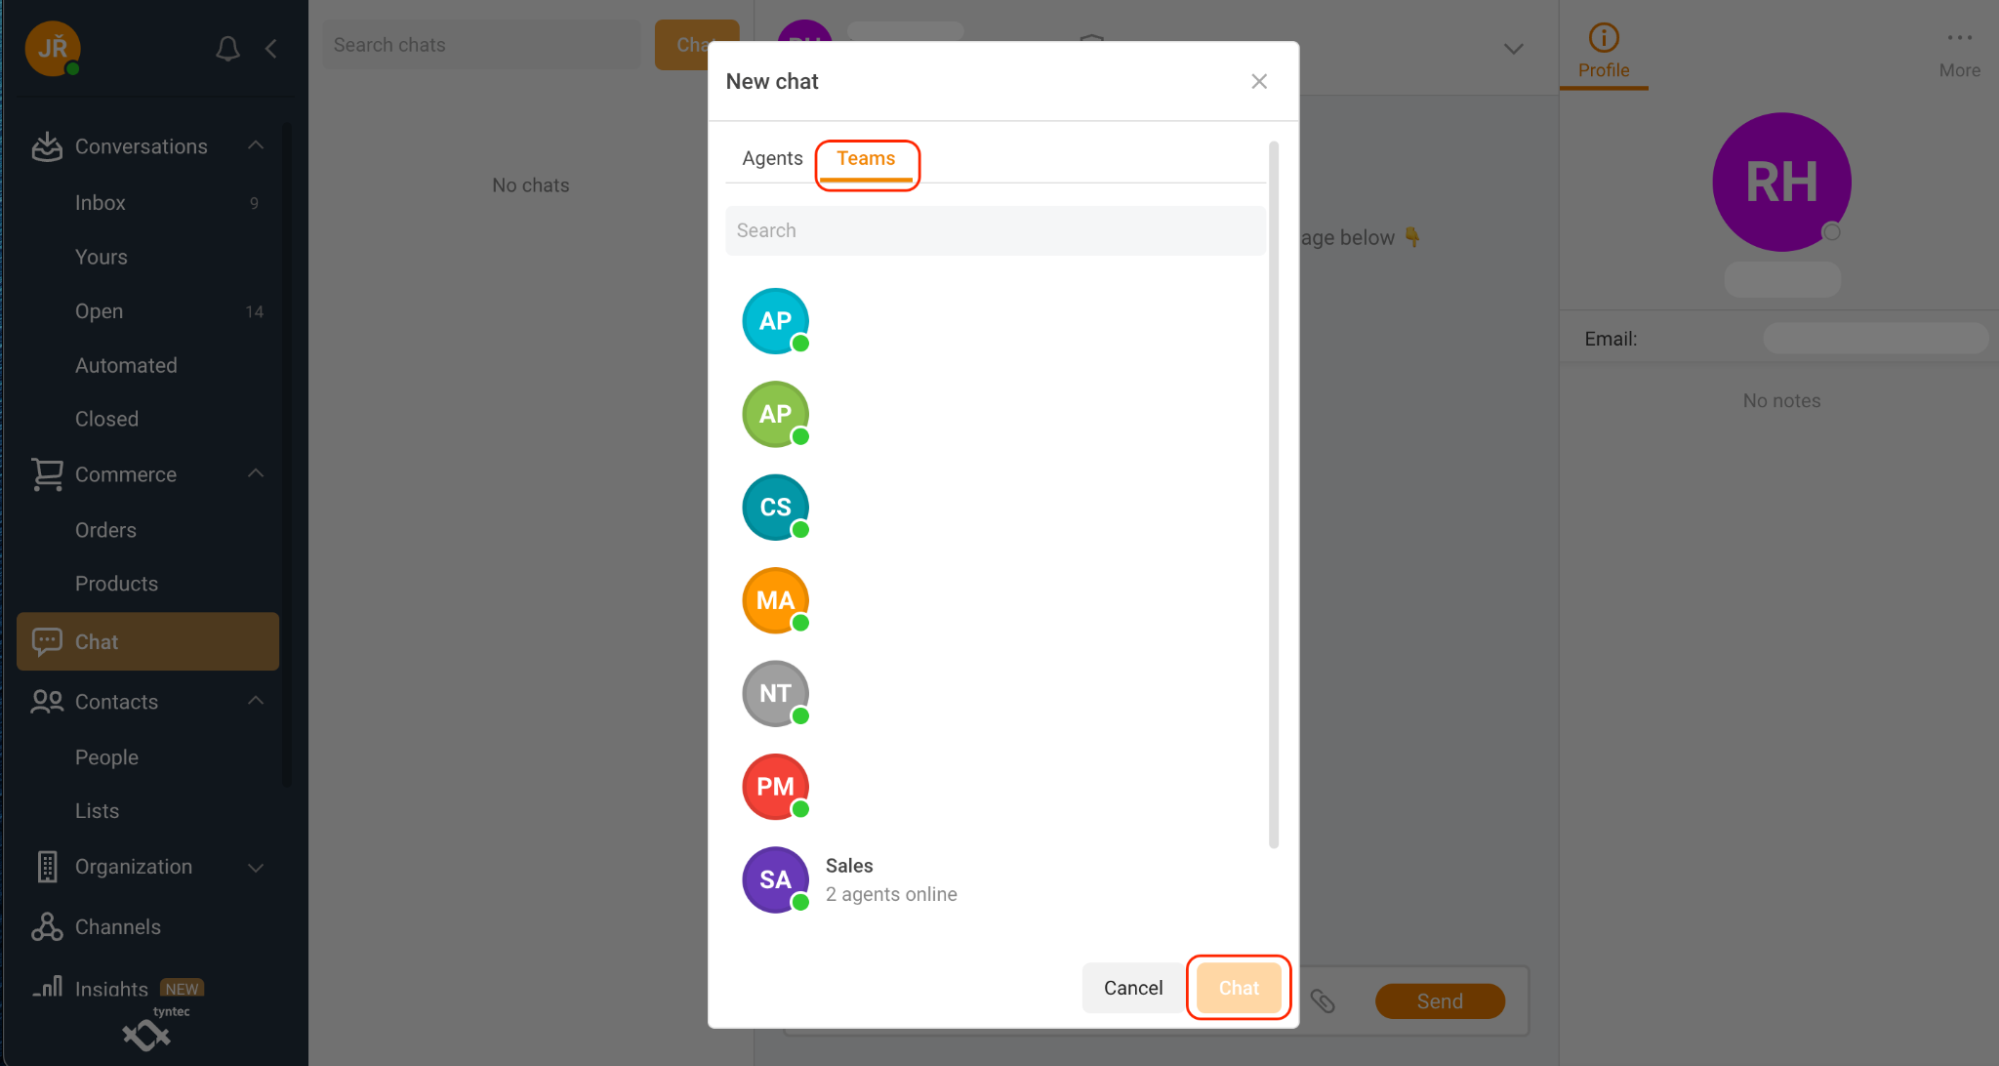
5. You can now start chatting with your team.
Popular features in Conversations and Chat
Within Conversations and Chat you can use these powerful features:
Emojis
Conversations Inbox can also send emojis to personalize conversations between your support team and customers. Click the emoji on the left of the input field to open the emoji menu. Select an emoji and complete your message.
Attachments
Depending on the channel you use, you can also send attachments, like recorded audio messages, PDFs, and more. Just select the ‘paper-clip’ icon inside the input field to upload a file.
Quick Replies
You can select a previously created Quick Reply [anchor to quick replies topic] to respond in a conversation. Select the Quick Reply icon or type a backslash ‘/’ to open the quick reply menu. Select the Quick Reply you want to send.
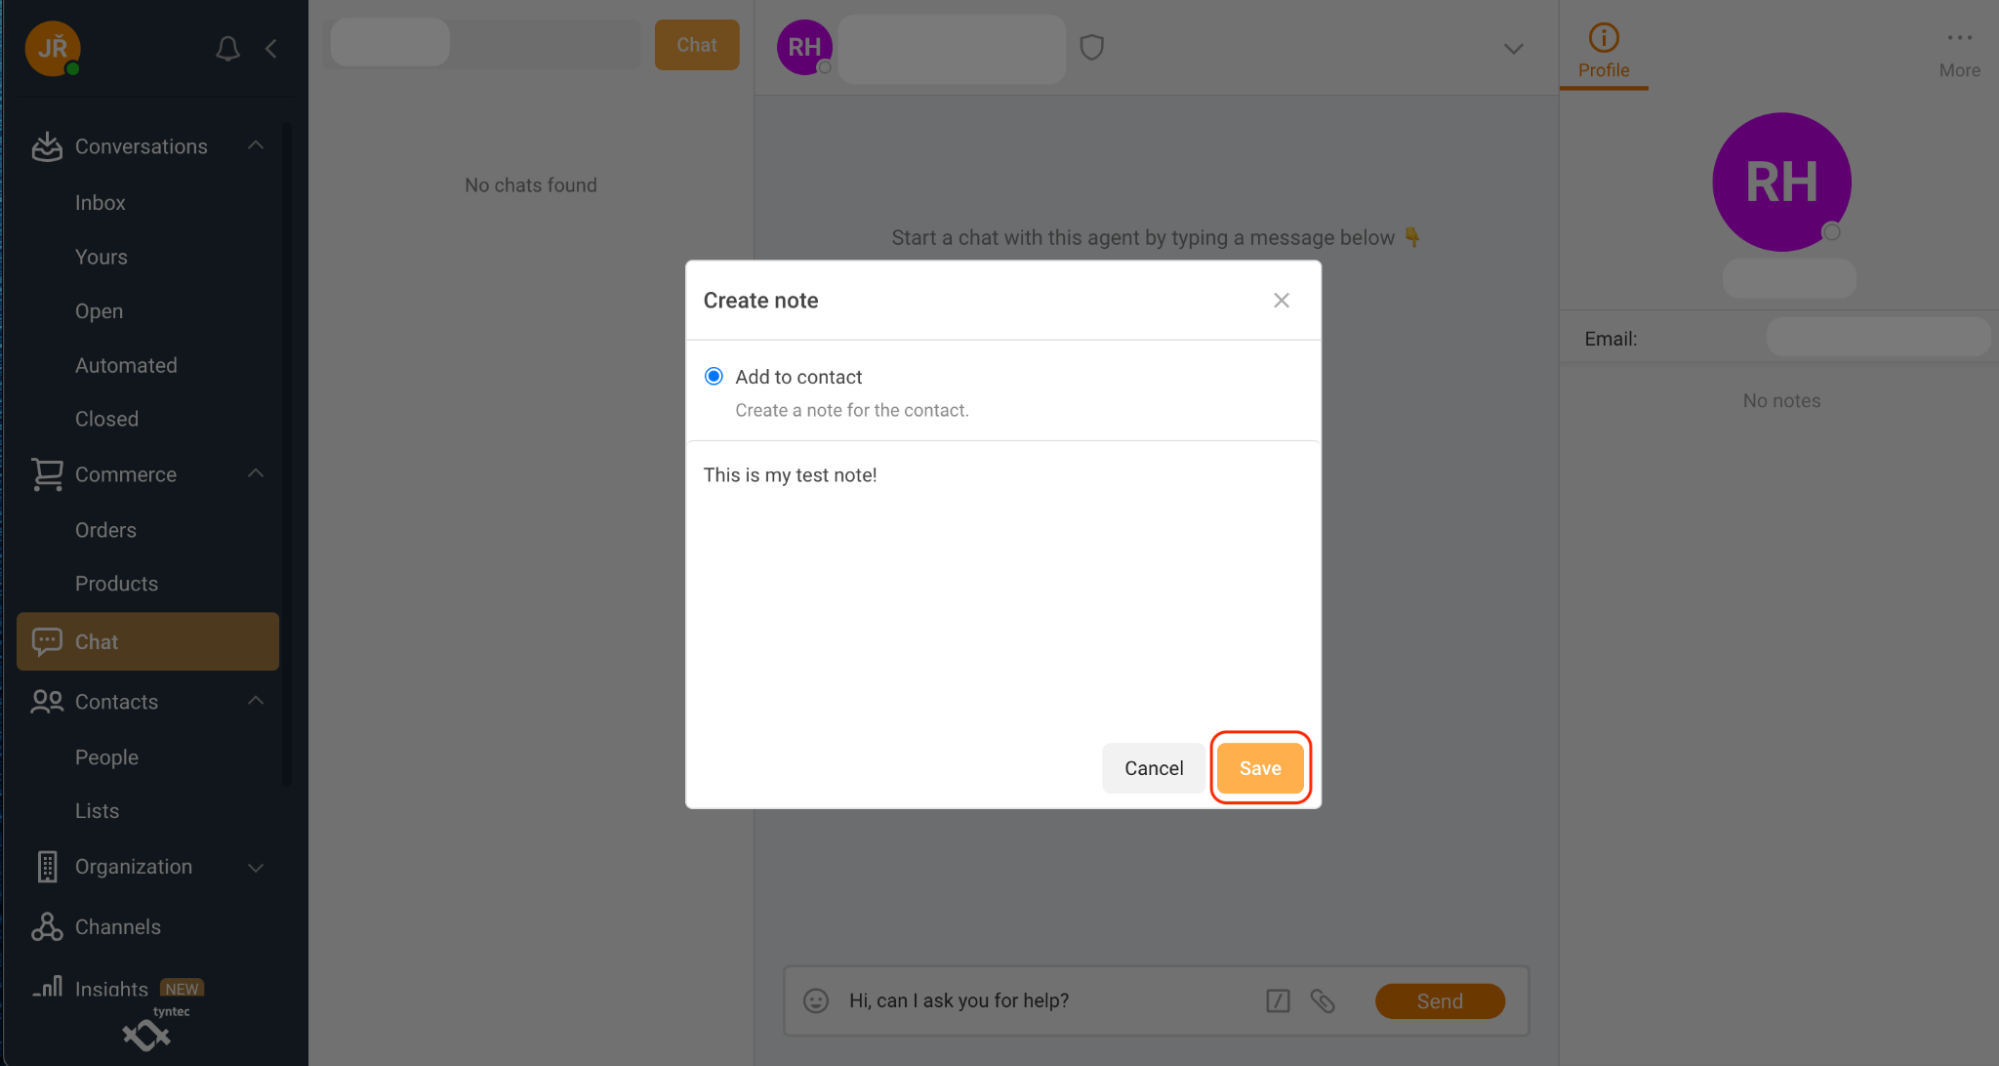
Profile Notes
You can also create your own notes for a contact. Chat notes will improve the efficiency of your work by having your notes always connected to the specific agent or team you select.
1.Click More on the top right corner of the window.
2. Click Create note.
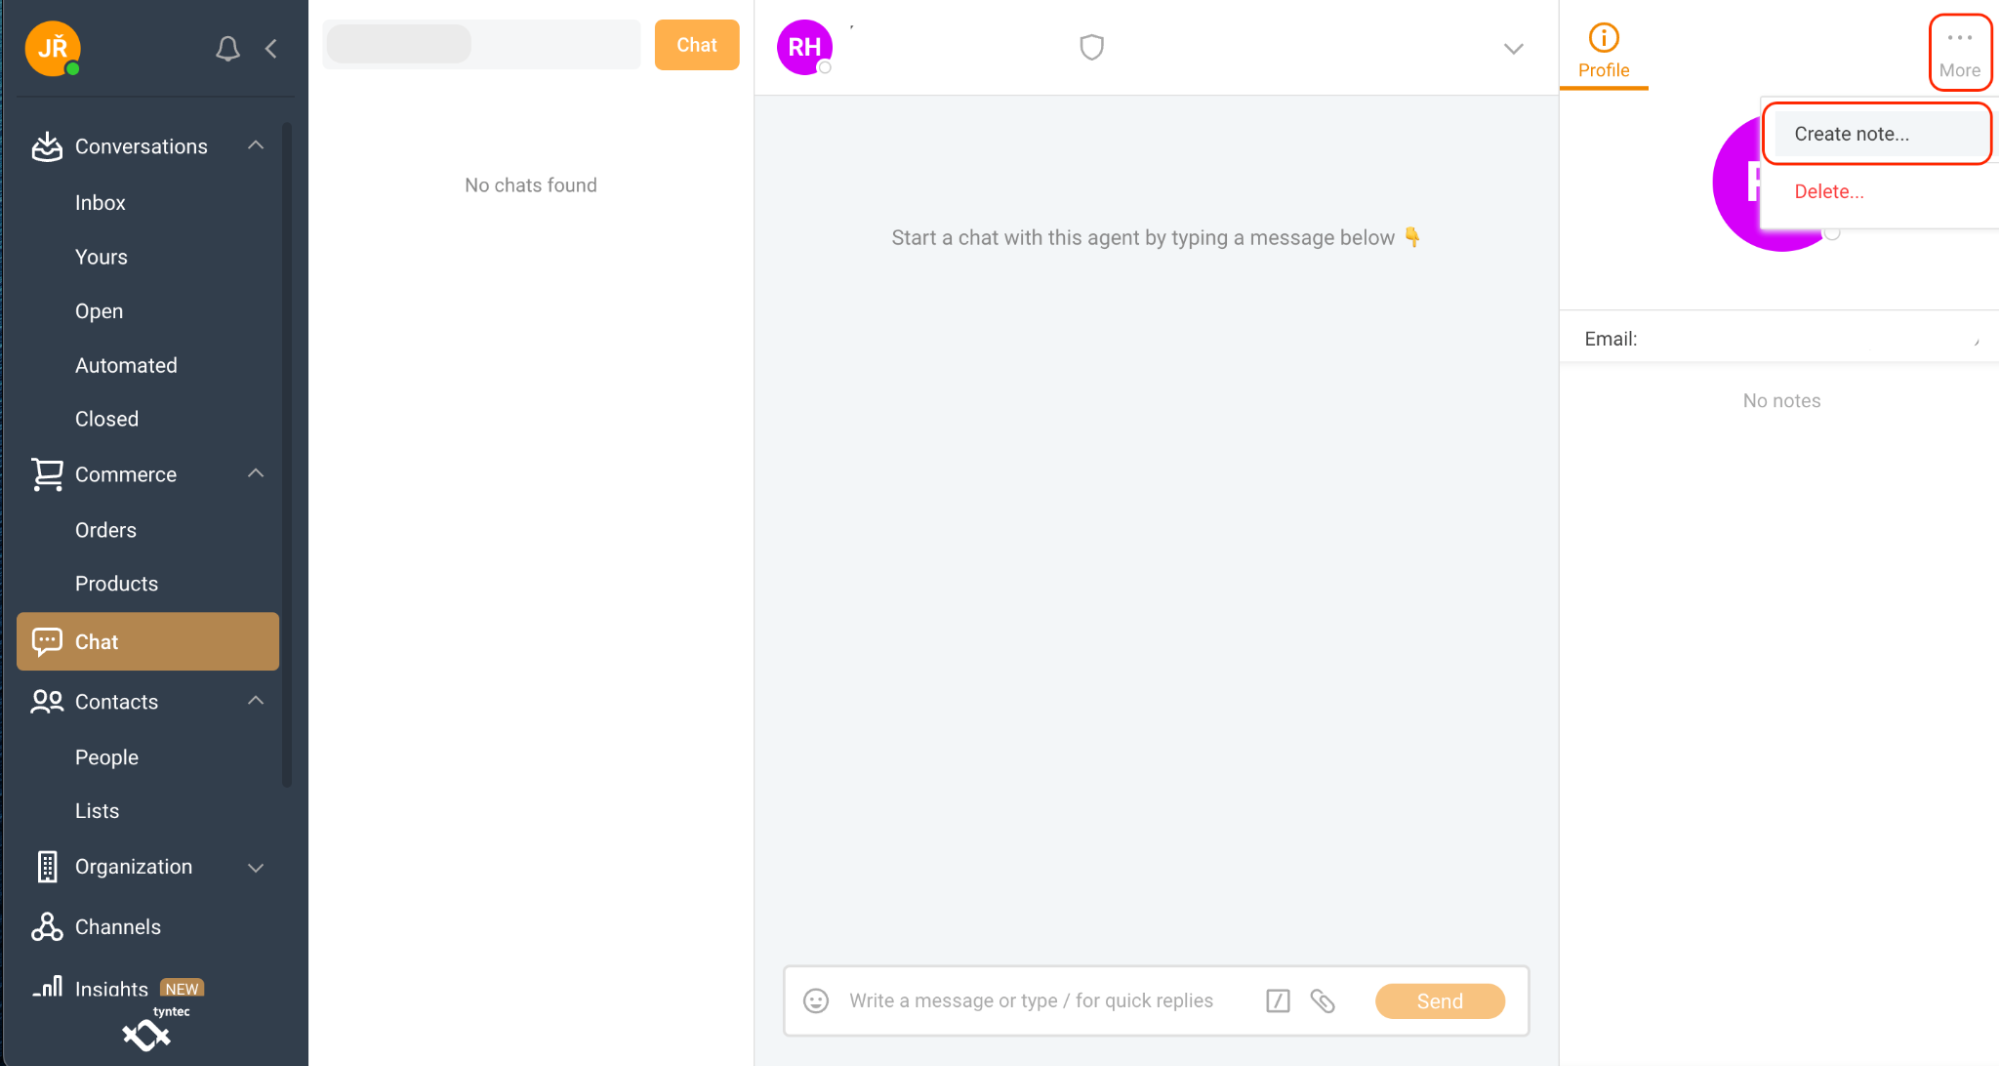
3. Fill the form with your note.
4. Click Save.
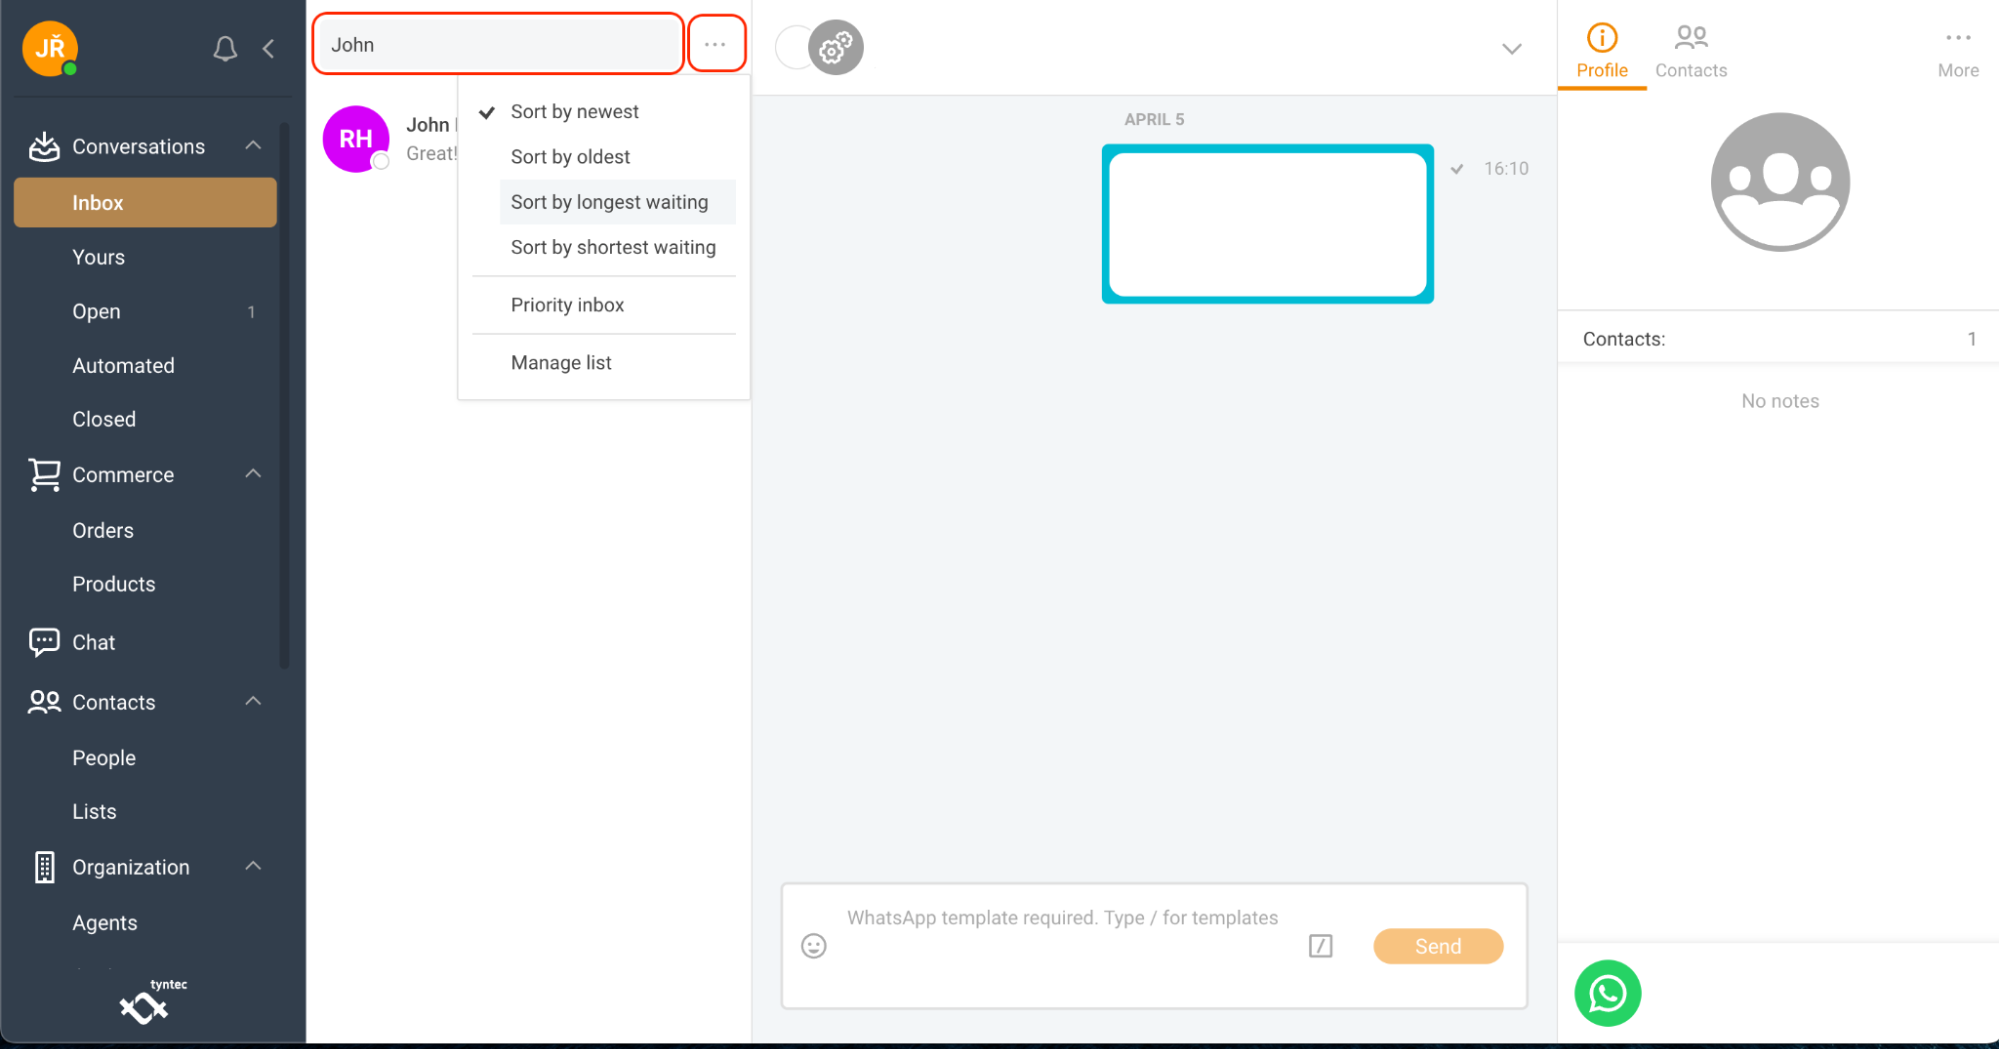
Search
Use Search conversations to find your contacts and conversations. Simply type in what you are looking for and you will get results immediately. This is very useful if you have many conversations and contacts.You can find the text filter (Search conversations) above the conversations list.
You can also use various sorts (e.g.sort by longest waiting) by clicking the three-dot button that’s next to the search text filter.
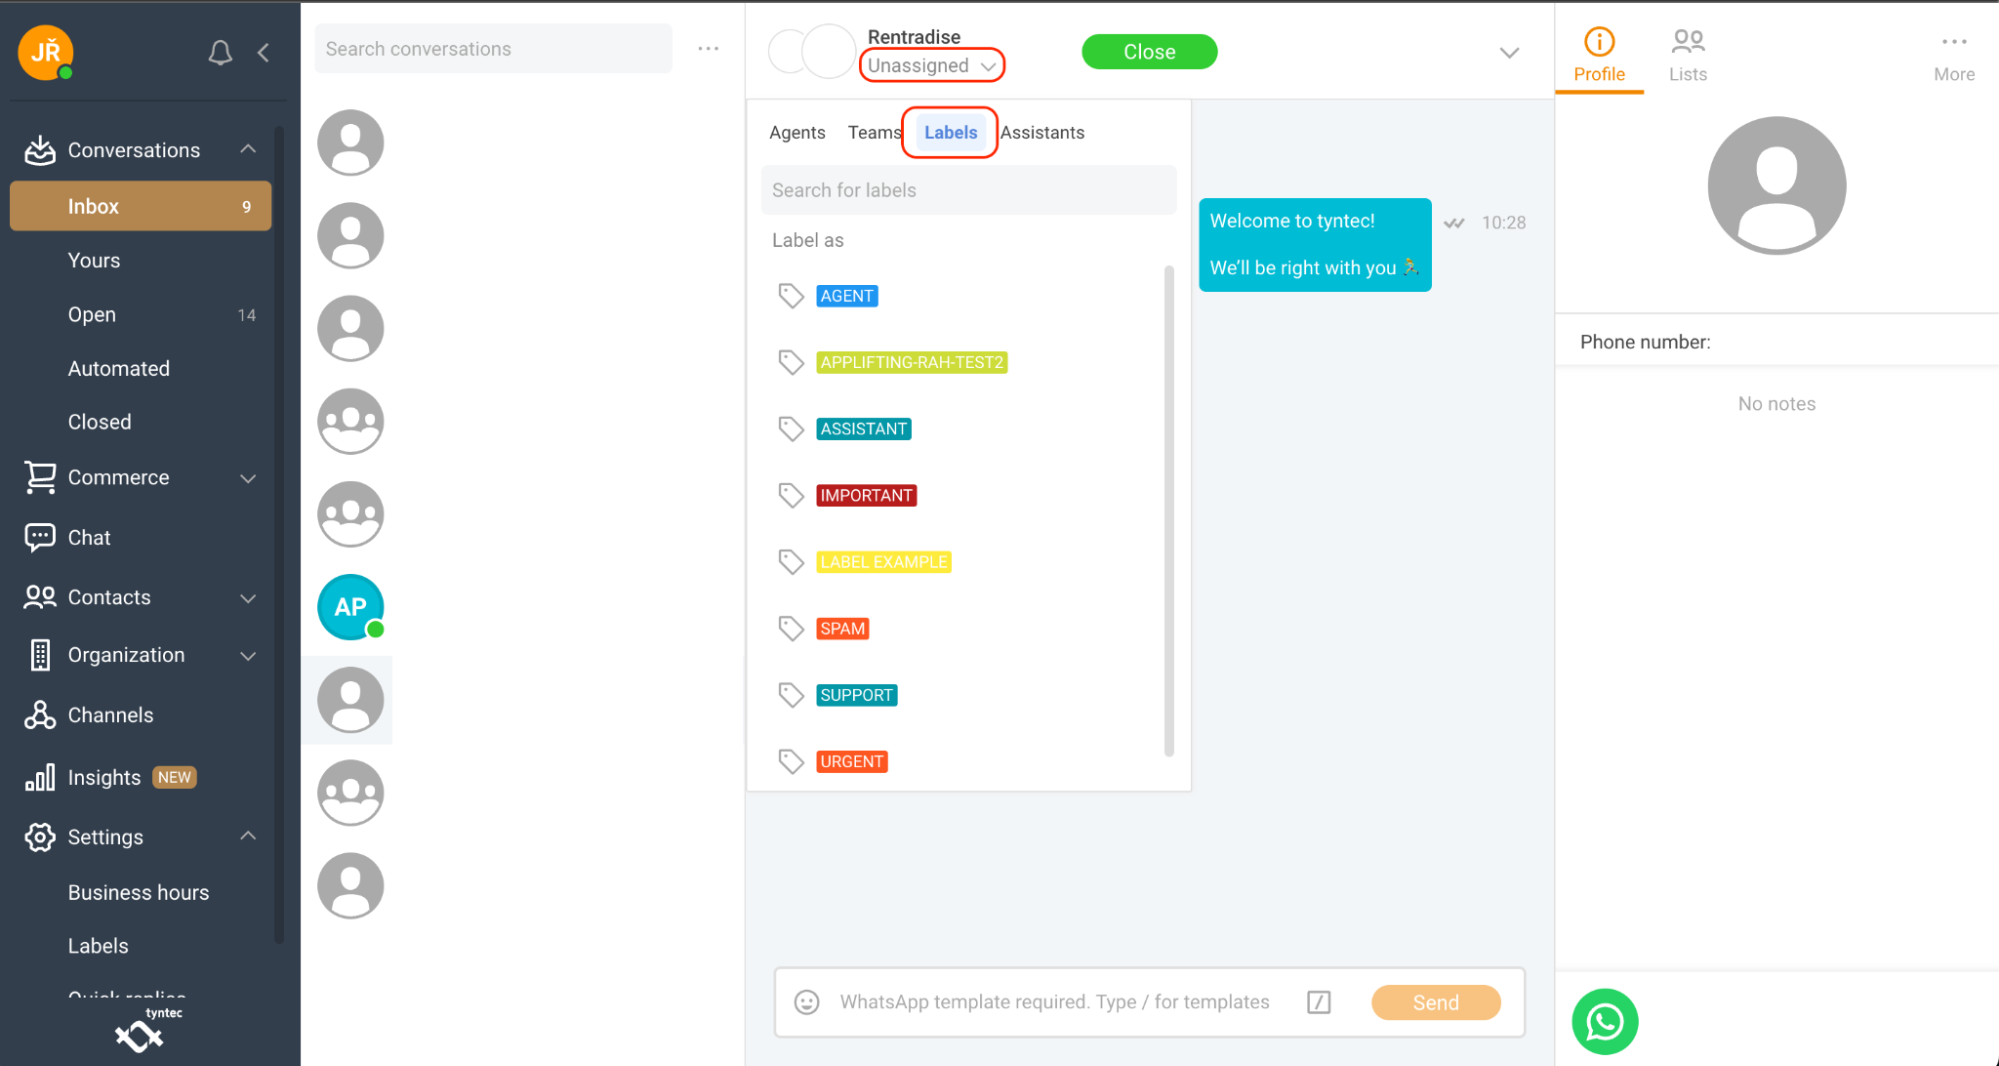
Labels
Labels are an easy way to classify and prioritize a conversation with a customer. Every business can create its own labels with which to manage and mark conversations.
For example, you could create a label named ‘Urgent’ for conversations that should be prioritized by your agents. Another example could be to define the department with a label (e.g. ‘Sales’).
1. Click the Conversations tab.
2. Open any conversation with a customer.
3. Click the arrow underneath the customer name at the top of your screen.
4. Select Labels from the menu.
You can always de-select a label by following the same steps and selecting the label again.
Using Contacts & Lists
In Contacts you will find all the connections associated with your account.
We divide Contacts into People and Lists.
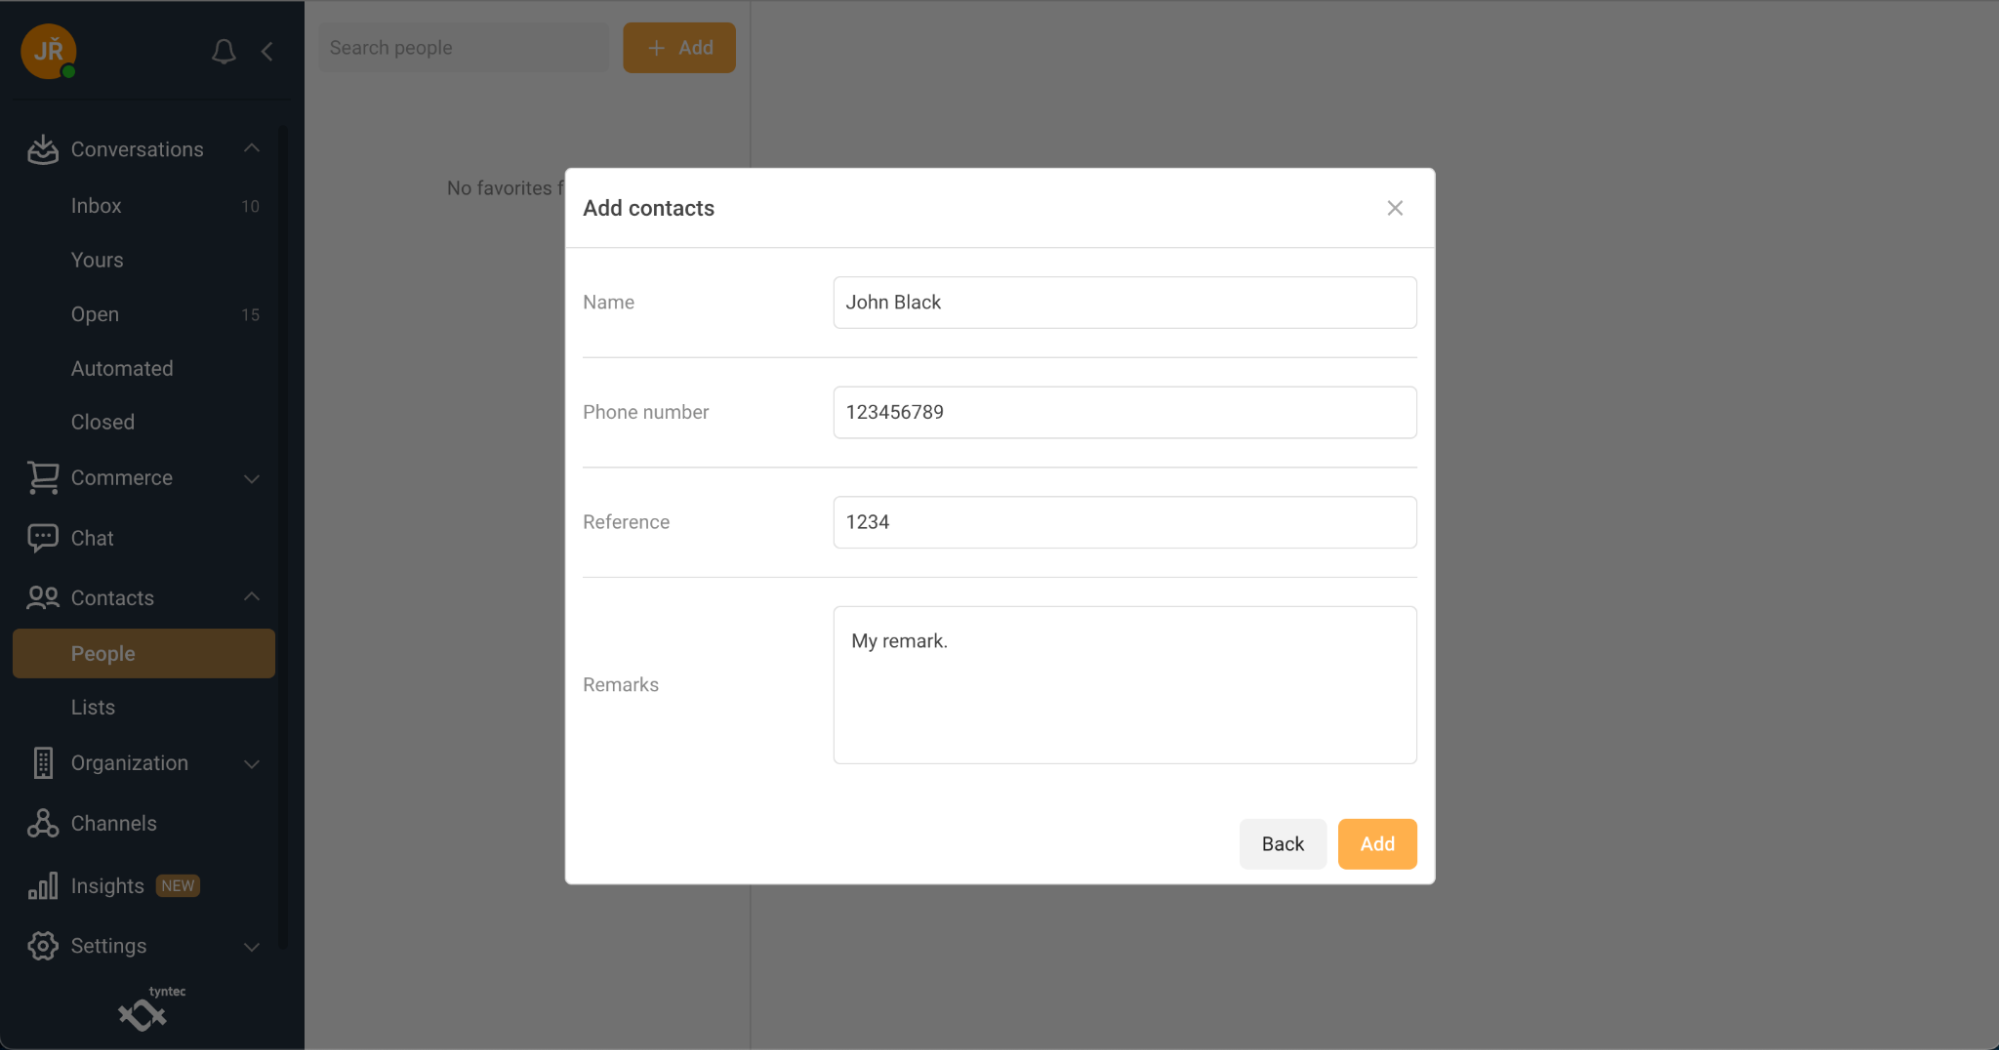
People
In People you will find all the individual people you have saved.
Add new contacts manually:
1. Click People.
2. Click + Add.
3. Select Manual method.
4. Select a channel you want to import contacts to.
5. Fill in information about your contract.
6. Click Add.
Add new contacts from file:
1. Click People.
2. Click Add.
3. Select Import method.
4. Select a channel you want to import contacts to.
5. Click Next.
6. Select if you want to Update or Ignore existing contacts.
7. Select which Delimiter you prefer, Comma or Semicolon.
8. Select the CSV file you want to import.
9. Click Import.

Lists
In Lists, you can create your own contact lists based on your preferences.
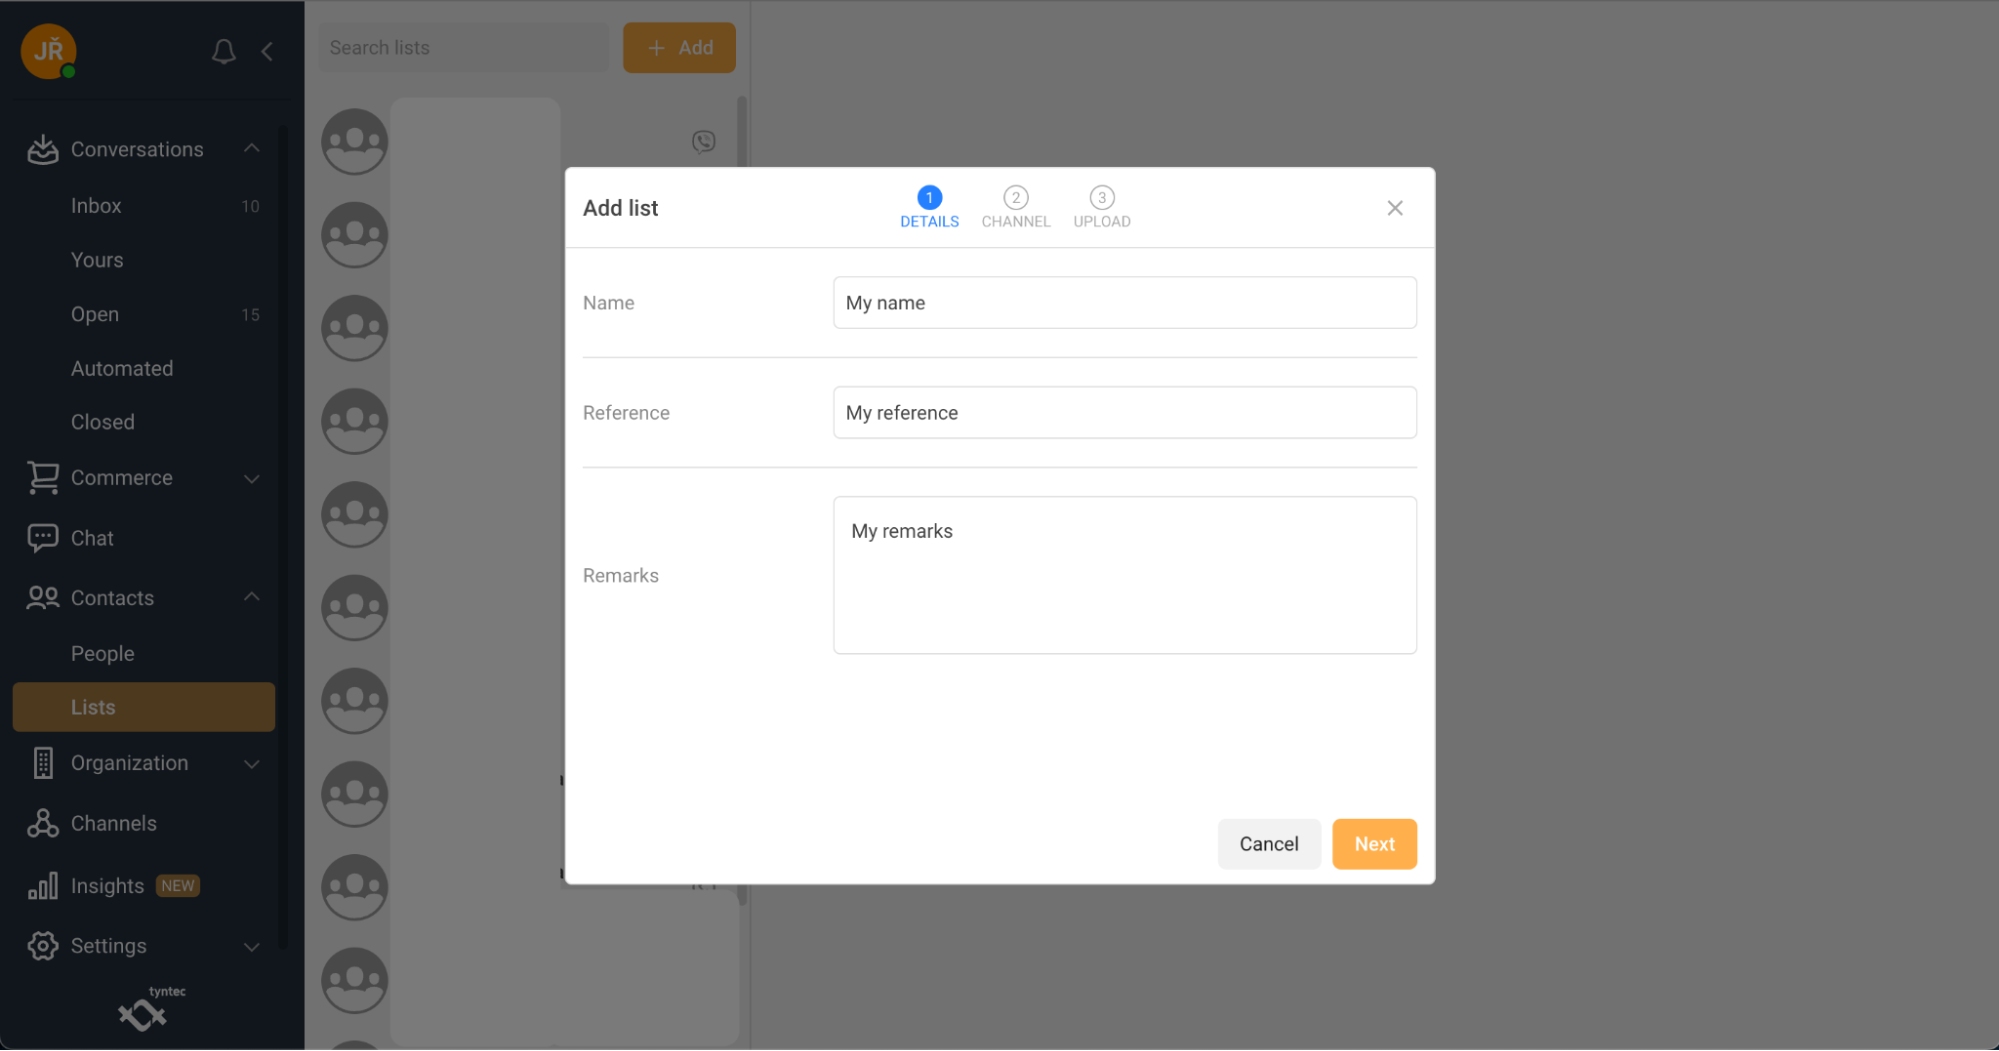
Add new list
1. Click Lists.
2. Click + Add.
3. Fill in information about your list.
4. Click Next.
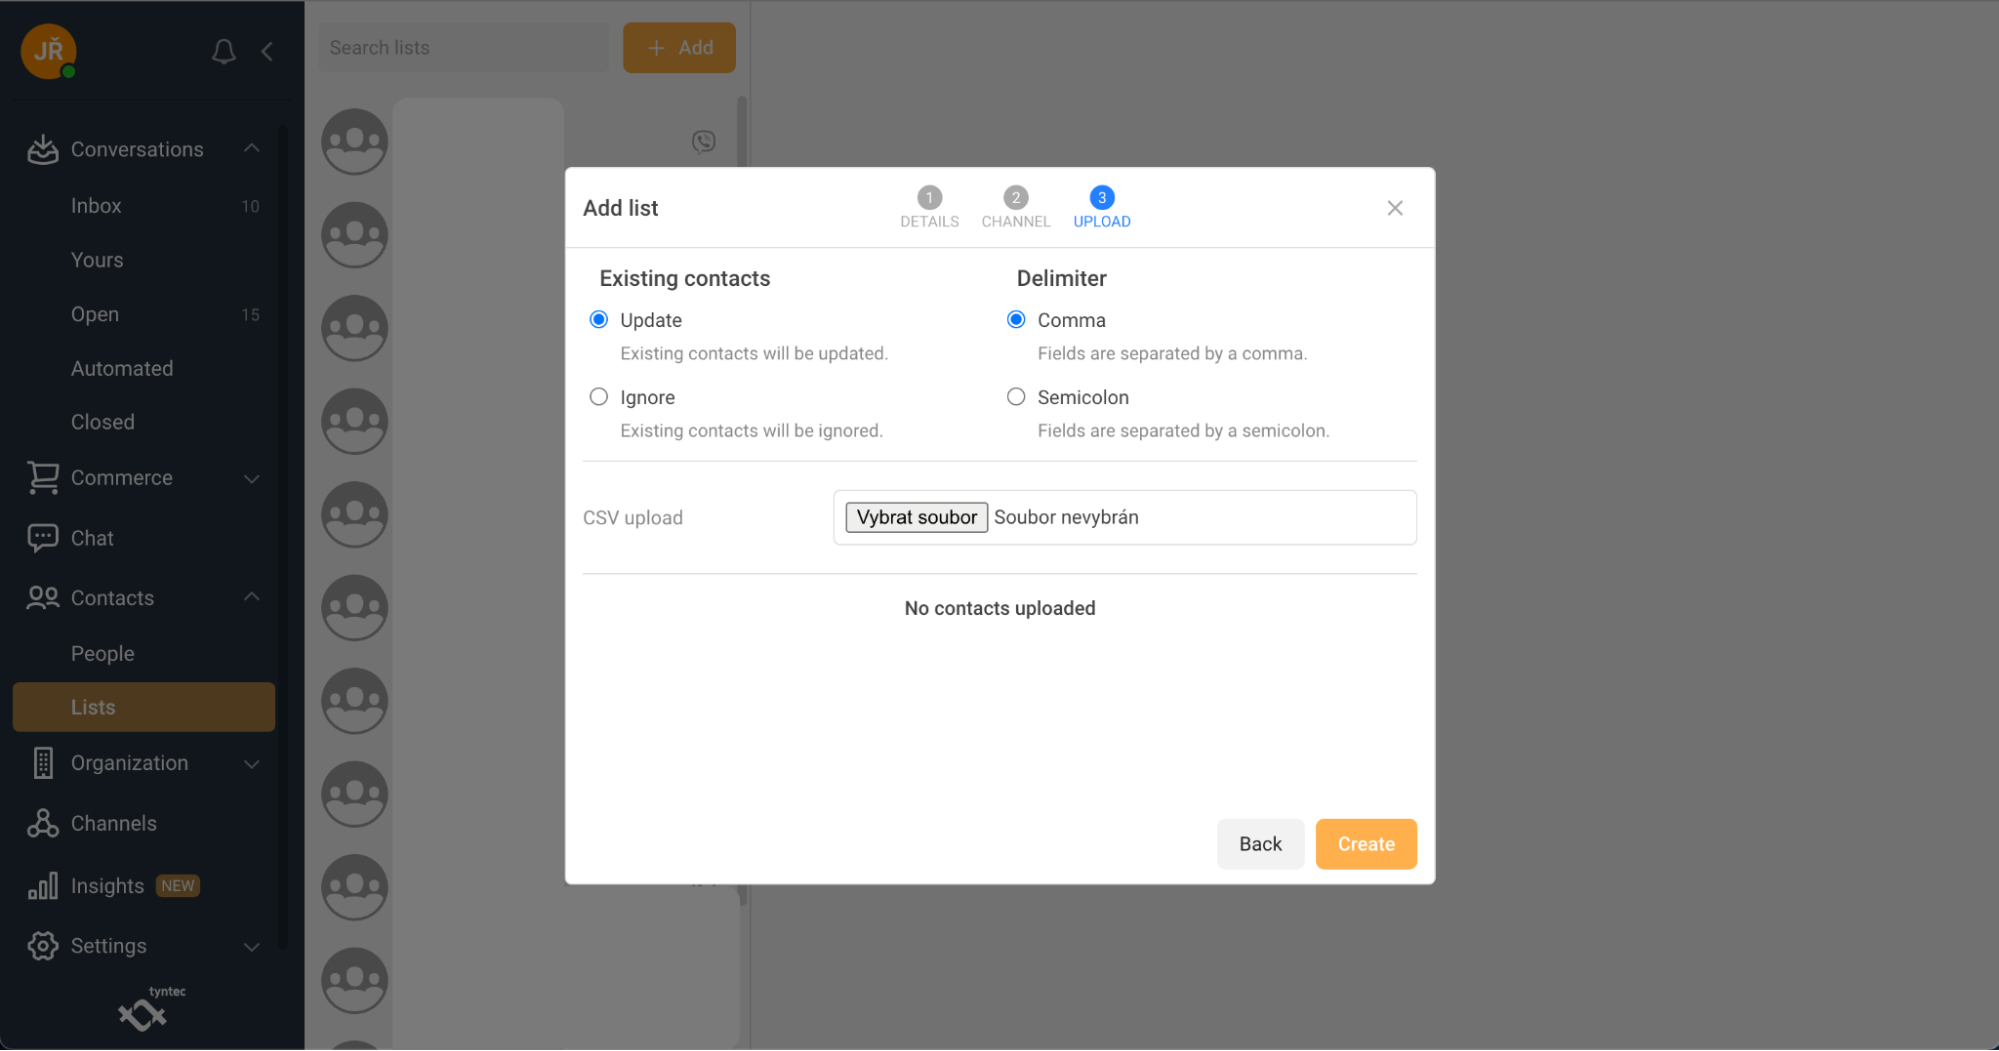
5. Select the channel.
6. Select if you want to Update or Ignore existing contacts.
7. Select which Delimiter you prefer, Comma or Semicolon.
8. Select the file you want to import.
9. Click Create to save the new list.
Using Organizations
In Organization you can find your fellow agents, all AI assistants and all teams belonging to your organization.
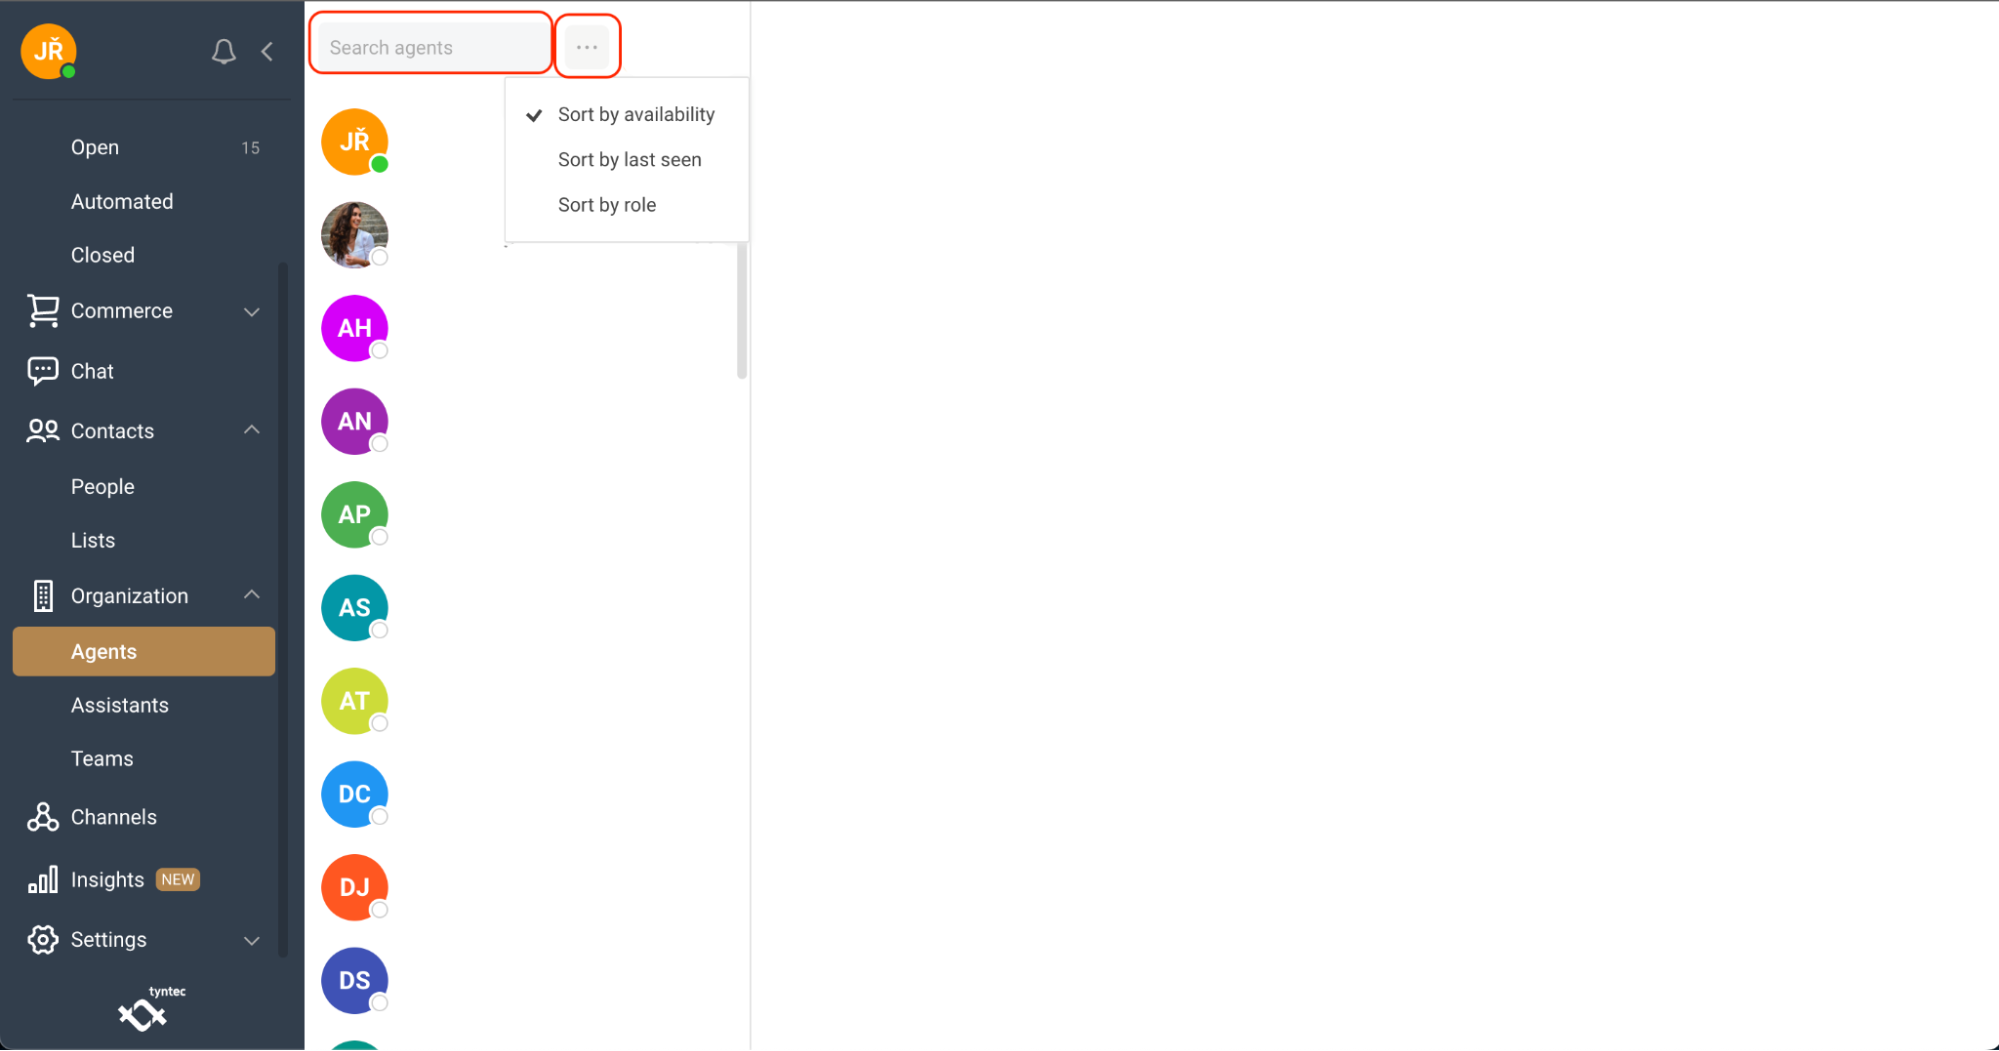
Agents
In Agents, you can see all the fellow agents in your organization using Conversations Inbox.
You can search agents with text filters or sort them by availability, last seen, or role.
Agents can be assigned to teams to efficiently distribute the work to the department. Agents who have administrator privileges have their own icon next to their name. This can be useful if you need to make system modifications, password resets, and more.
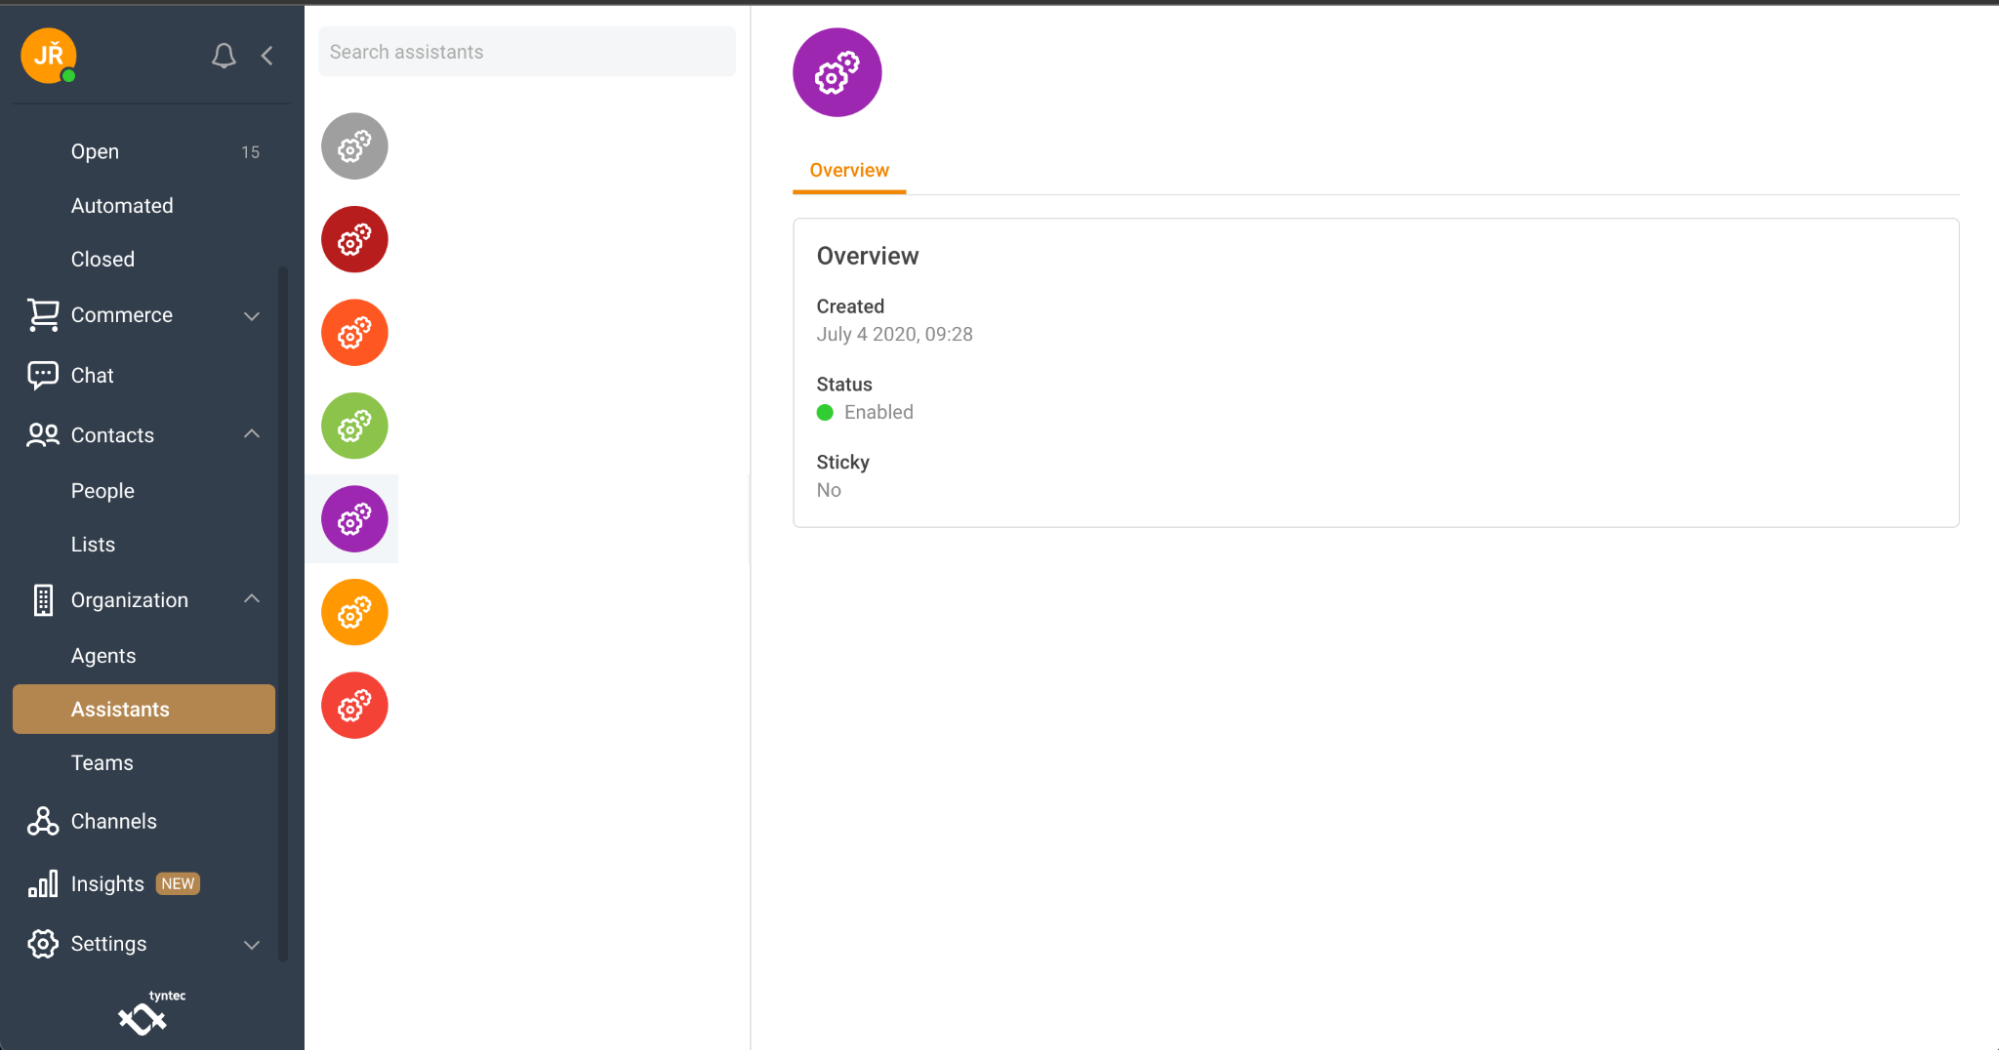
Assistants
In Assistants, you can see all the AI assistants you currently use in your organization. Click the selected AI assistant to see the details.
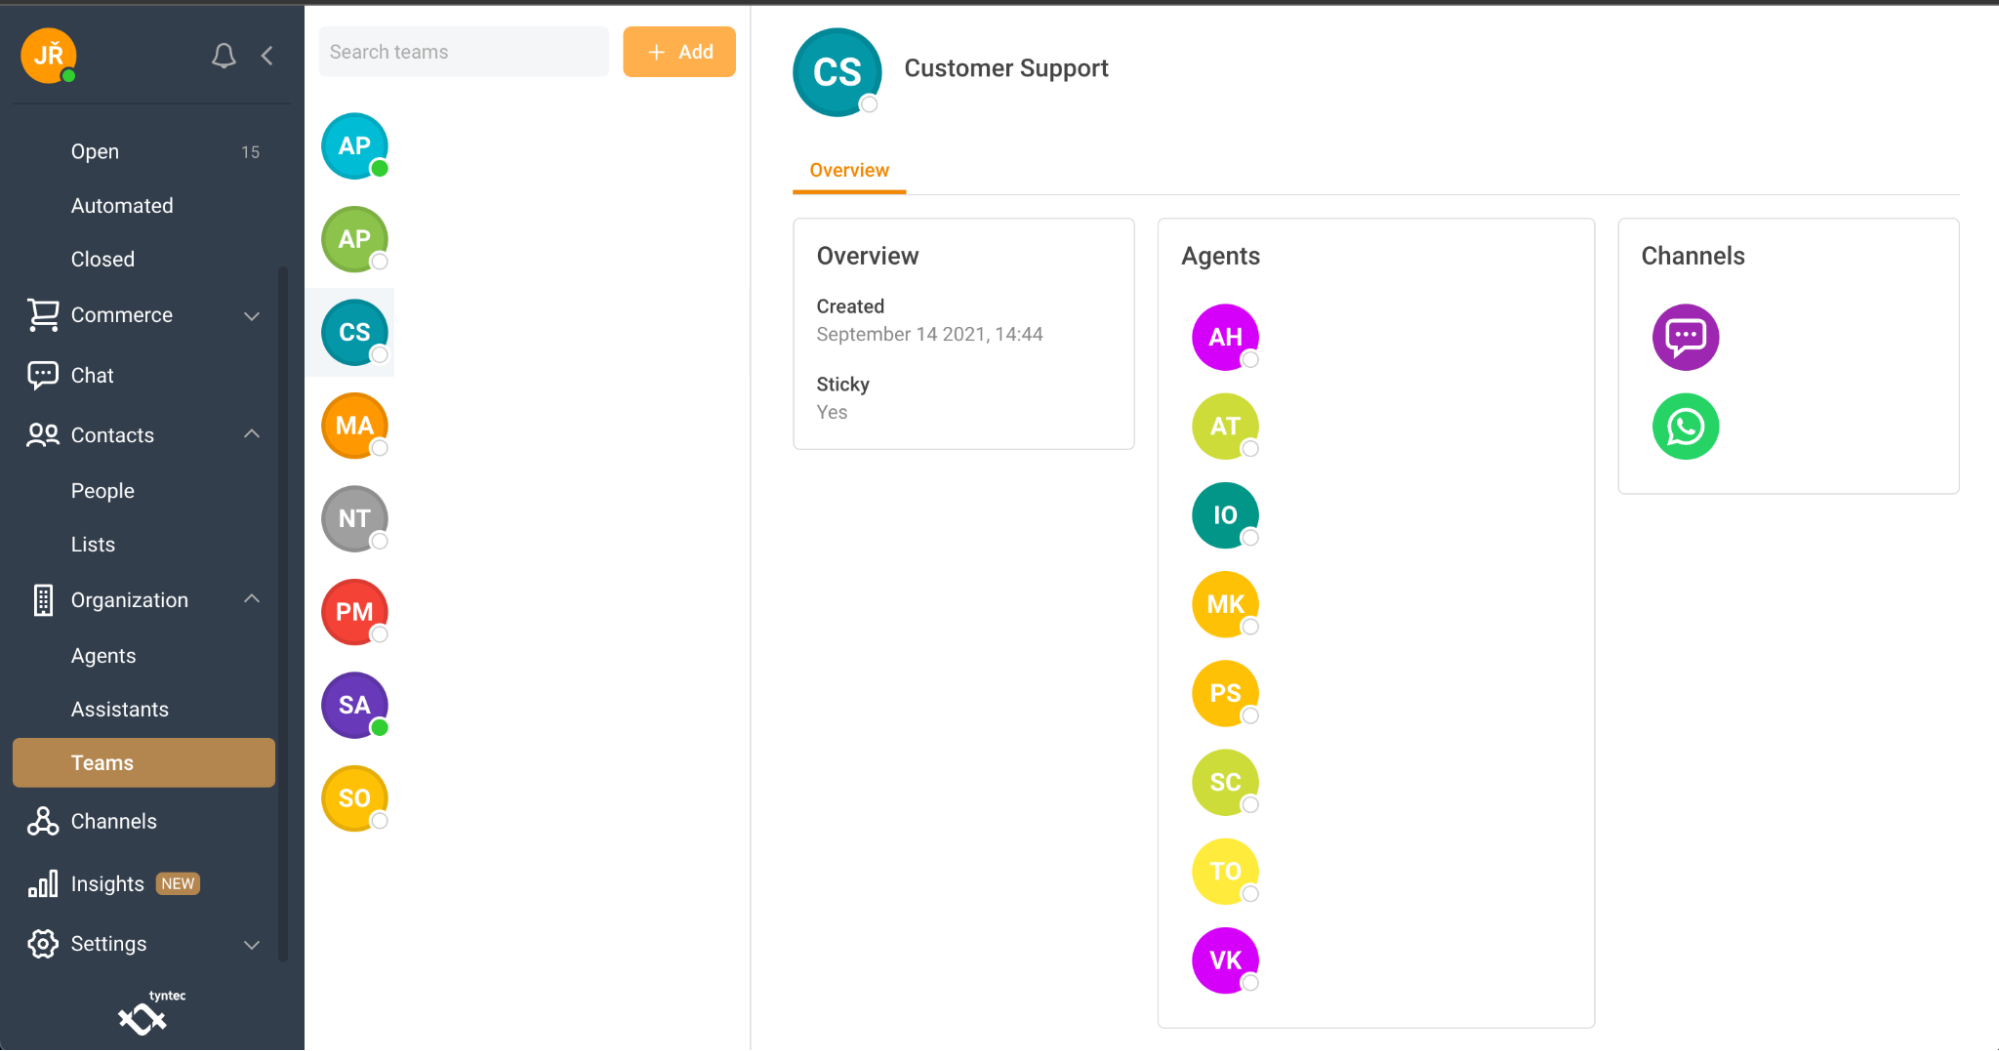
Teams
Teams are an easy and flexible way to organize your agents. Each team can be assigned an email address, so your team doesn’t miss out on important notifications.
Businesses use Teams to reflect the organization of larger customer support teams. For example, a company with specialists for certain topics can create a team to handle incoming customer questions better, by assigning a conversation to a dedicated team.
Or, businesses with customer support agents for different countries and languages can create a team to differentiate incoming customer questions by region or language.
In Team you can find detailed information about your team:
1. Overview information.
2. Agents assigned to the team.
3. Channels assigned to the team.
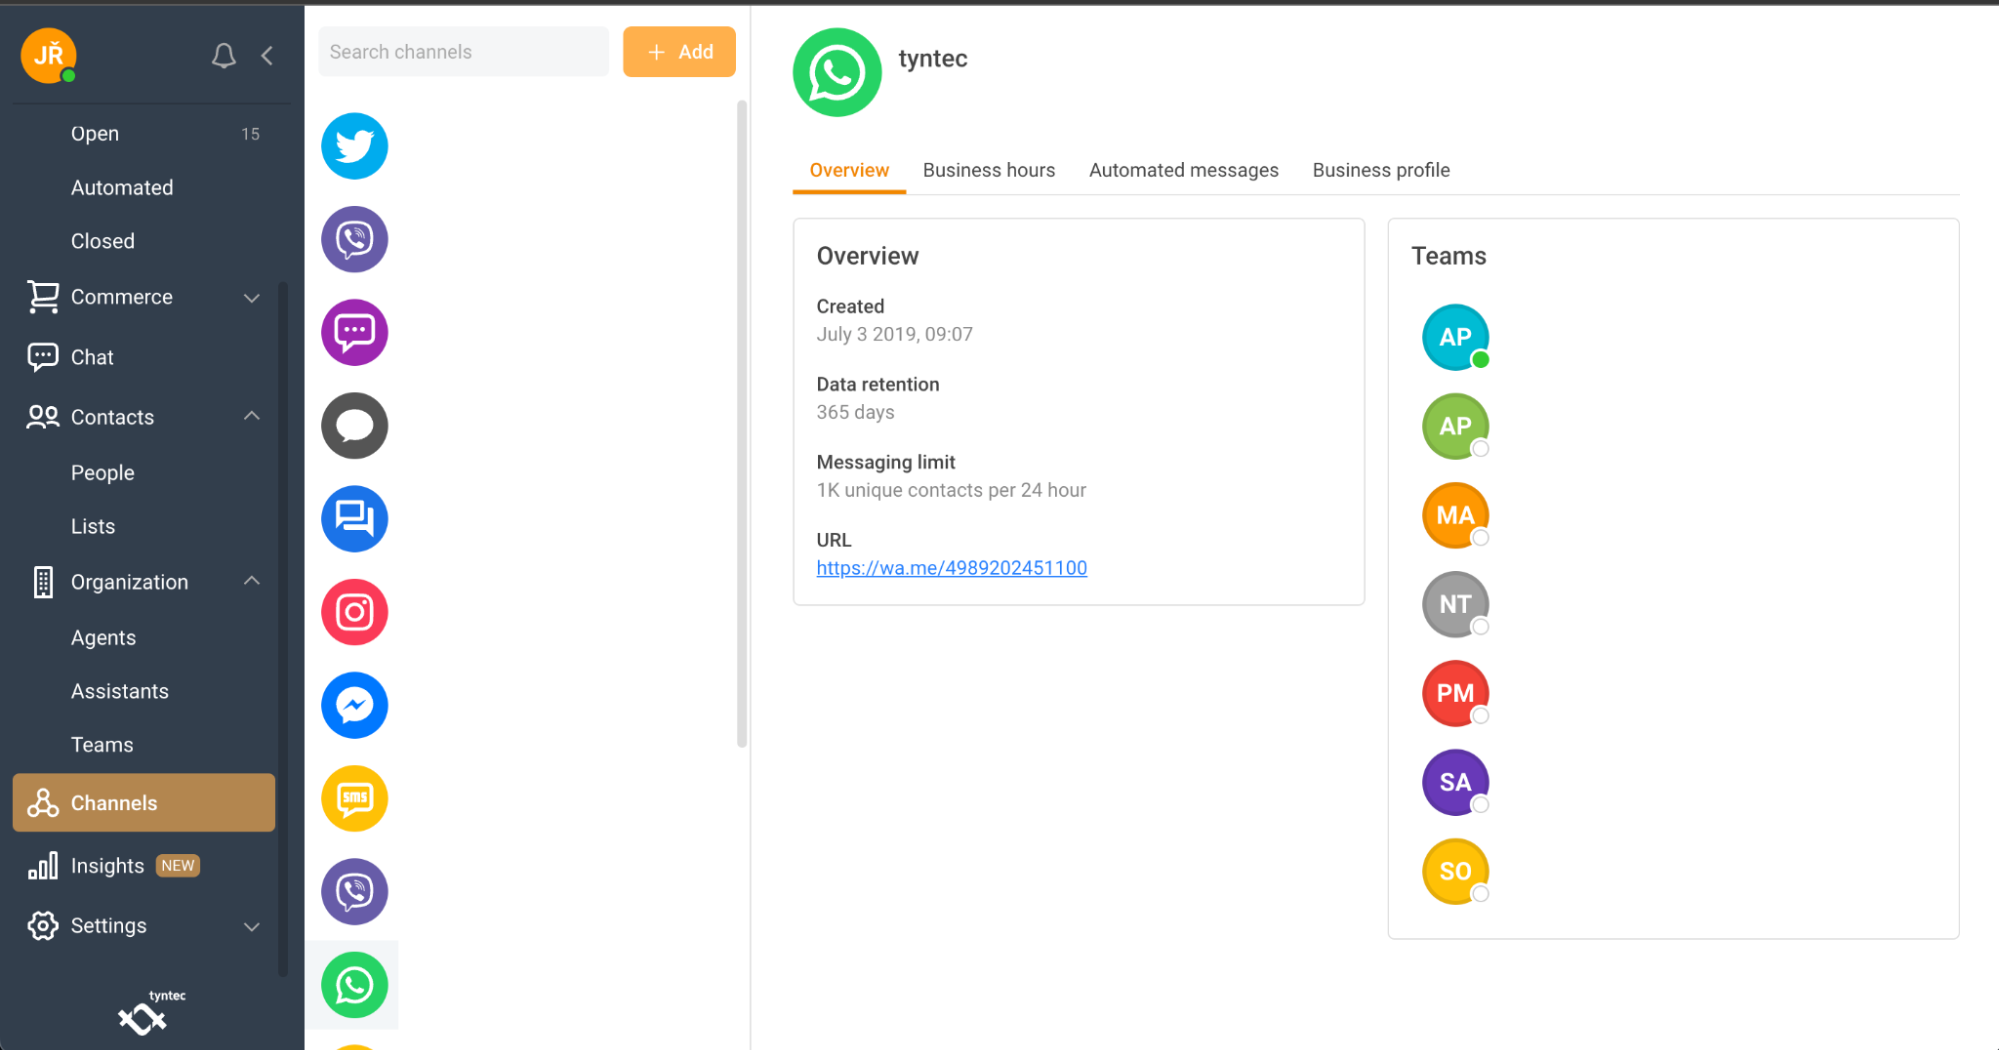
Using Channels
In Channels you can see all the channels you have linked to your organization.
Overview
You can find basic information about the channel and which teams use the channel with ease.
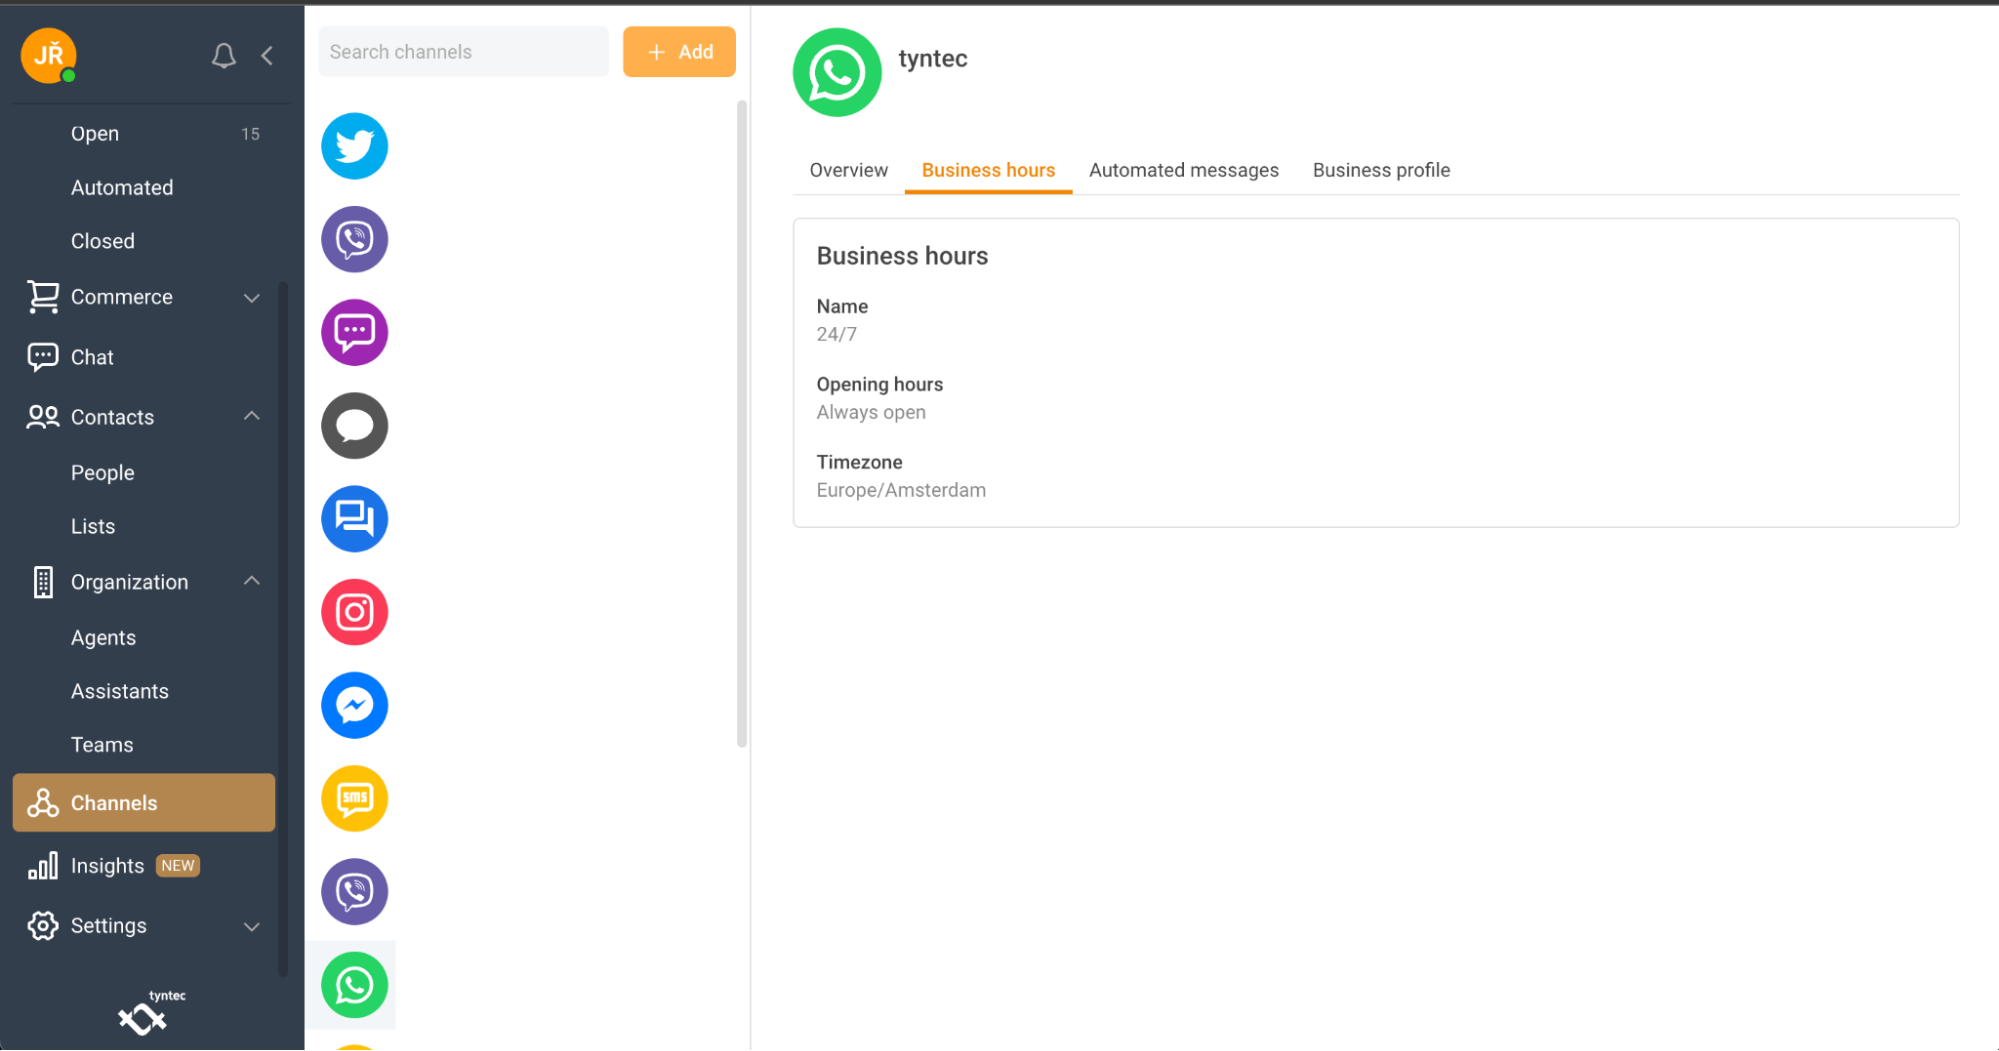
Business hours
You can see the current setting for business hours and timezone details here…
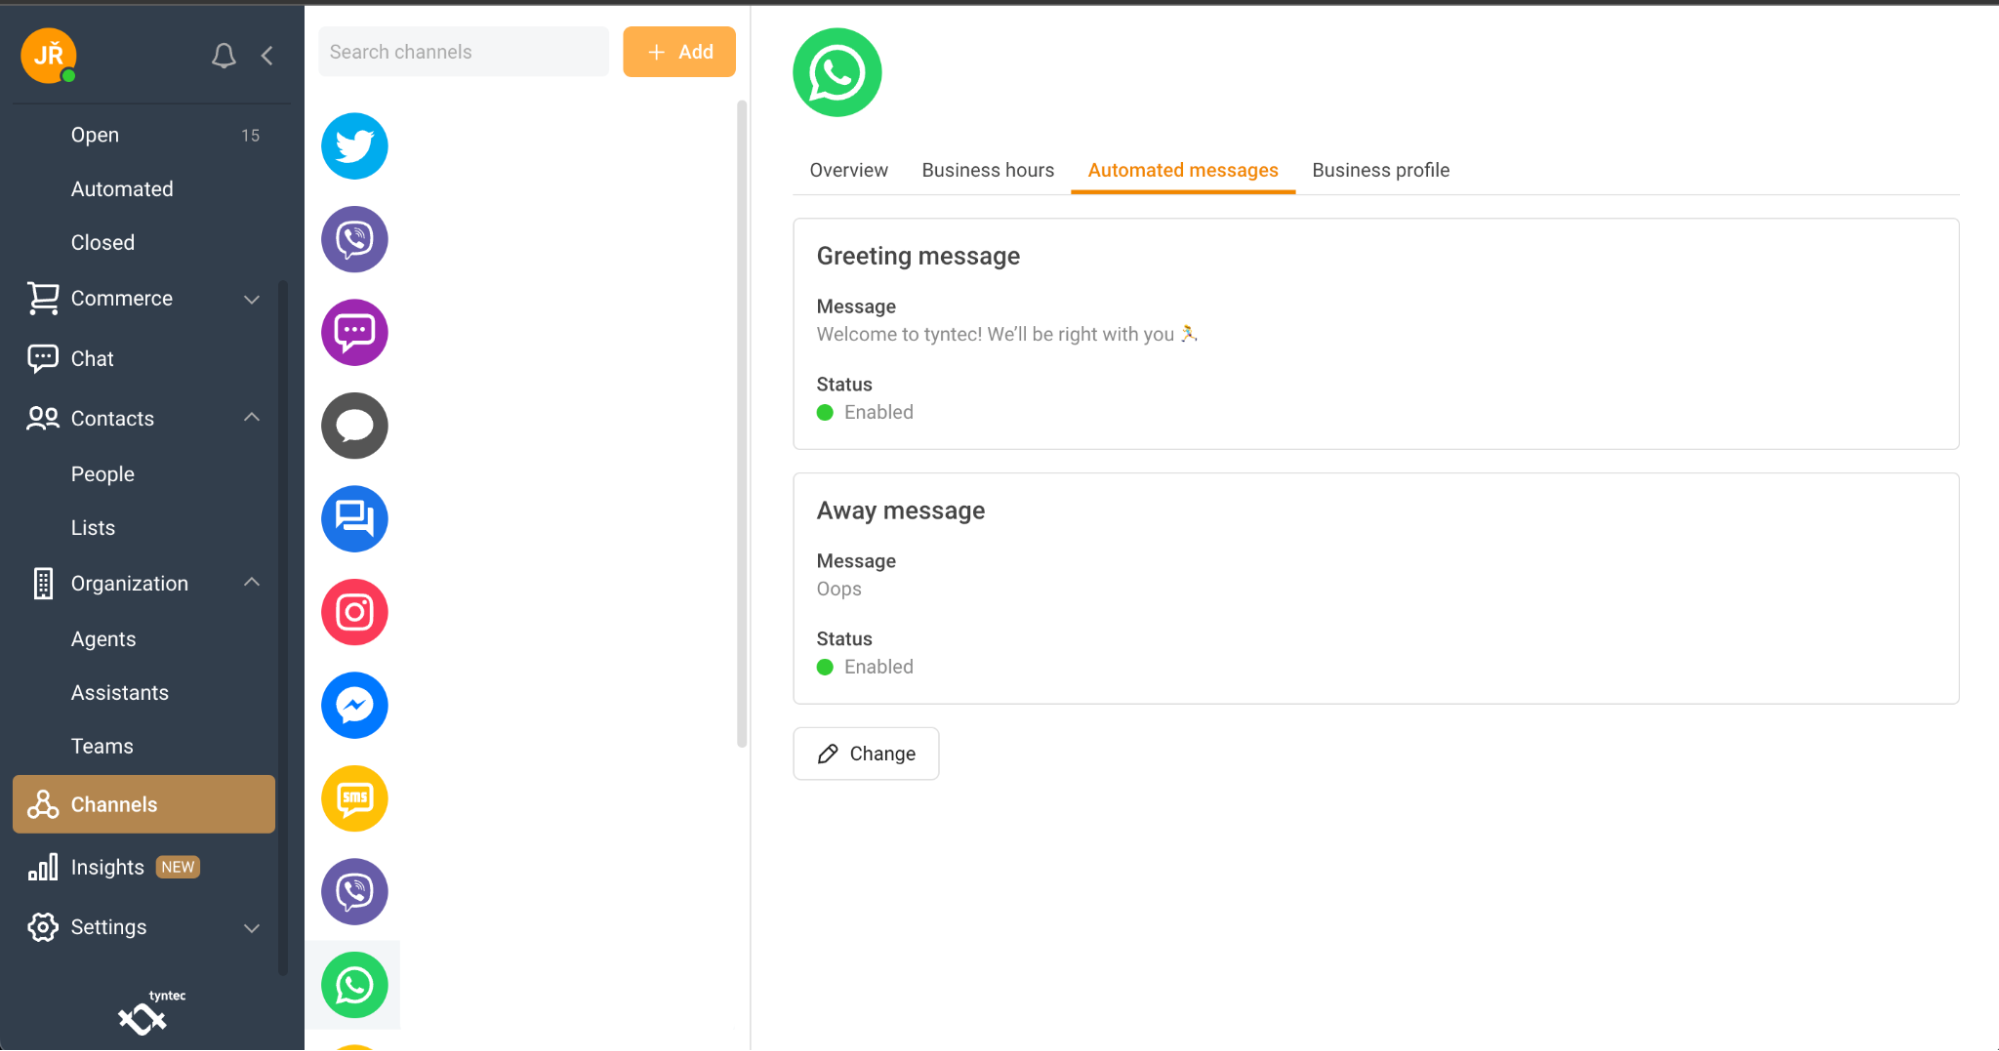
Automated messages
You can see or change the message content, and active status of automated messages here.
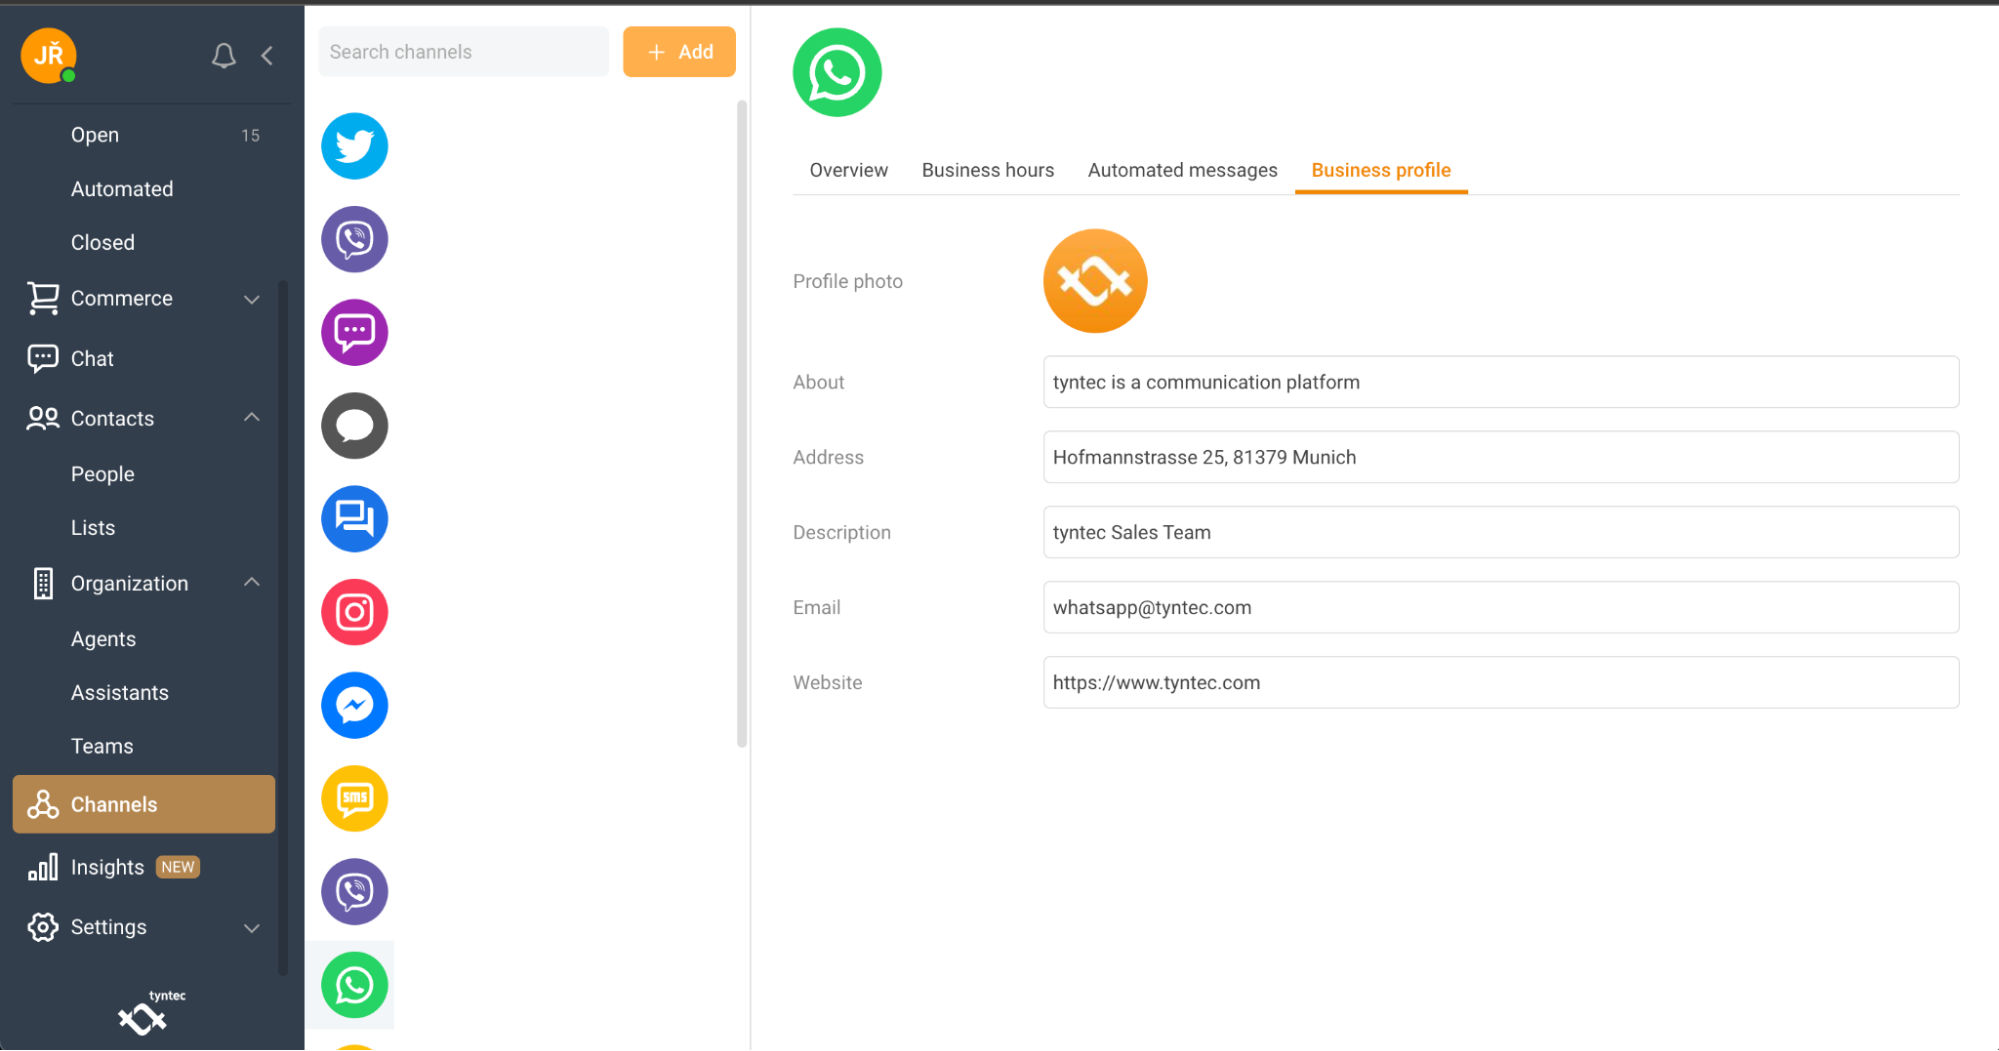
Business profile
You can find information about your company that can be seen by customers.