Viber Business | Integration with Email
Hi there!
Would you like to use Viber to notify your customers? Also, would you like to answer their Viber messages from your mailbox?
In this tutorial, you will learn to integrate Viber with email using tyntec Conversations API. This integration will allow you:
- To collect opt-in using a custom form
- To initiate a conversation in Viber
- To receive a response from Viber to your email
- To reply from your email
Note: You may also use the SMS channel of the tyntec Conversations API as a fallback for Viber plain text messages. Information on Conversations channels can be found in the API Reference or contact us for more information.
You will need
- A mobile phone with the Viber and a working phone number for testing
- Your tyntec API key from your tyntec account
- Your Viber Service ID that has been assigned to you by tyntec
- An ngrok account with the binary installed and authorized
- Node.js installed and your favorite text editor or IDE with JavaScript
- Postman and our Postman collection
- An (admin) email to receive opt-ins and to reply to Viber messages
- An (service) email to transport outgoing email
Note: If you use only one email as both admin and service, then you receive your own replies. These replies can make a mess in your inbox.
Step One: Get your integration app ready
For your quick start with integrations, we’ve prepared a sample integration app. Let’s look at what the code does. You will notice that the code is in several files and directories:
- server.js binds scripts together, listens for updates via webhook and interacts with URL.
- In the static directory:
- index.html is a sample opt-in form.
- in the api directory:
- form.js initializes Viber communication with the initial message.
- fetch.js handles email replies and sends them to Viber.
- incoming.js handles incoming Viber messages and sends them to your email.
1. Clone the api-sample repository and go to the viber-integrations/email directory.
2. Install dependencies (and the nodemon module if you don’t have it yet):
npm install
npm install nodemon
3. Afterwards, you need to create a publicly accessible URL using ngrok. Launch ngrok with local port 3000 using following command:
path/to/ngrok http 3000
4. Copy the displayed public URL (such as https://14254cc10080.ngrok.io/).
5. Now, you can start the sample application. Run server.js with nodemon in another terminal window:
nodemon server.jsWhen you go to your root ngrok address from your browser, you should see the opt-in form.
6. Last but not least, open .env file and set your environment variables:
- IMAP_HOST – the IMAP server of your service email account, for example: imap.example.com
- IMAP_PORT – the IMAP port on the server, for example: 993
- SMTP_HOST – the SMTP server of your admin email account, for example: smtp.example.com
- SMTP_PORT – the SMTP port on this server, for example: 465
- ADMIN_EMAIL – your admin email address
- ADMIN_PASSWORD – your admin email password
- EMAIL – your service email address
- API_KEY – your tyntec API key
- VIBER_ID – your Viber Service ID from tyntec
Step Two: Collect an opt-in
Important: Remember to follow the guidelines on Getting Opt-ins!
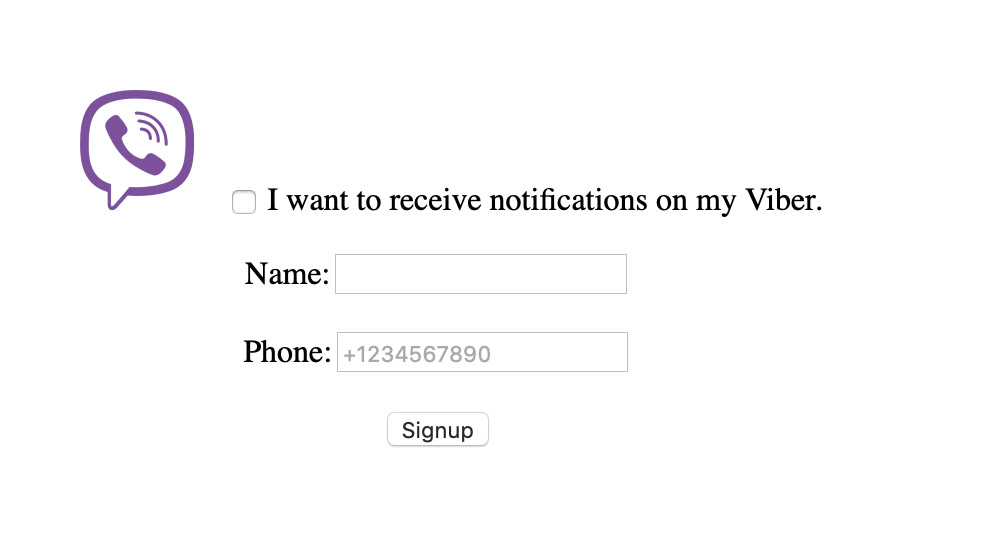
1. You can open directory static and look at the index.html file. If you want, you can edit the code to change the looks of the opt-in form. The code sample is:
<form action="/optin" method="post">
      <p><img id="vi-logo" src="Viber_logo.png" alt="Viber Logo" height="60px">
        <input type="checkbox" name="agree" value="1">
        I want to receive notifications on my Viber.</p>
      <p><label for="name">Name:</label><input type="text" id="name" name="name" value=""></p>
      <p><label for="phone">Phone:</label><input type="text" id="phone" name="phone" placeholder="+420123456789" value=""></p>
      <input type="submit" value="Signup">
</form>
On submit, the form sends a POST request to the endpoint called /optin.
2. You may want to adapt the text of the initial message in the file api/form.js.
Note: The message text is defined in the sendMessage constant.
Time to collect your first opt-in! Open the root ngrok URL in your browser.
Fill in a name and your testing phone number and hit the Submit button.
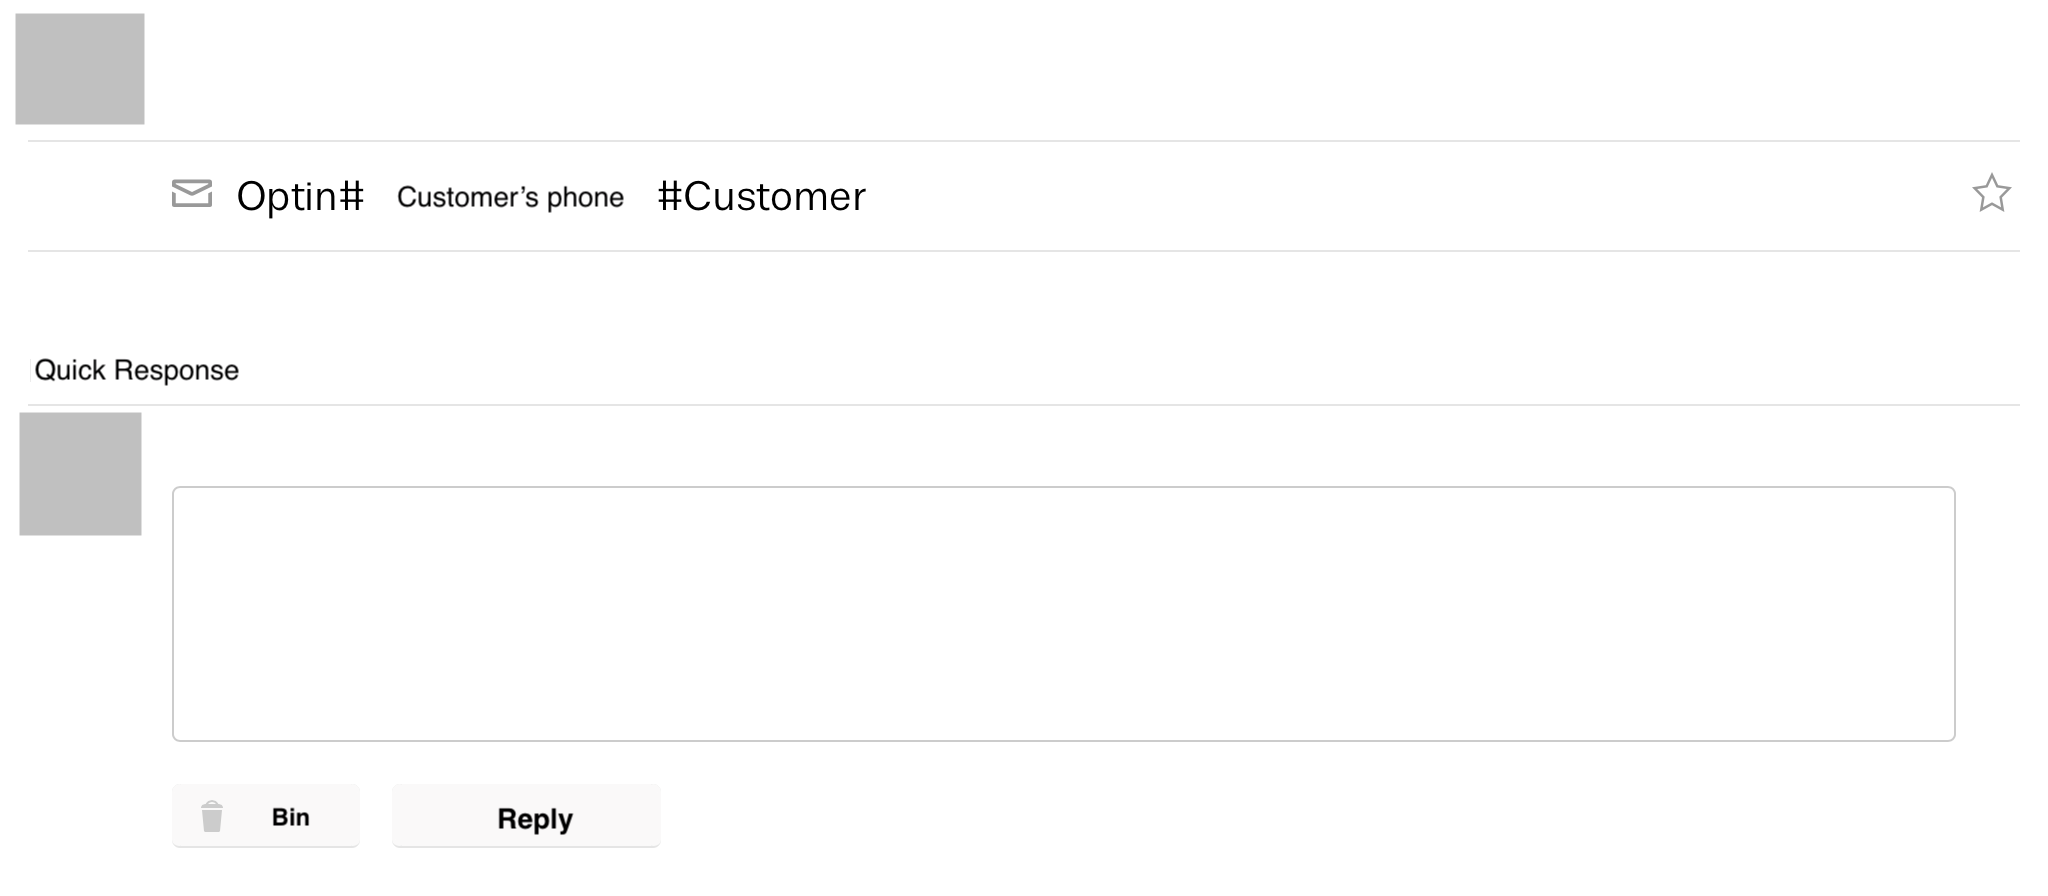
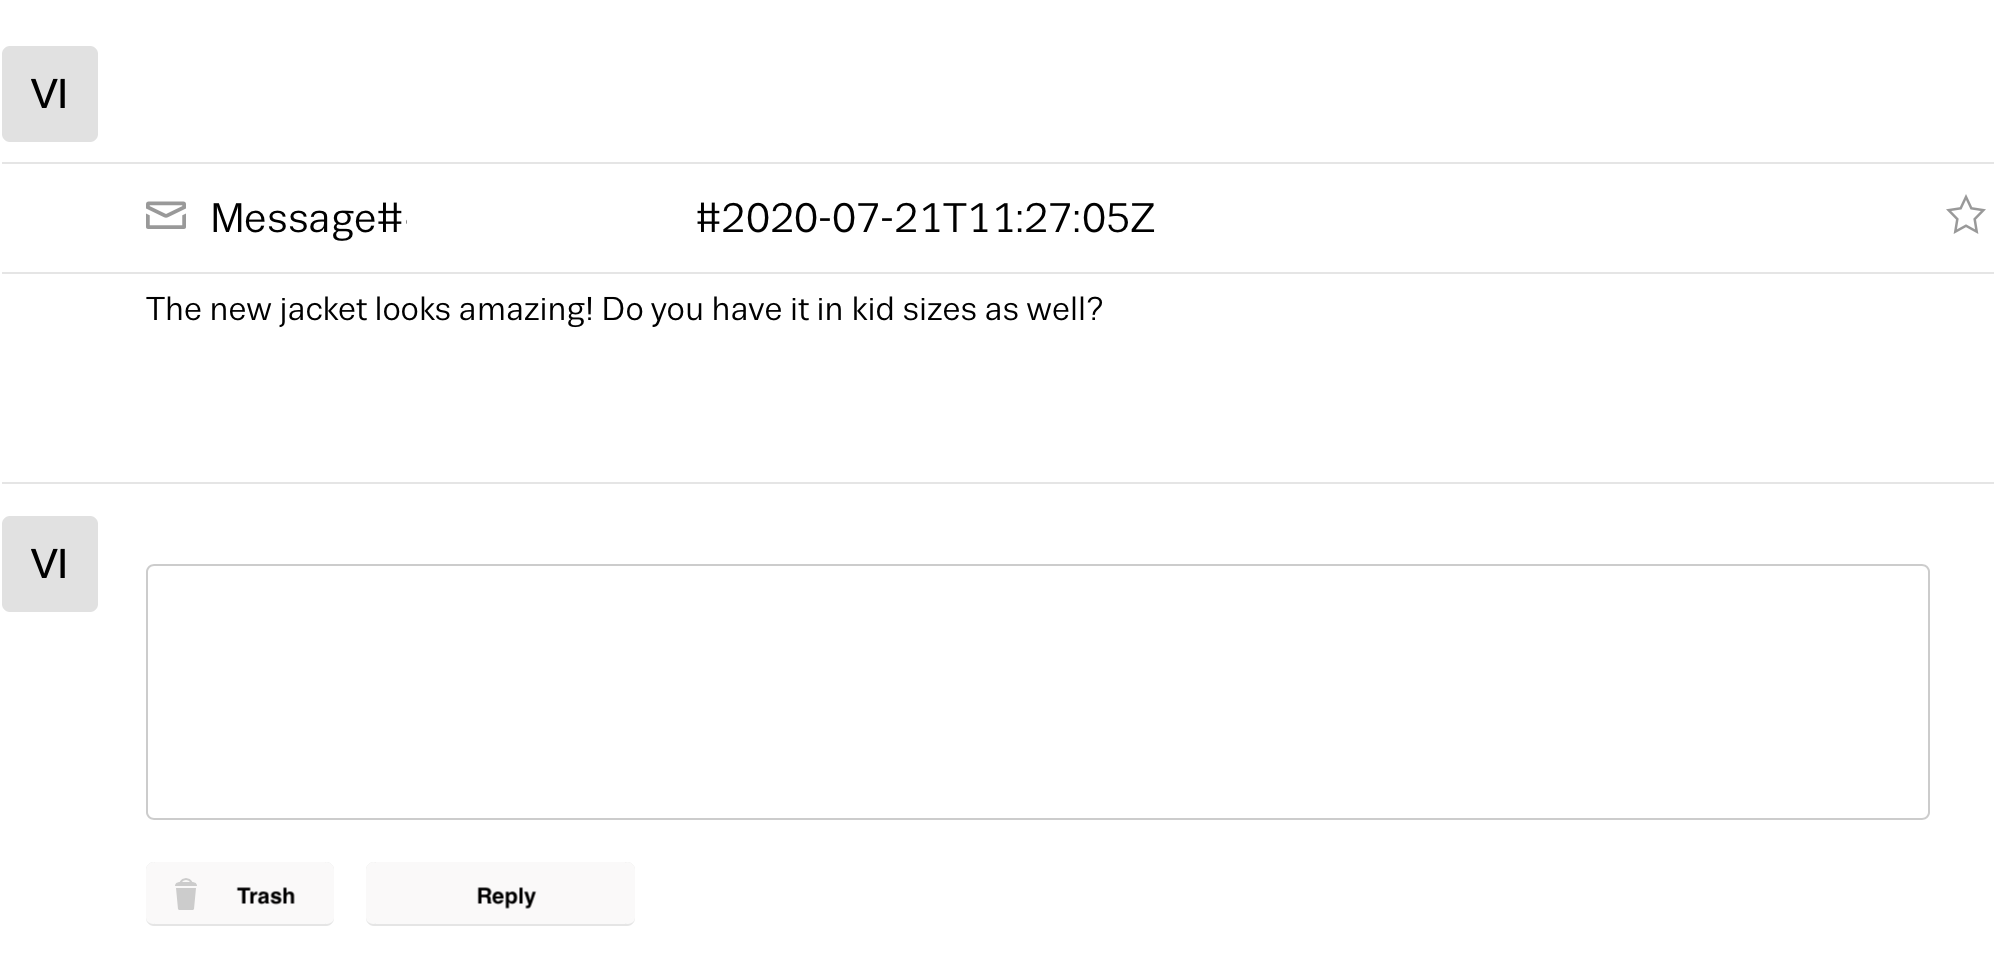
Now as confirmation for both parties, a new email with the opt-in appears in your mailbox:
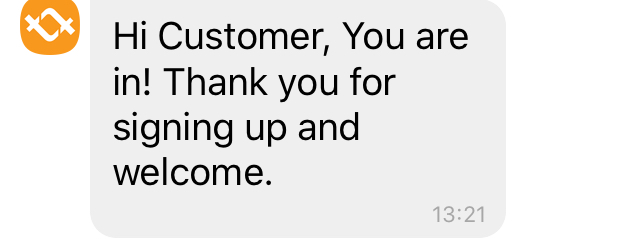
And your testing Viber also receives the initial message:
Step Three: Receive a message to your mailbox
1. Now you need to update the tyntec API with the new callback URL using Postman. In the Postman collection, go to the Application Management folder, and open the patch Update default application.
2. In the request body change the callbackUrl for the MoMessage event to your /incoming ngrok URL (for example: https://14254cc10080.ngrok.io/incoming). Then click Send to update webhooks.
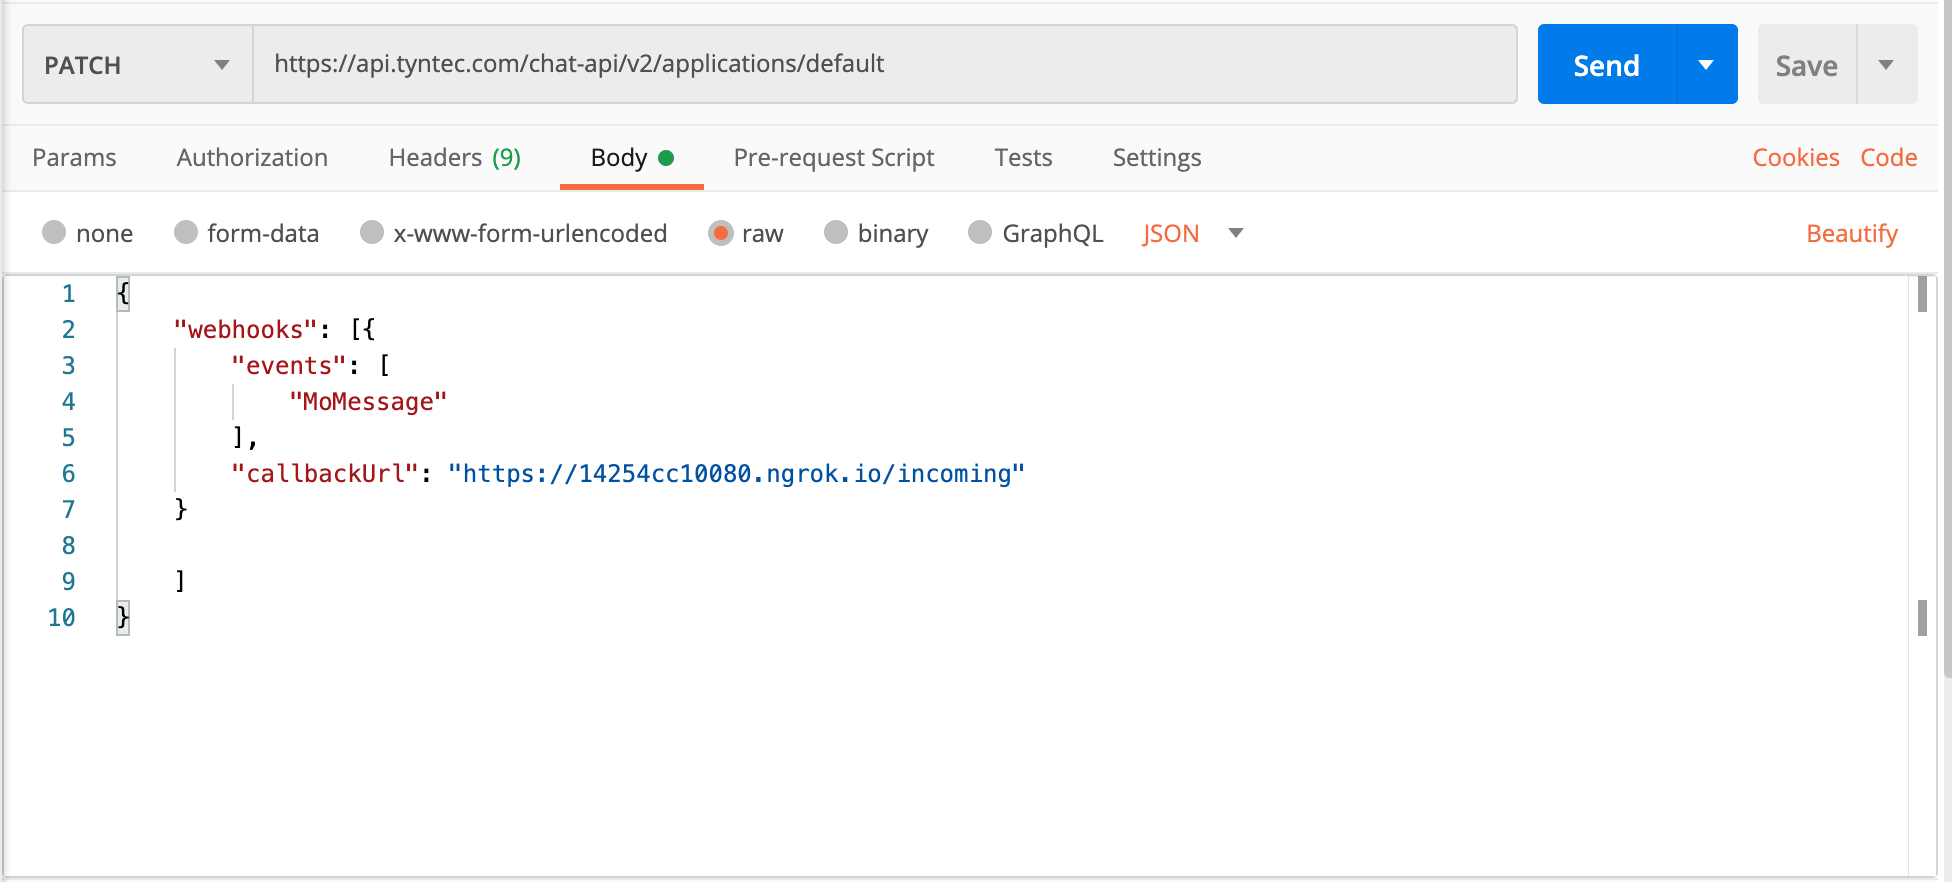
Note: A detailed example of a webhook update with Postman can be found in this tutorial.
3. And now the testing time! Grab your phone and send a lovely Viber message to your Viber Business account.

Also, immediately you can see it back in your mailbox.
Step Four: Respond from your mailbox
Now the most exciting part! Let’s connect your email response to the tyntec API and back to the customer.
1. Let’s try responding. In your mailbox, reply to the forwarded customer’s message as if you were replying to a usual email. And send it.
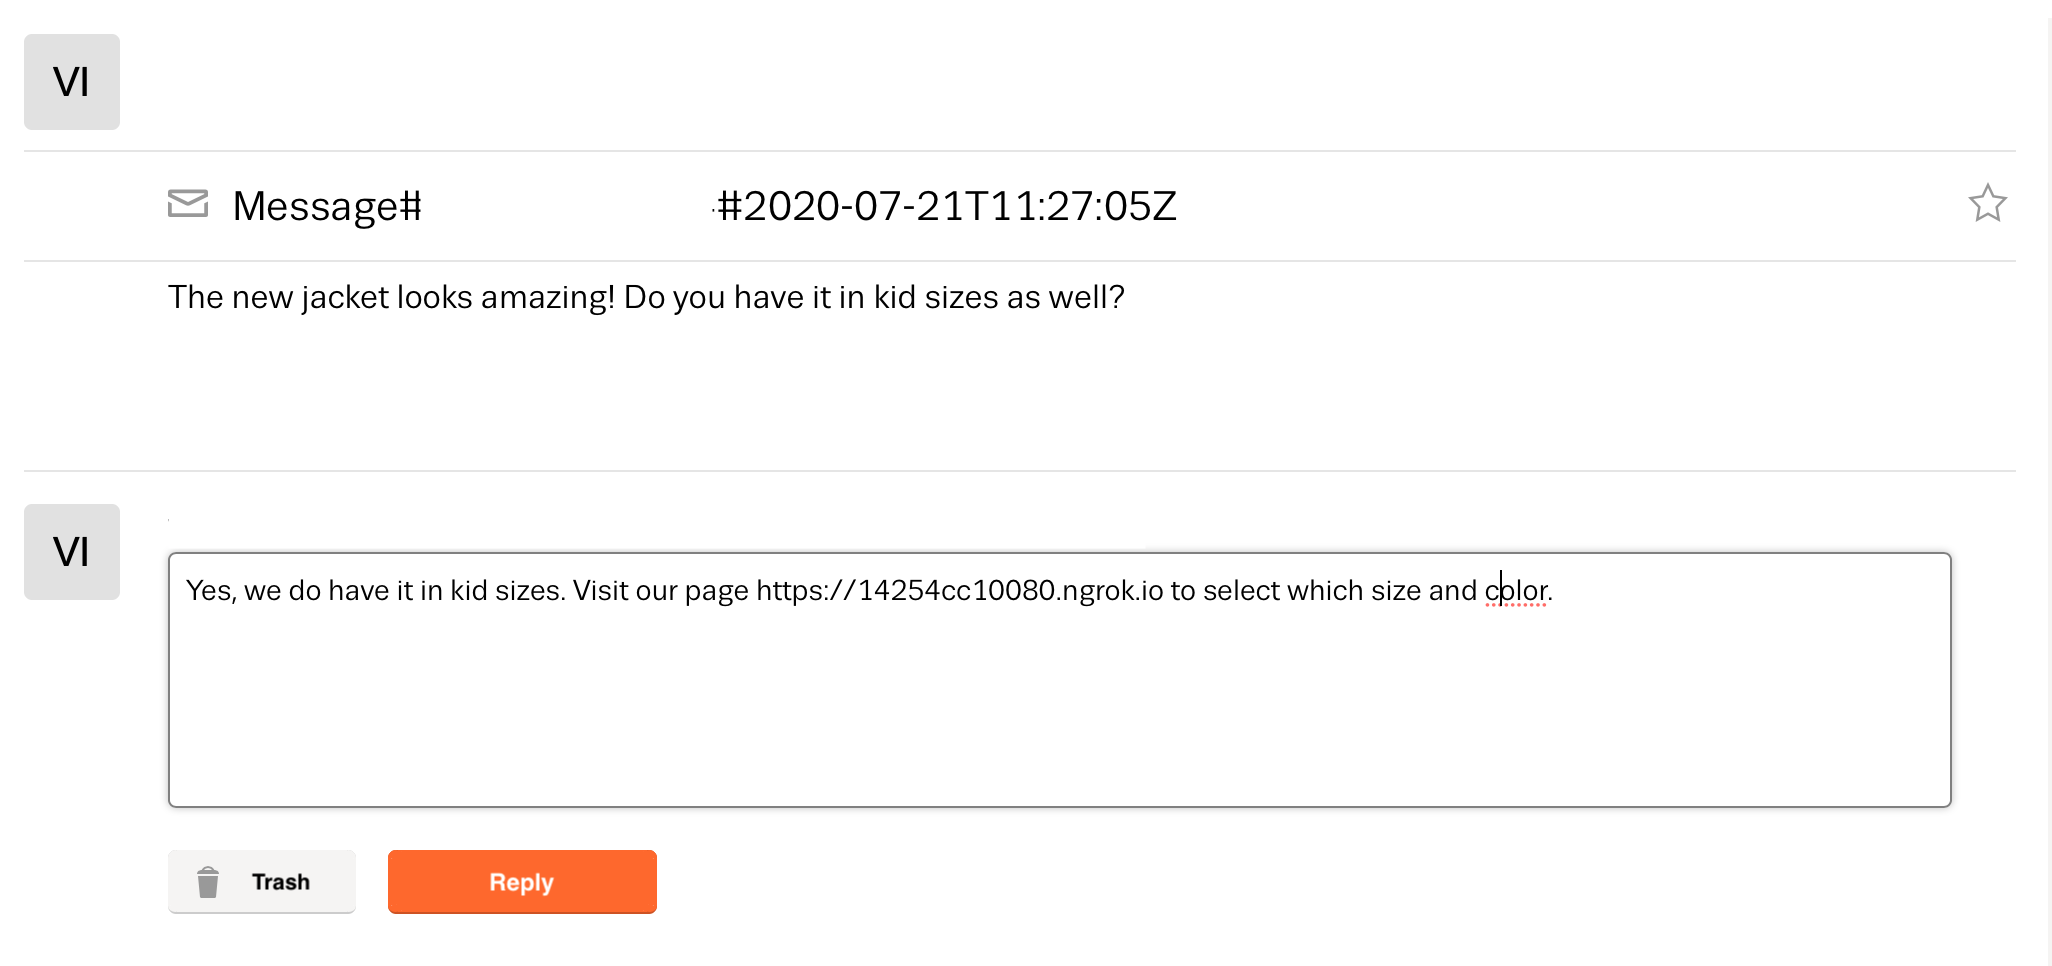
2. If you look at your customer’s Viber, you won’t see the message.That is alright, you need to call the mailfetch endpoint first, which forwards your response to Viber.
Open the mailfetch endpoint in your browser, for example https://14254cc10080.ngrok.io/mailfetch

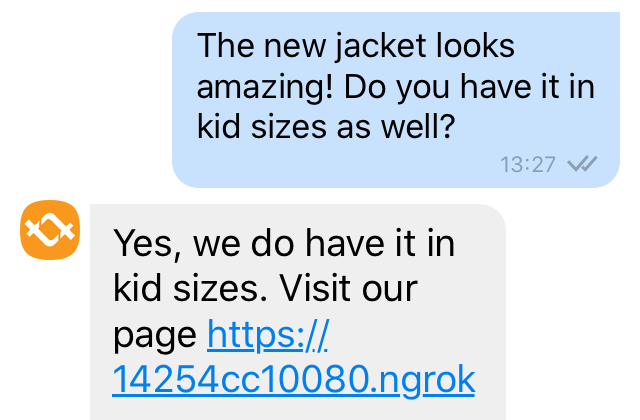
Now your customer receives your response.
Congratulations on your integration!
More?
- You may use Zapier integration to call the mailfetch automatically when your service email receives a reply from your admin email.
- For that you need a zapier account.
- Then you need to create a Zap that triggers on new email, and does GET request on your ngrok URL (for example 14254cc10080.ngrok.io/mailfetch)
- Customize the design of the opt-in form.
- There are numerous articles on how to design good opt-in forms. If you search “best opt-in form” and select images, you get thousands of forms as inspiration.
- In the demo version, the checkbox (I want to receive notifications on my Viber.) doesn’t affect function right now. However, you may decide to use a different approach. You can just collect phone and name for those who don’t want to receive Viber notifications.
- Connect it to the Two-Way Whatsapp Business Interaction.
You need to:
- Create a logic to decide if a message is from Viber/WhatsApp
- Reply to the right channel
- Update the opt-in form. Customers might want to receive Viber or WhatsApp only.