Receiving WhatsApp Messages From Customers
Hi there! In this tutorial, you will learn to set up a server and to create a simple webhook app, so you will be easily able to receive messages sent to your WhatsApp Business phone number.
You will need
- Your tyntec API key from your tyntec account
- Your WhatsApp Business Account (WABA) phone number that has been assigned to you by tyntec
- A mobile phone with the WhatsApp application and a working phone number
Step One: Setup a server with a webhook application
To set up a very simple receiving messages interface, you will use a Node.js application. As simple as the interface is, that will be the webhook application. We just need to create a server with 4 endpoints to catch API callbacks.
To make things even simpler, we have already created this application for you. You can find it in the GitHub repository https://github.com/tyntec/webhook-starter as the server.js file.
Now, we have the application so let’s serve it somewhere. We want to show you how to make things easy, so let’s go to serve it with Glitch, which is a simple tool for creating web apps.
1. Go to https://glitch.com/.
2. Start a new project by selecting New project > Clone from Git Repo.
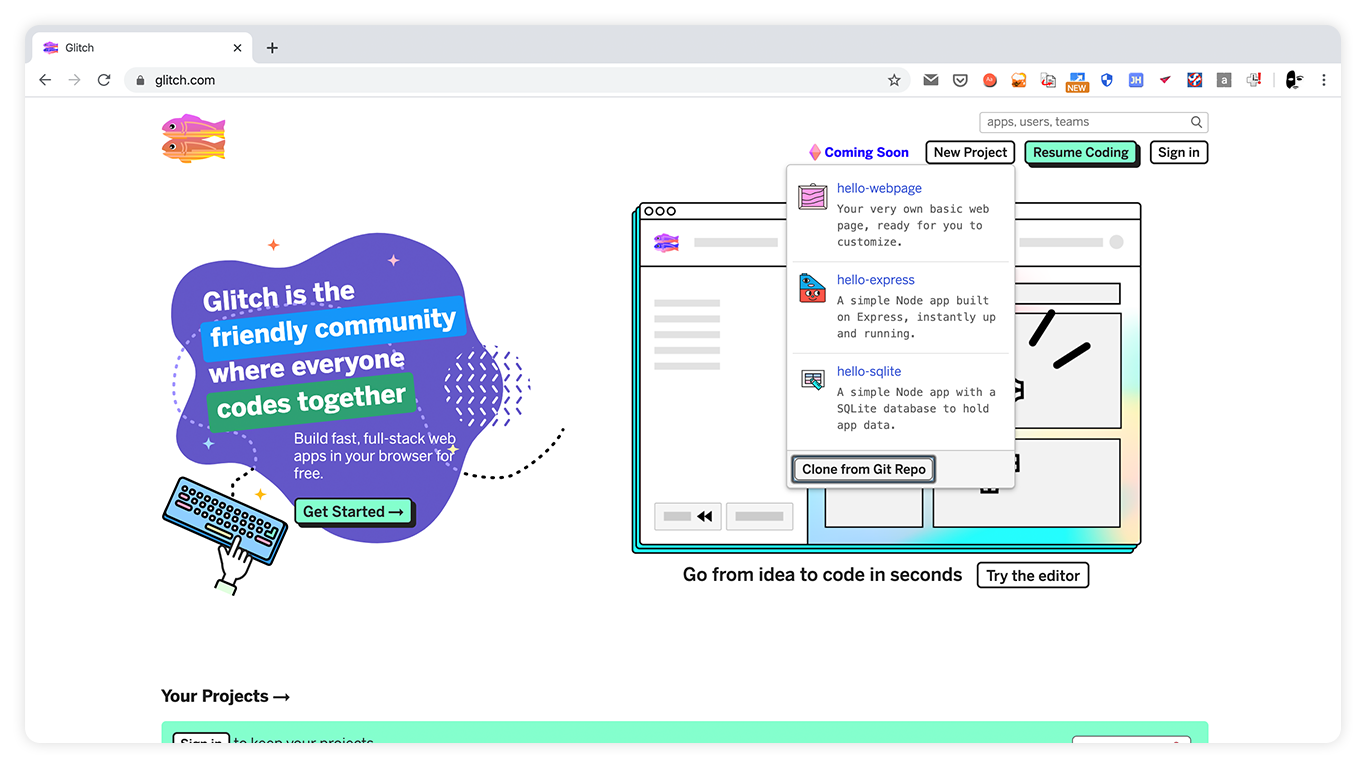
Copy and paste the cloning address of our webhook-starter repository and confirm.
Glitch opens a project and you should see the files from the repository copied to the project on your left-hand side.
3. Wonderful, you’ve successfully started your Glitch project with a webhook app!
The application is already live, you can check it out on a link you’ll find via Share > Live App > Copy.
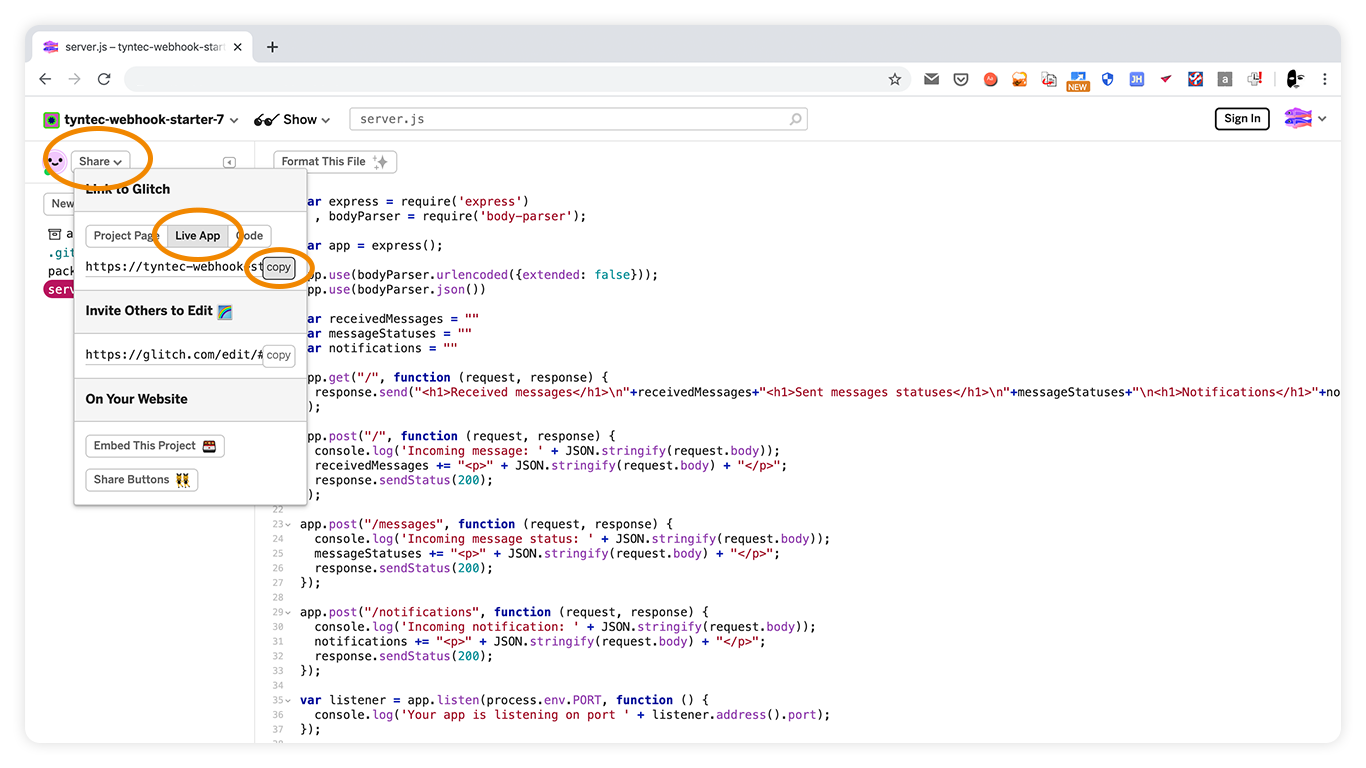
Open the link in a new tab and Voila! You have your application ready!
Step Two: Connect your application with tyntec API
When the app is ready and working, it’s now time to configure the tyntec API.
For that we are going to use the Update default application API call which is described in documentation.
It’s up to you how to call this endpoint, but we are going to show a nice example of how to use the Postman REST client and the Postman Collection that we’ve prepared.
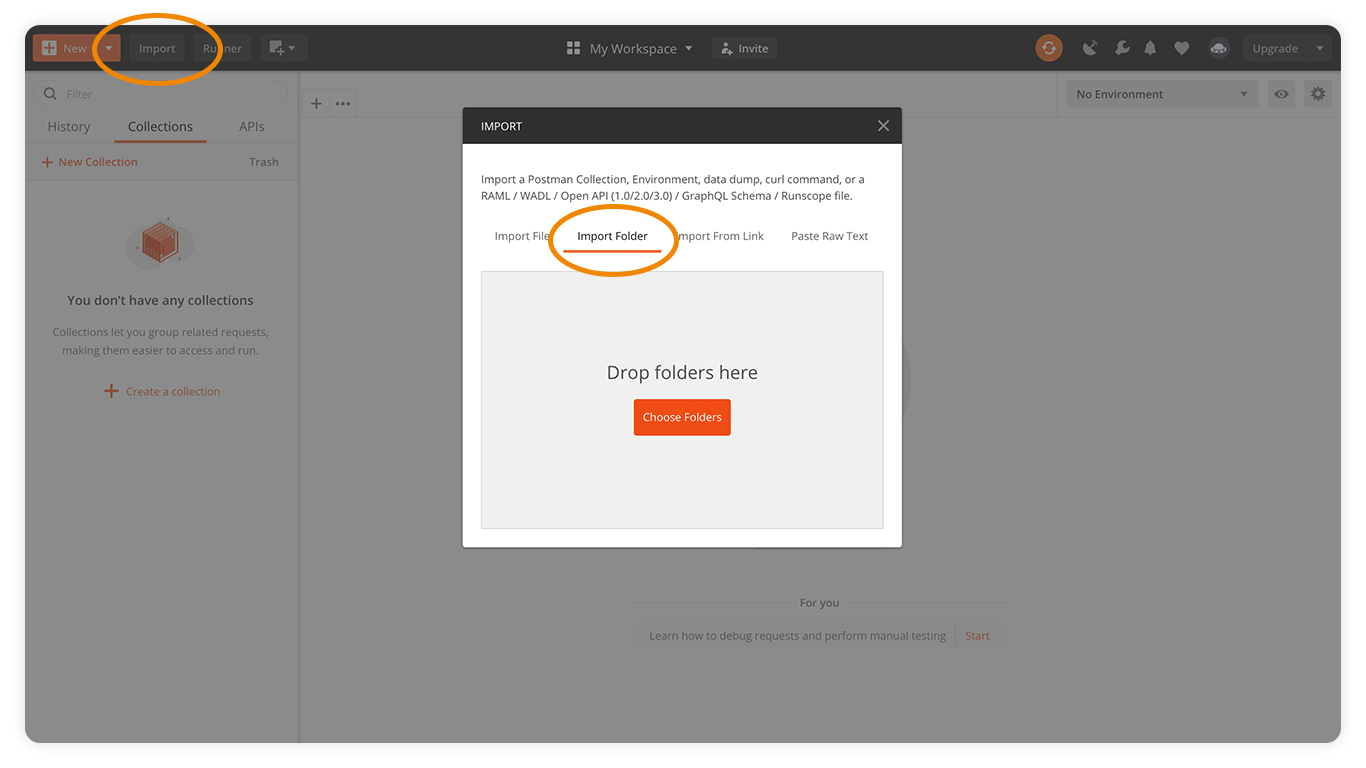
1. Download Postman and install it following its instructions.
2. Download the Postman Collection from our API collection repository.
3. Uncompress the zip file and import the whole folder to Postman via Import > Import Folder.
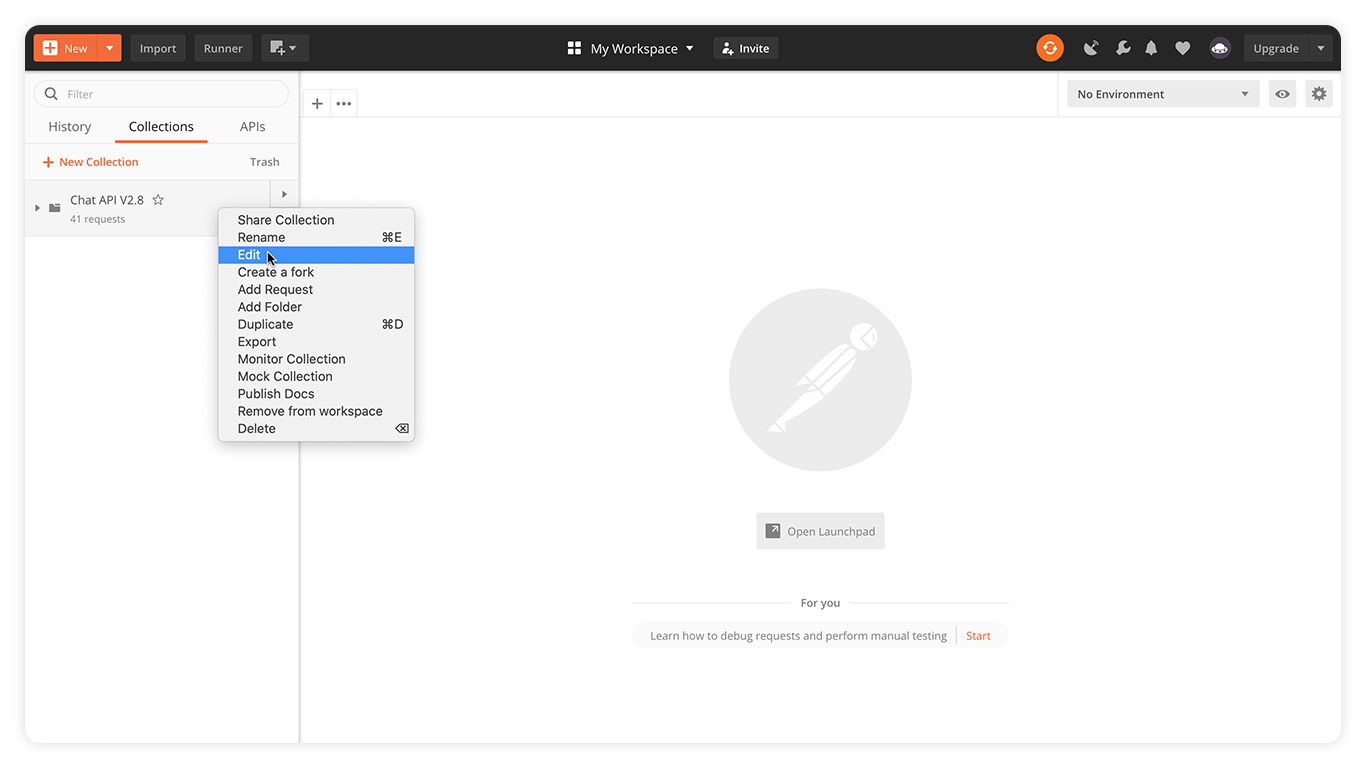
Click on the Authorization tab and notice that in Value of apikey is in two curly braces like {{apikey}}.
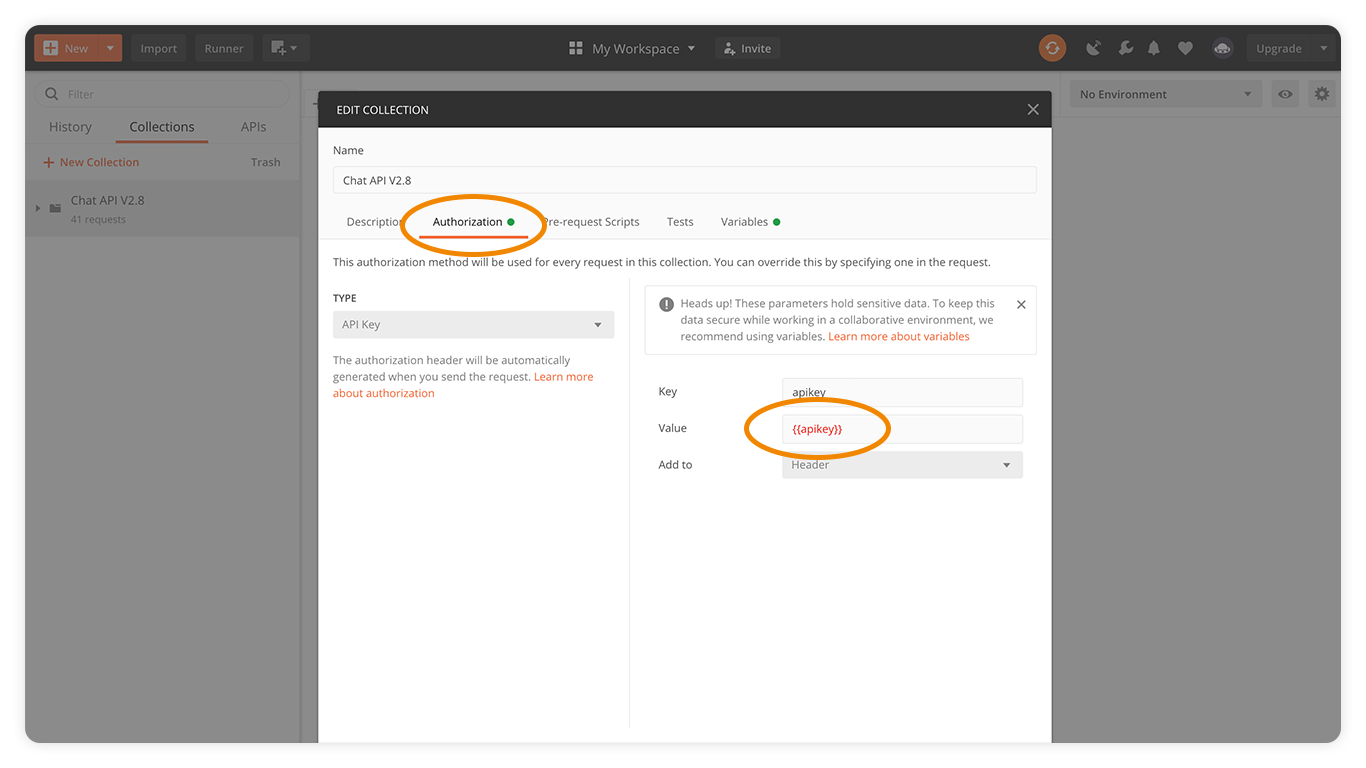
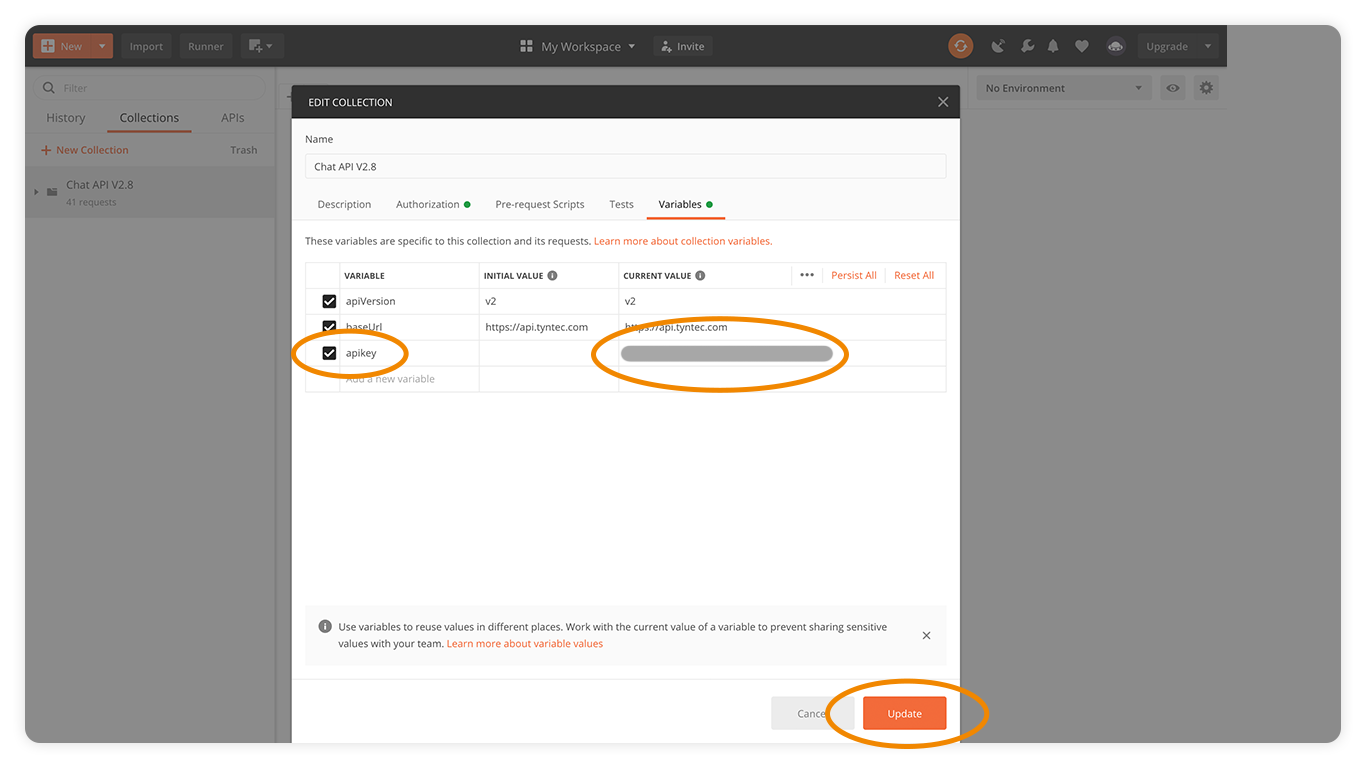
Because API Key is sensitive information, you want to keep your apikey value in a Variable. Instead of changing it here, go to the Variables tab and add a new line with Variable apikey, fill in the Current value with your tyntec API key and click Update.
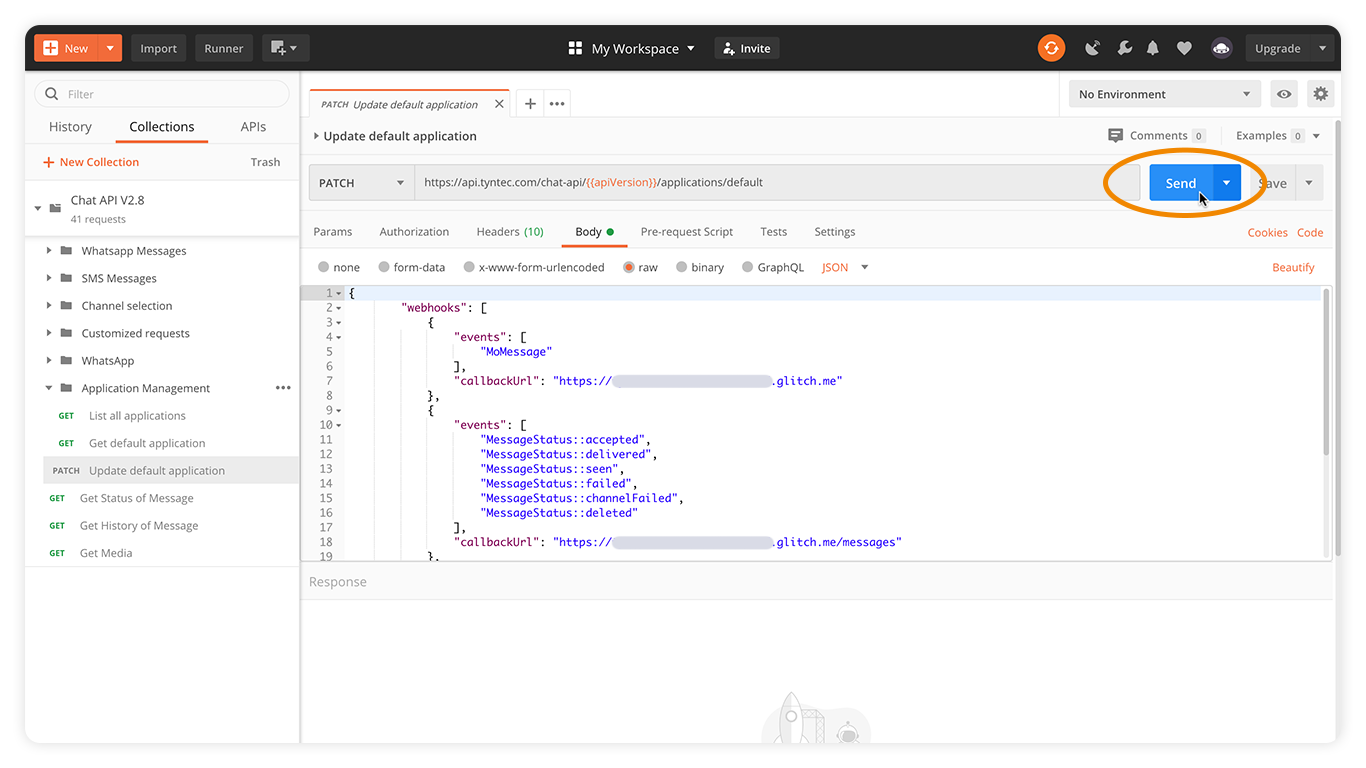
5. Now you get to call the endpoint Update default application!
Click the Chat API collection to open it, then Application Management and select the patch Update default application.
You’re going to update the body of the request, so switch to the tab Body.
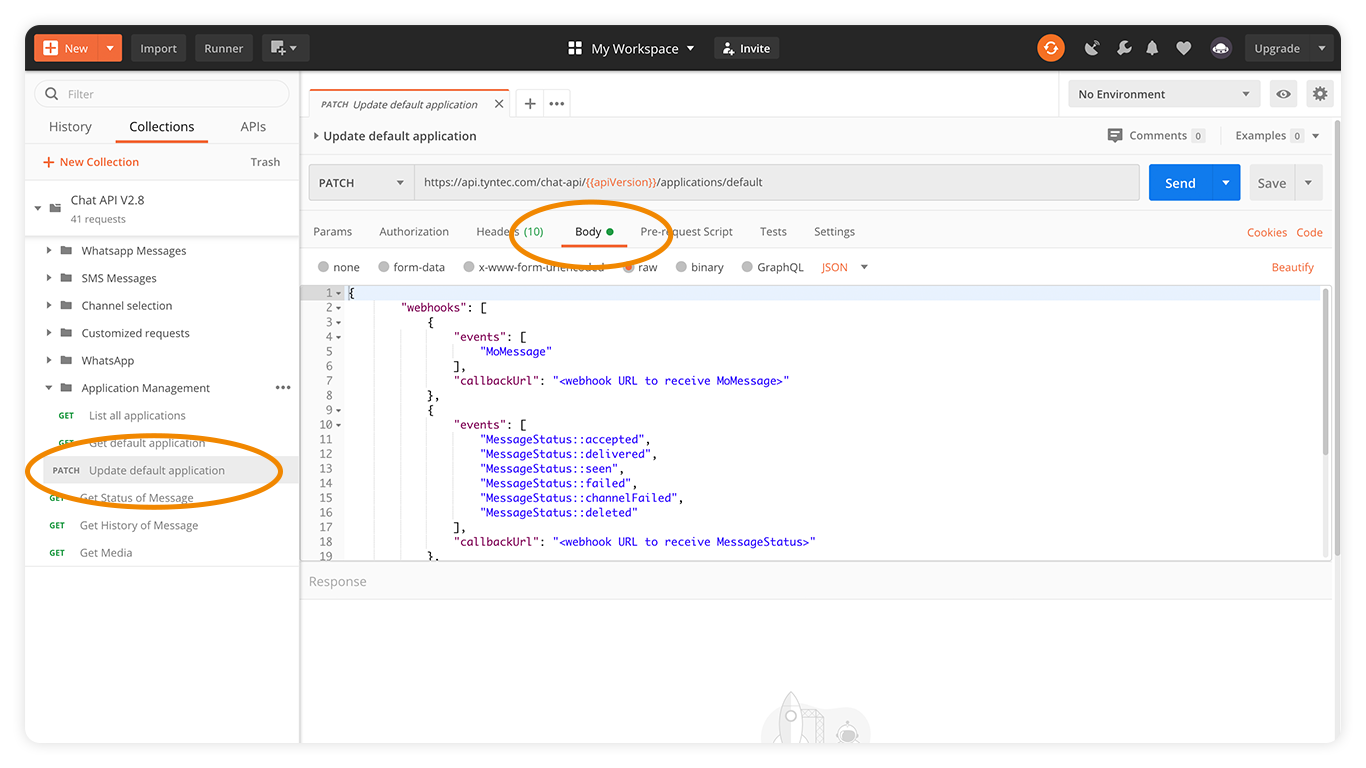
Here update the webhook’s URLs with your server’s live app URLs like this:
<div class="geshifilter"><pre class="php geshifilter-php"><span class="br0">{</span>
        <span class="st0">"webhooks"</span><span class="sy0">:</span> <span class="br0">[</span>
        	<span class="br0">{</span>
                <span class="st0">"events"</span><span class="sy0">:</span> <span class="br0">[</span>
                    <span class="st0">"MoMessage"</span>
                <span class="br0">]</span><span class="sy0">,</span>
                <span class="st0">"callbackUrl"</span><span class="sy0">:</span> <span class="st0">"https://YOUR_APP_NAME.glitch.me"</span>
            <span class="br0">}</span><span class="sy0">,</span>
            <span class="br0">{</span>
                <span class="st0">"events"</span><span class="sy0">:</span> <span class="br0">[</span>
                    <span class="st0">"MessageStatus::accepted"</span><span class="sy0">,</span>
                    <span class="st0">"MessageStatus::delivered"</span><span class="sy0">,</span>
                    <span class="st0">"MessageStatus::seen"</span><span class="sy0">,</span>
                    <span class="st0">"MessageStatus::failed"</span><span class="sy0">,</span>
                    <span class="st0">"MessageStatus::channelFailed"</span><span class="sy0">,</span>
                    <span class="st0">"MessageStatus::deleted"</span>
                <span class="br0">]</span><span class="sy0">,</span>
                <span class="st0">"callbackUrl"</span><span class="sy0">:</span> <span class="st0">"https://YOUR_APP_NAME.glitch.me/messages"</span>
            <span class="br0">}</span><span class="sy0">,</span>
            <span class="br0">{</span>
                <span class="st0">"events"</span><span class="sy0">:</span> <span class="br0">[</span>
                    <span class="st0">"WhatsAppGroupEvent::userJoined"</span><span class="sy0">,</span>
                    <span class="st0">"WhatsAppGroupEvent::userLeft"</span><span class="sy0">,</span>
                    <span class="st0">"WhatsAppGroupEvent::subjectChanged"</span><span class="sy0">,</span>
                    <span class="st0">"WhatsAppGroupEvent::descriptionChanged"</span>
                <span class="br0">]</span><span class="sy0">,</span>
                <span class="st0">"callbackUrl"</span><span class="sy0">:</span> <span class="st0">"https://YOUR_APP_NAME.glitch.me/notifications"</span>
            <span class="br0">}</span>
        <span class="br0">]</span>
    <span class="br0">}</span></pre></div>
See the overview of event types for their complete list and meaning. The event that is important in this case, is the MoMessage event.
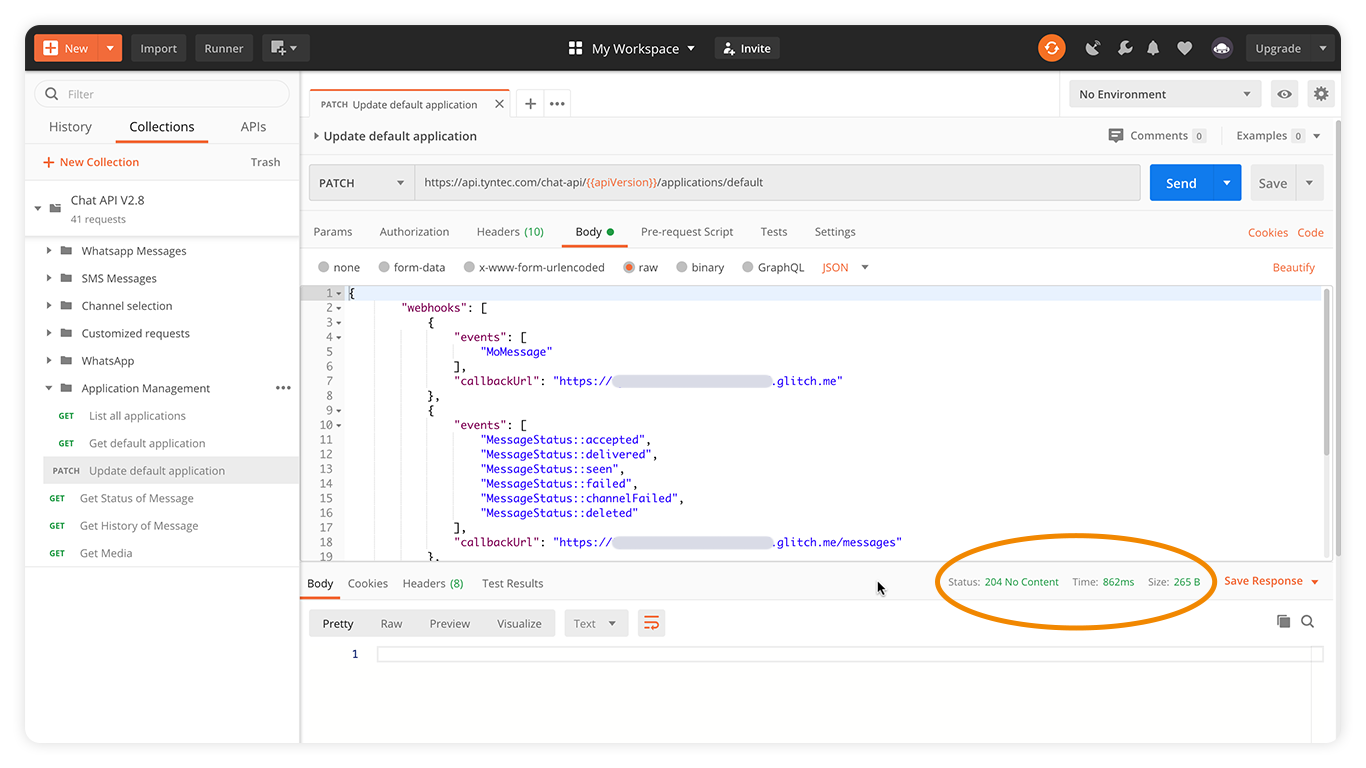
Now send the update request with the Send button.
If the request was successful, you should get the “204 No content” response status.
6. Ok, let’s check if everything is set OK by calling the endpoint Get default application.
The response body should have the addresses you’ve set.
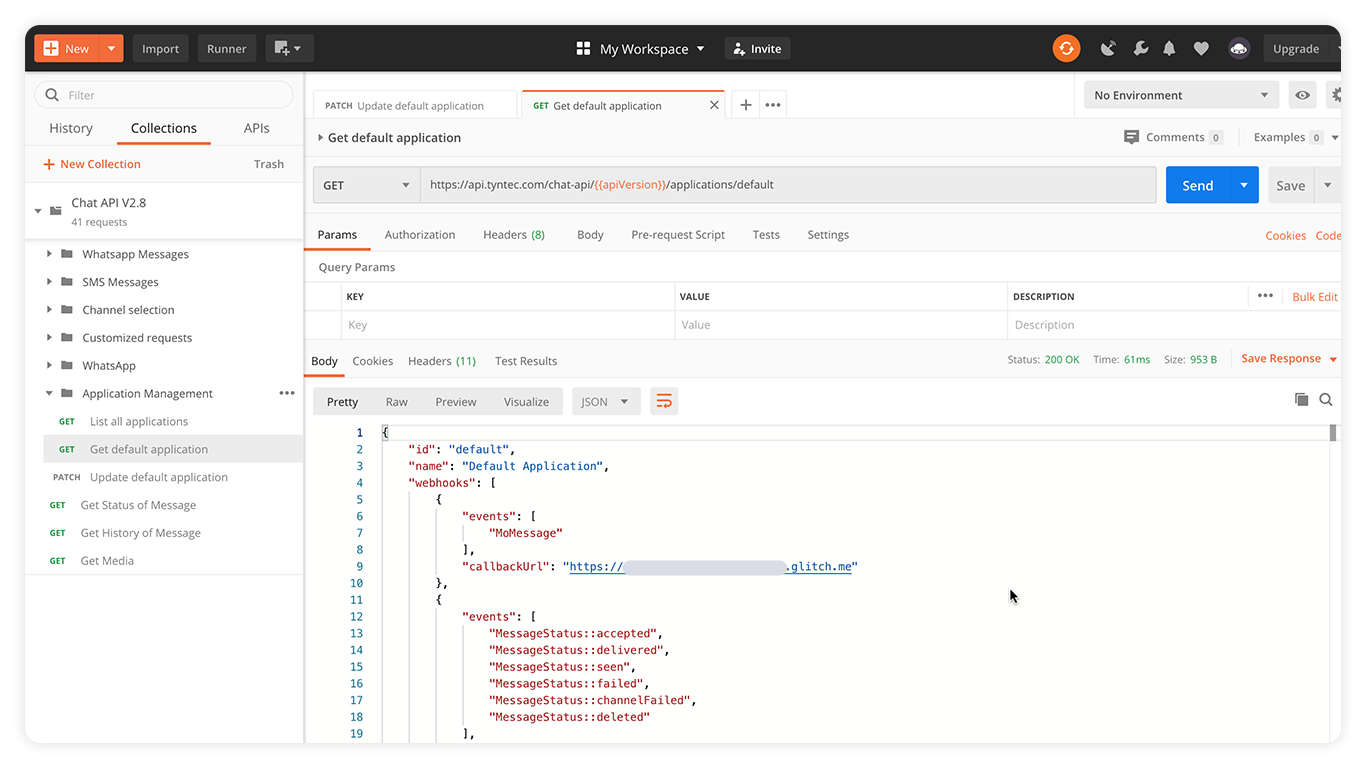
Great! Everything should be ready now.
7. So, try it out! Take your mobile phone and write a WhatsApp message to your WABA number.
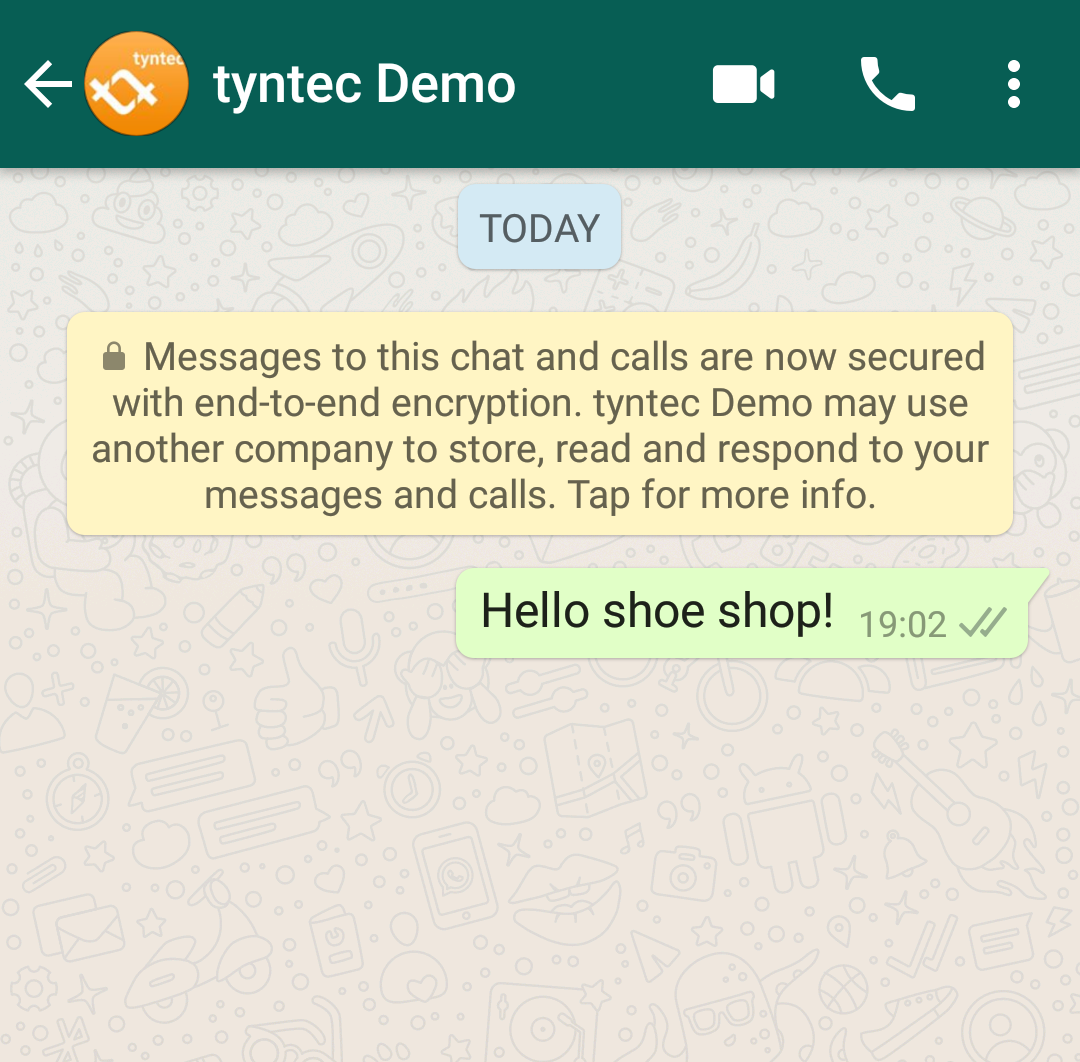
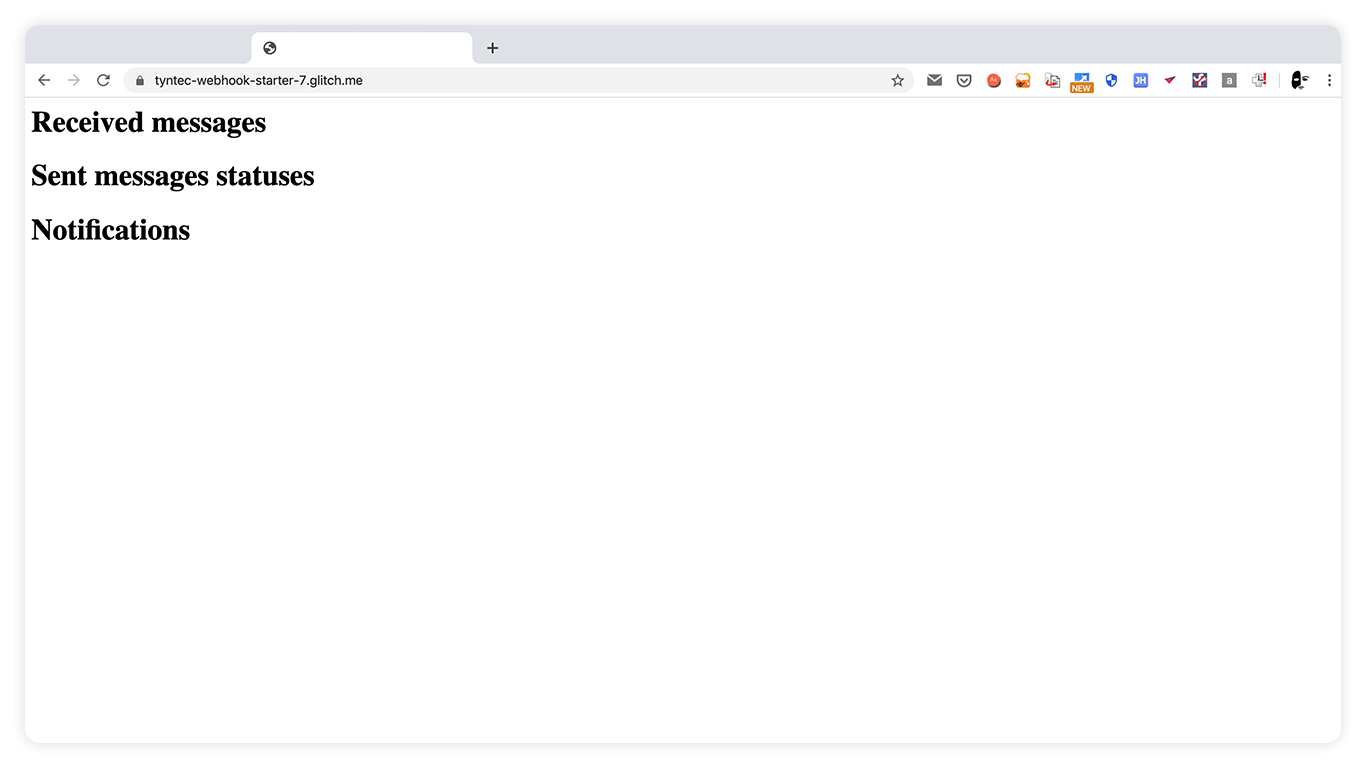
Go to your Glitch live app site that you made previously, refresh the page and Voila!
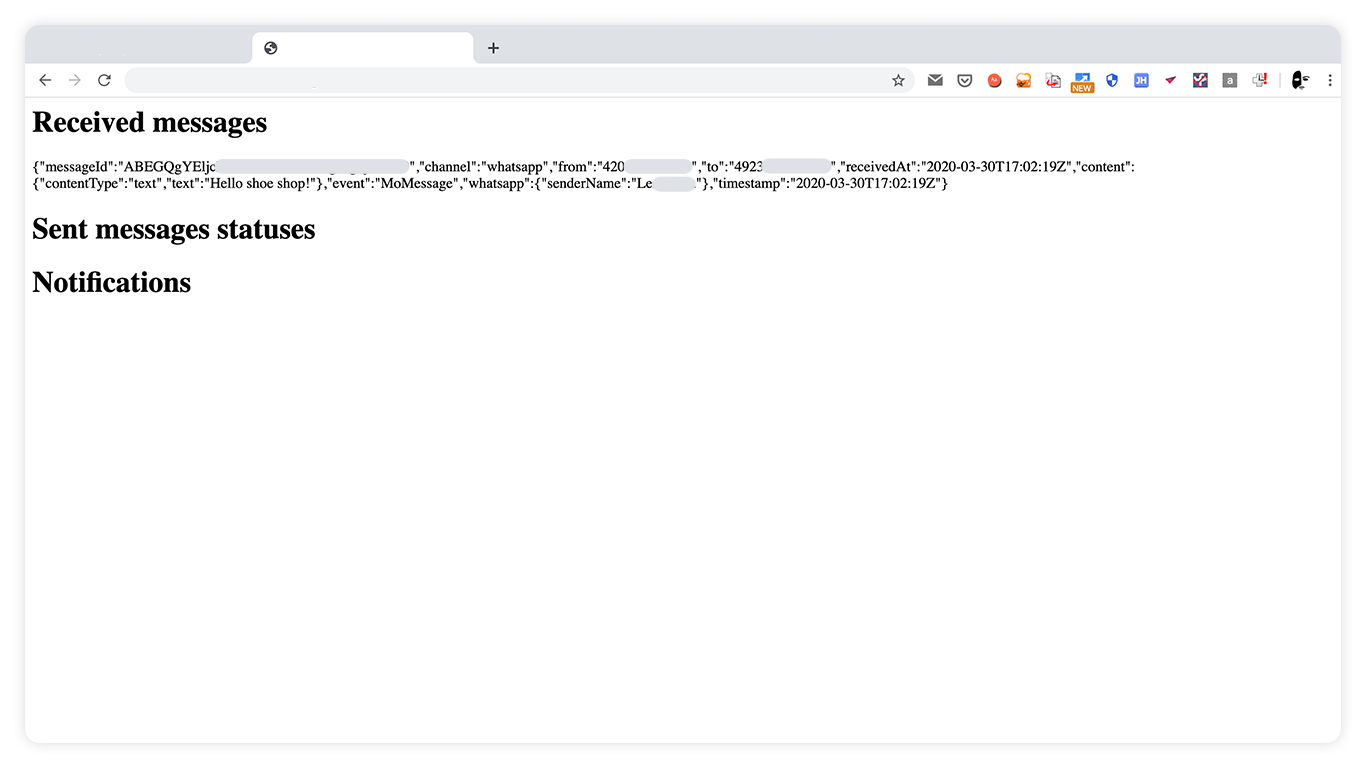
You can see the POST request from tyntec logged in your live app. tyntec has made the request based on the MoMessage event and the request body is described in our reference.
MORE TEST?: Try to call Send WhatsApp Text Message endpoint from your collection and check the status of this message in your live app.
Hint: You have to add new variables: toPhoneNumber with your personal WhatsApp number and whatsappPhoneNumber with your WhatsApp Business number to your collection.
Next Steps
You may want to continue here: