Viber Business | Integration with Microsoft Dynamics 365

Hi there!
Would you like to enrich your Microsoft Dynamics 365 communication capabilities with Viber messaging?
In this tutorial, you will learn how to integrate Microsoft Dynamics with Viber using tyntec Viber Business connector and Power Automate Flow. This integration will allow you to send custom Viber messages from your Microsoft Dynamics environment.
You will need
-
- Your tyntec API key from your tyntec account
-
- Your Viber Service ID that has been assigned to you by tyntec
-
- A mobile phone with Viber for testing
-
- A Microsoft Dynamics 365 account with the Marketing app installed
-
- A Microsoft Power Automate Subscription license with your Dynamics Environment
-
- A Contact in your Microsoft Dynamics with the mobile number set to your testing Viber phone number
Step One: Create your Flow
To quickly start with Power Automate and the tyntec Viber Business connector, you will build a sample Flow. Let’s look at what it does.
The sample Flow works in your Microsoft Dynamics background and automatically listens to a creation of a new appointment (the Trigger). Once triggered, it calls the Action Send Viber Text Message to the assigned Contact in the Trigger.
1. Open your Power Automate.
2. In the left dropdown menu, click the Create button.
3. From all possible Flow types, select Automated—from blank.
Automated flows run when an event triggers, Instant flows on a manual trigger, and Scheduled on a given time condition.
4. In the design window pop-up, use the search function to find the event When a row is added, modified or deleted from Microsoft Dataverse. Then click the Create button.
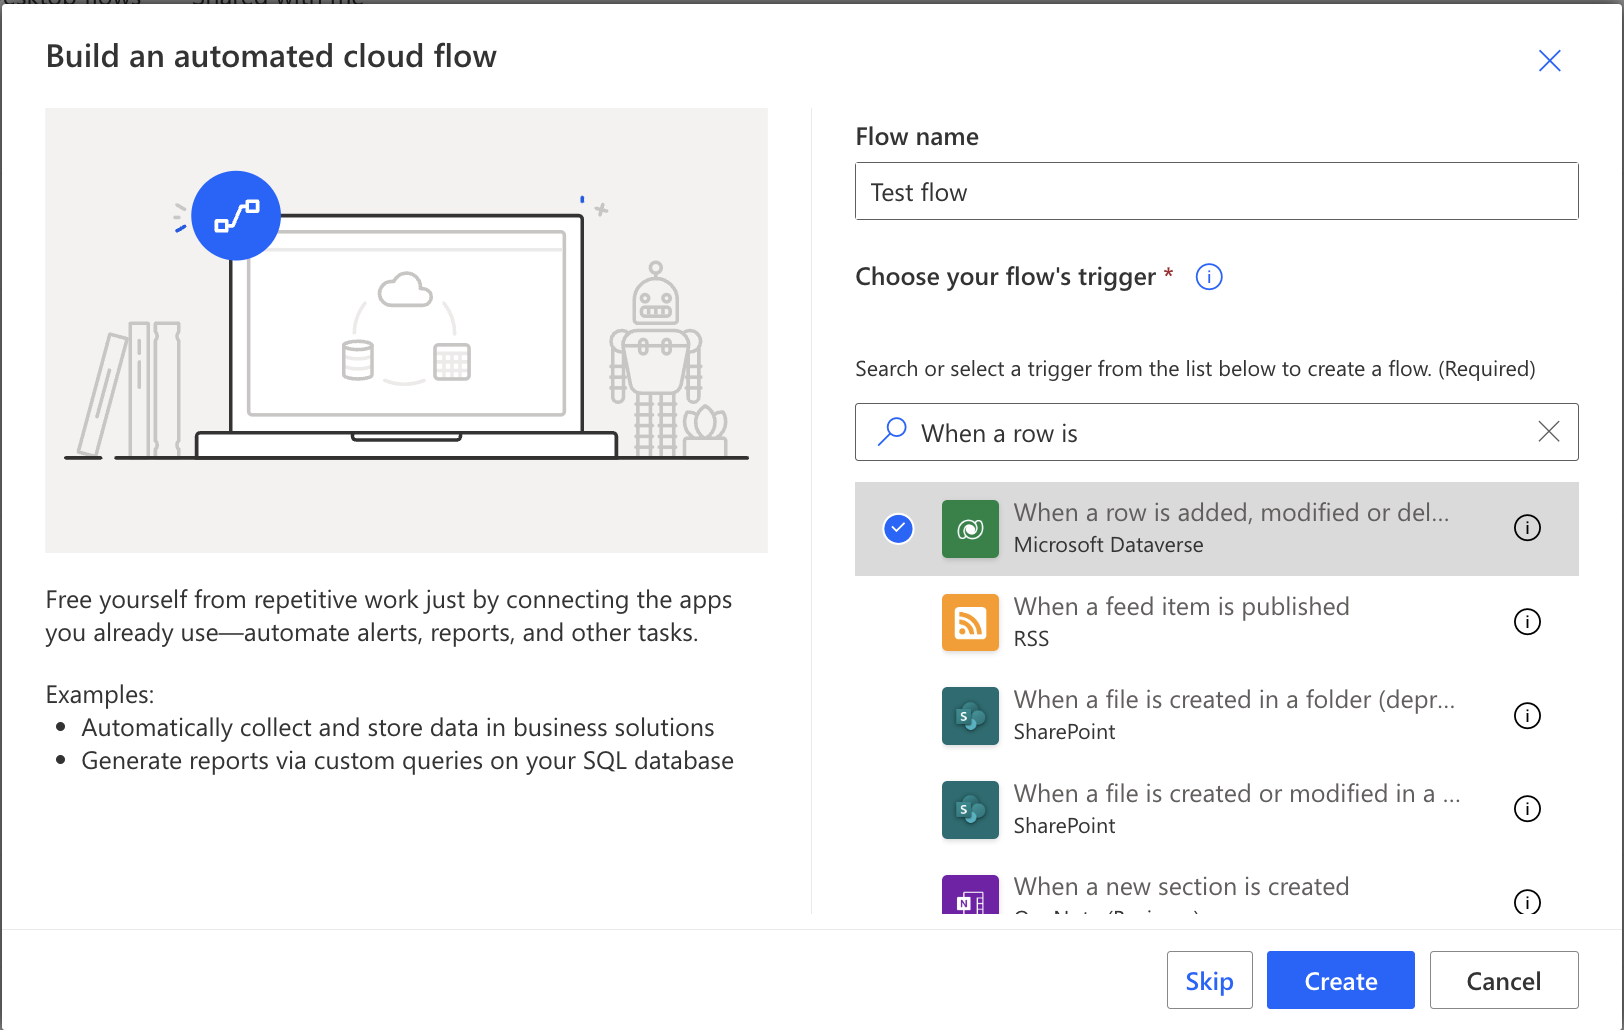
You are now in the UI Flow designer that can add Actions to your Flow and chain them into algorithms. The designer automatically creates When a row is added, modified or deleted trigger step.
5. In the When a row is added, modified or deleted trigger step, set the Change type to Added, the table name to Appointments, and scope to Organization. Your Trigger is now listening for any new appointments.
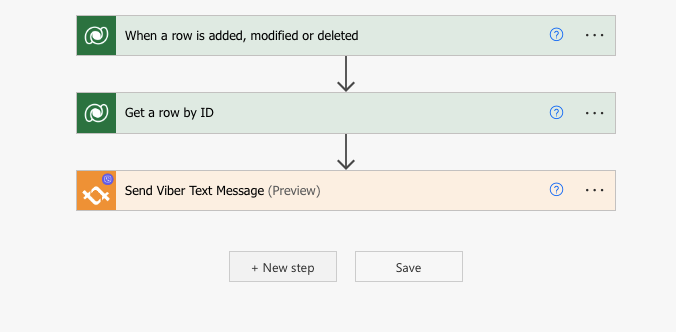
6. Now is the time to create a new action. Click on the + New step. In the step selection, search for Get a row by ID.
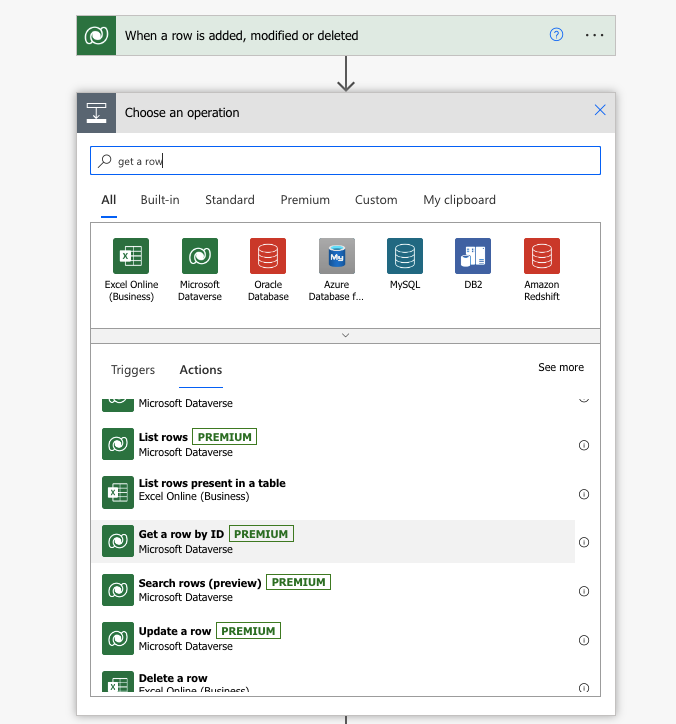
In the Get a row by ID action step, set the Table Name to Contacts and Row ID to Regarding (Value) dynamic content.
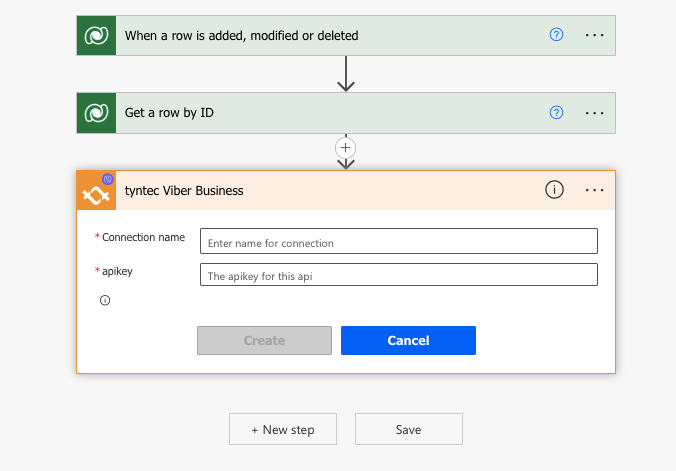
7. Click on the + New step. In the step selection, search for tyntec Viber Business and select the Send Viber Text Message action.
8. Tyntec Connector will automatically try to create a connection. Name your Connection and set your apikey to your tyntec API key.
Afterward, the Send Viber Text Message action updates itself to show you different fields.
9. Set the to field to Mobile Phone dynamic content and the from field to your Viber Service ID.
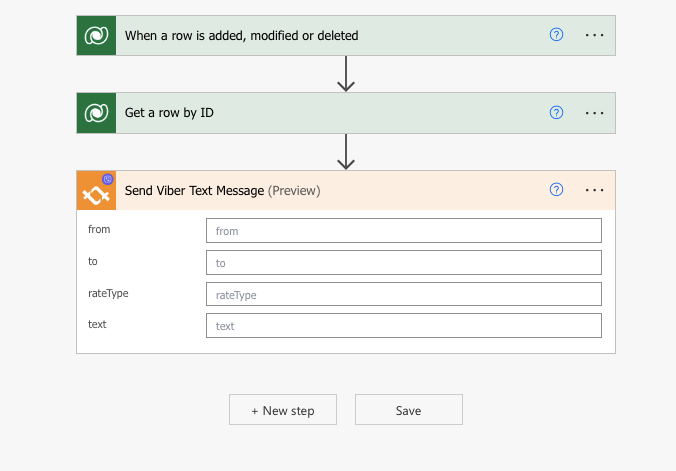
10. The components text specifies the content of your Viber message. Set its value to your desired text.
You can use dynamic content to autofill data. For example, typing Dear and then adding the First Name dynamic content automatically greets all the assigned Contacts.
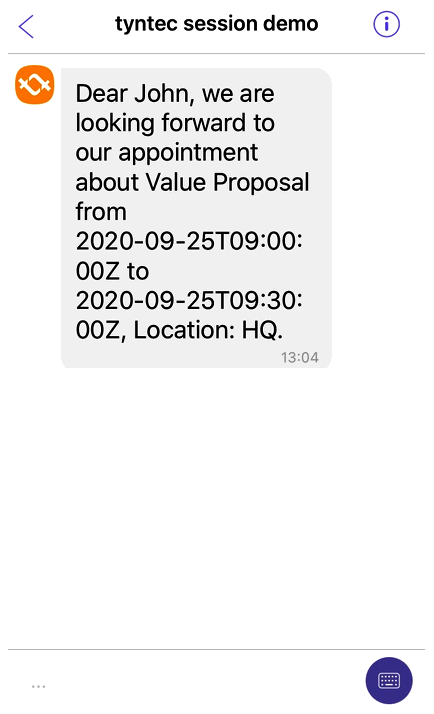
TIP: You can add more dynamic content values. Using something like Dear First Name, we are looking forward to our appointment about Description, from Start Time to End Time, Location: Location, will create a good informational message.
11. Click Save.
Your Flow will now automatically run when you create a new appointment.
Step Two: Test your Flow
Now the most exciting part! Let’s try triggering your Flow.
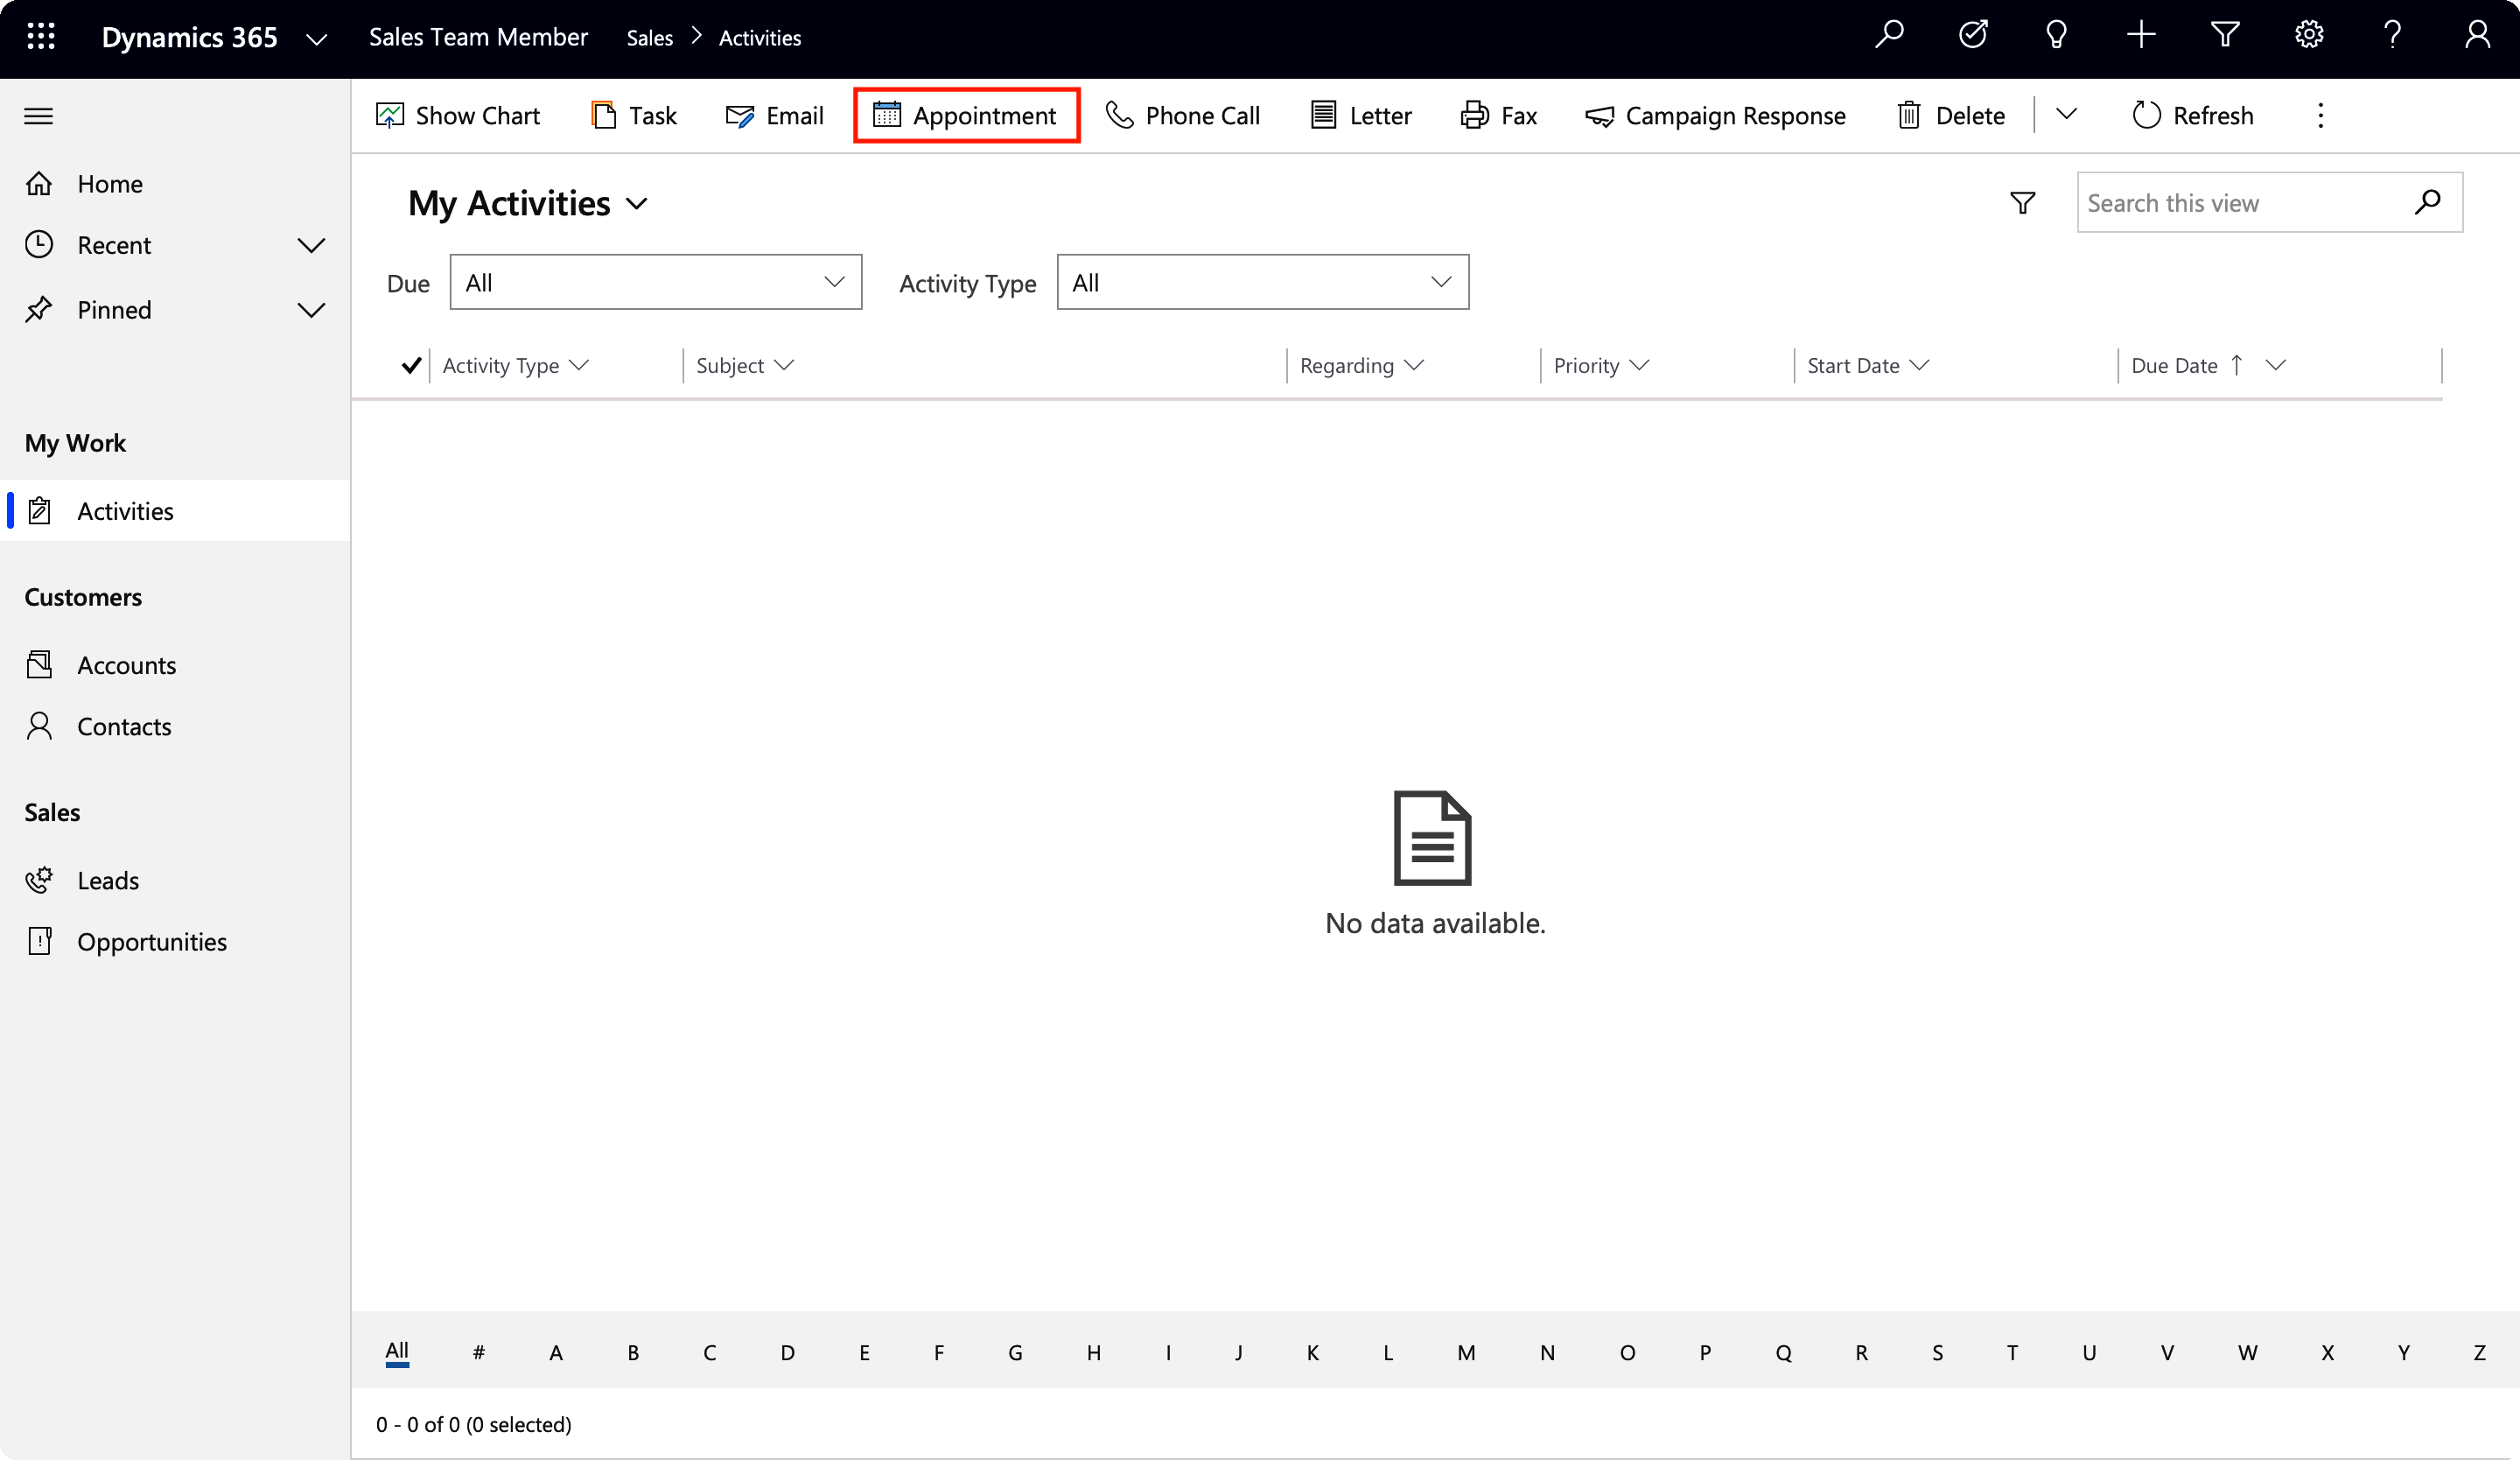
1. Go to your Dynamics 365 and select either your Marketing instance or Sales Team Member instance.
2. In Sales, click on Activities in the left dropdown menu. Then click on Appointment.
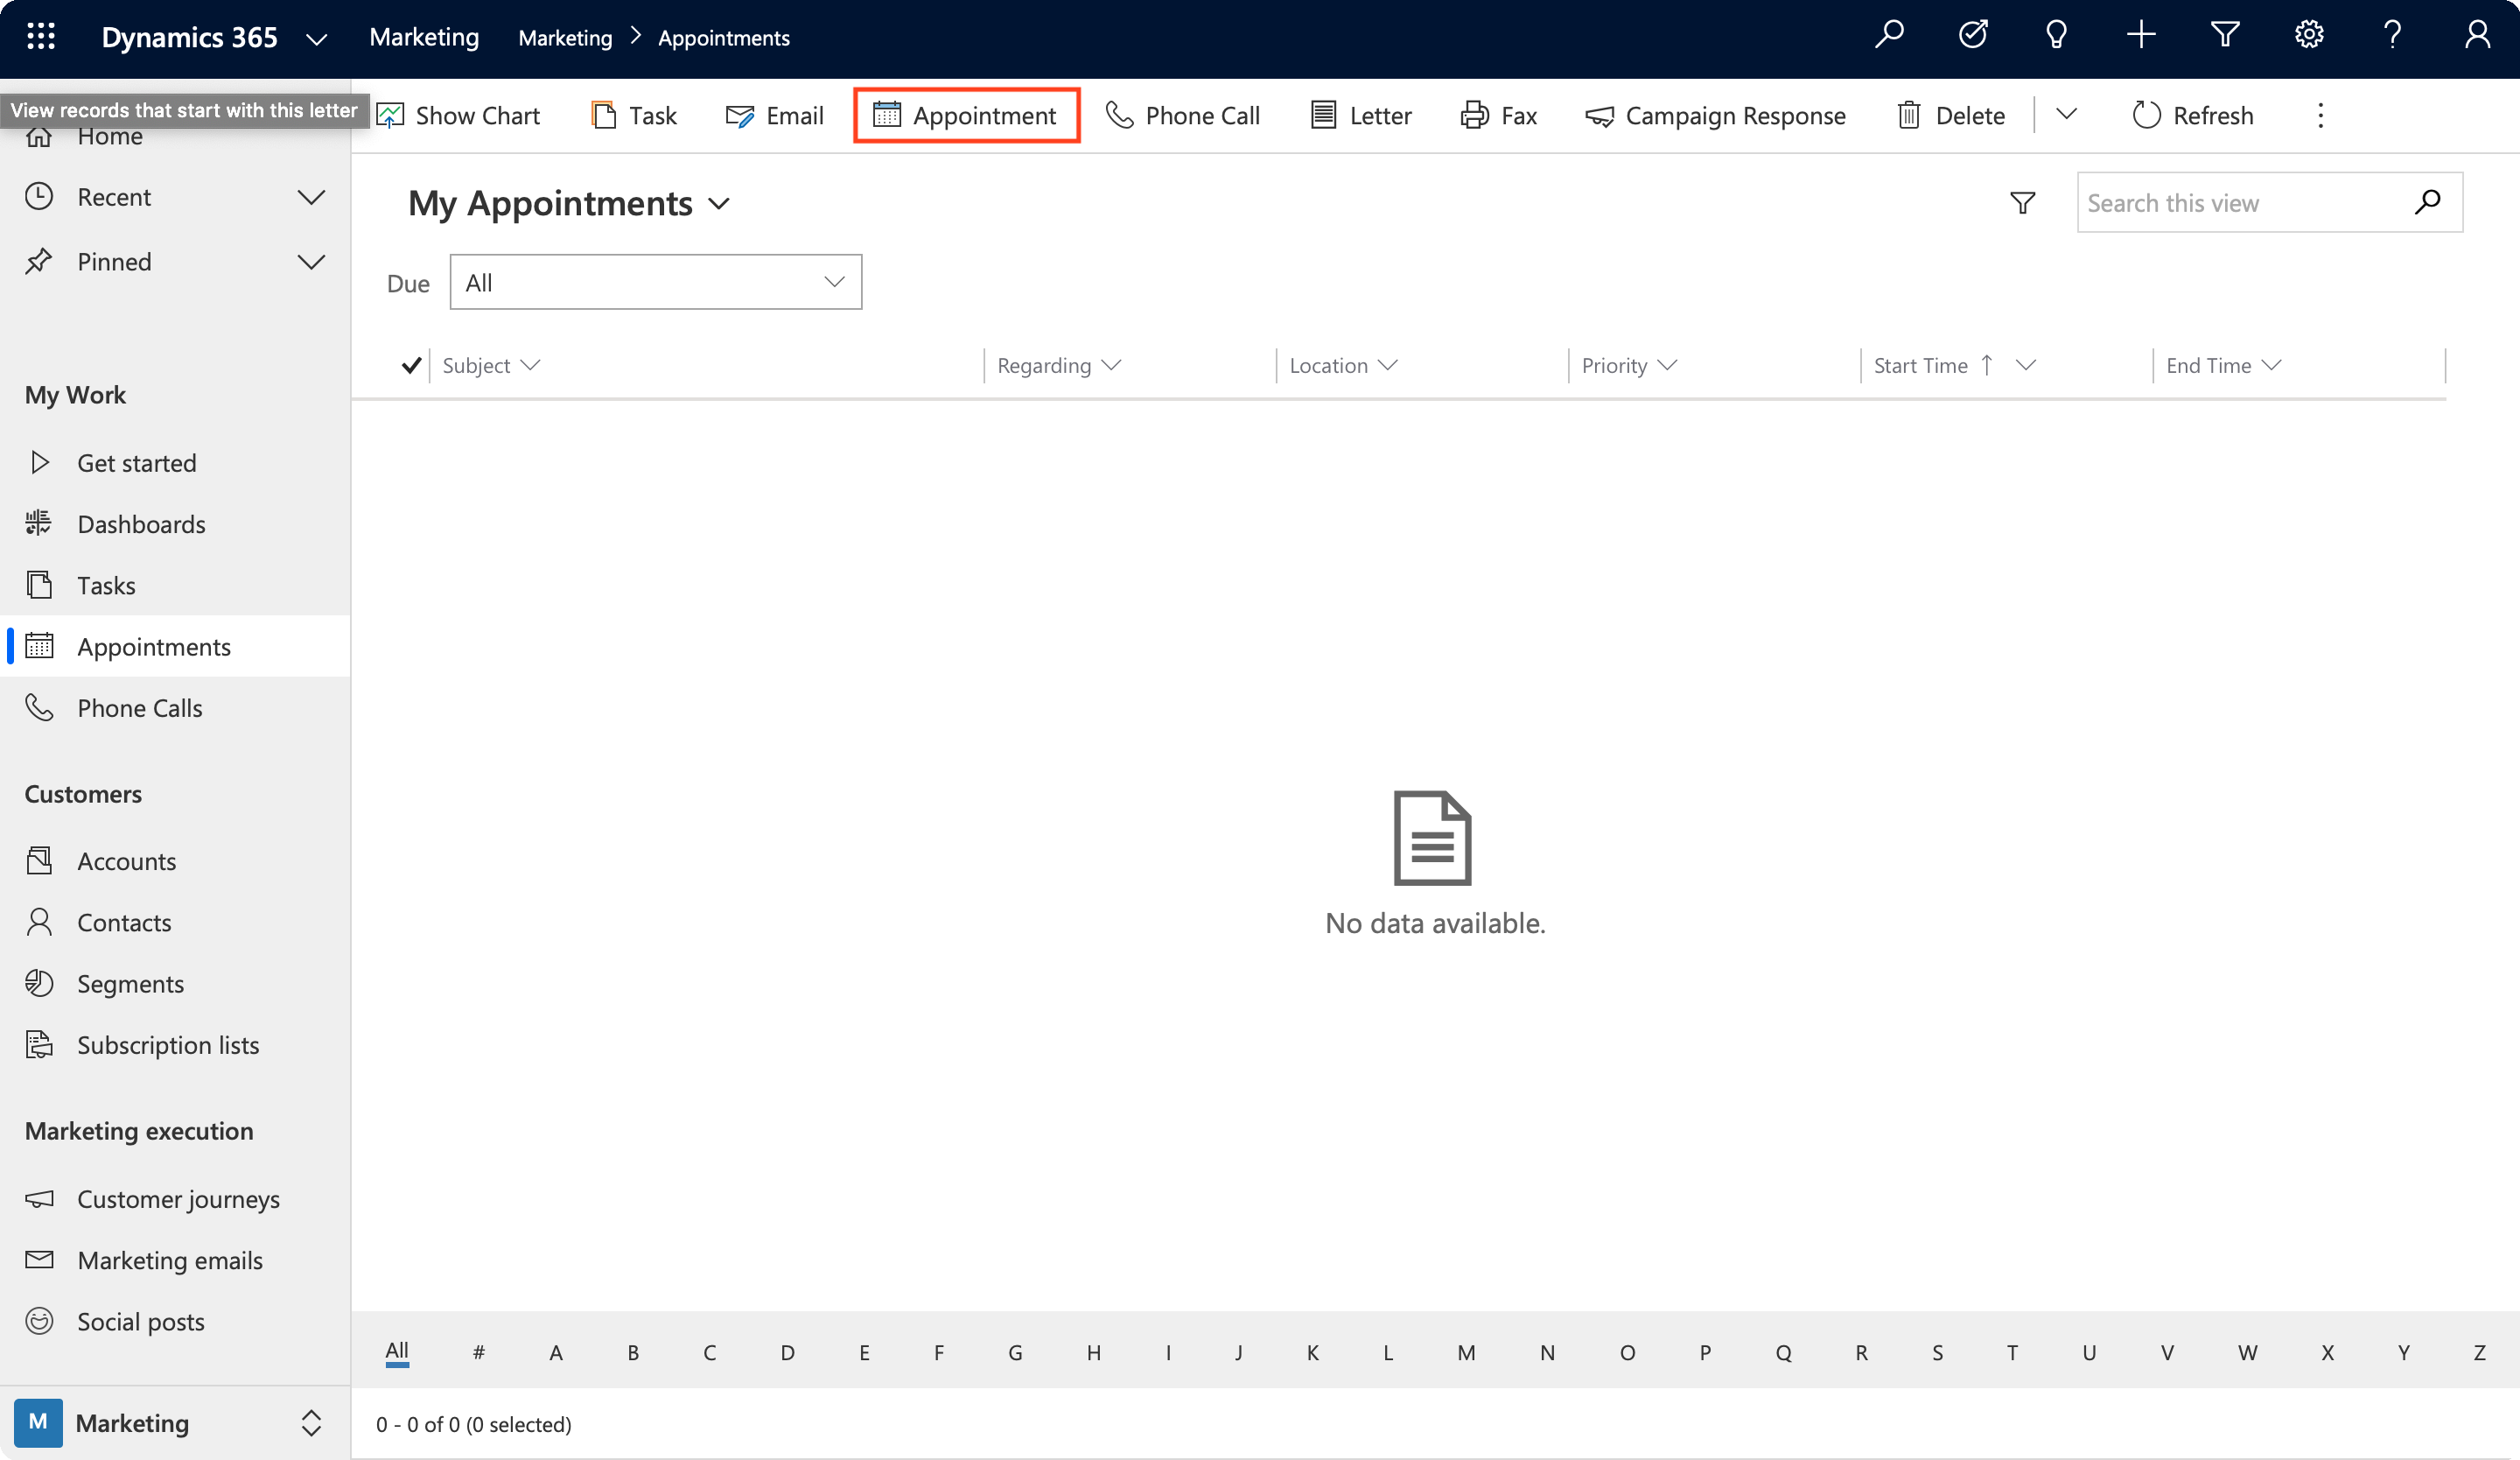
3. In Marketing, click on Appointments. Then click on Appointment.
 Appointments” >
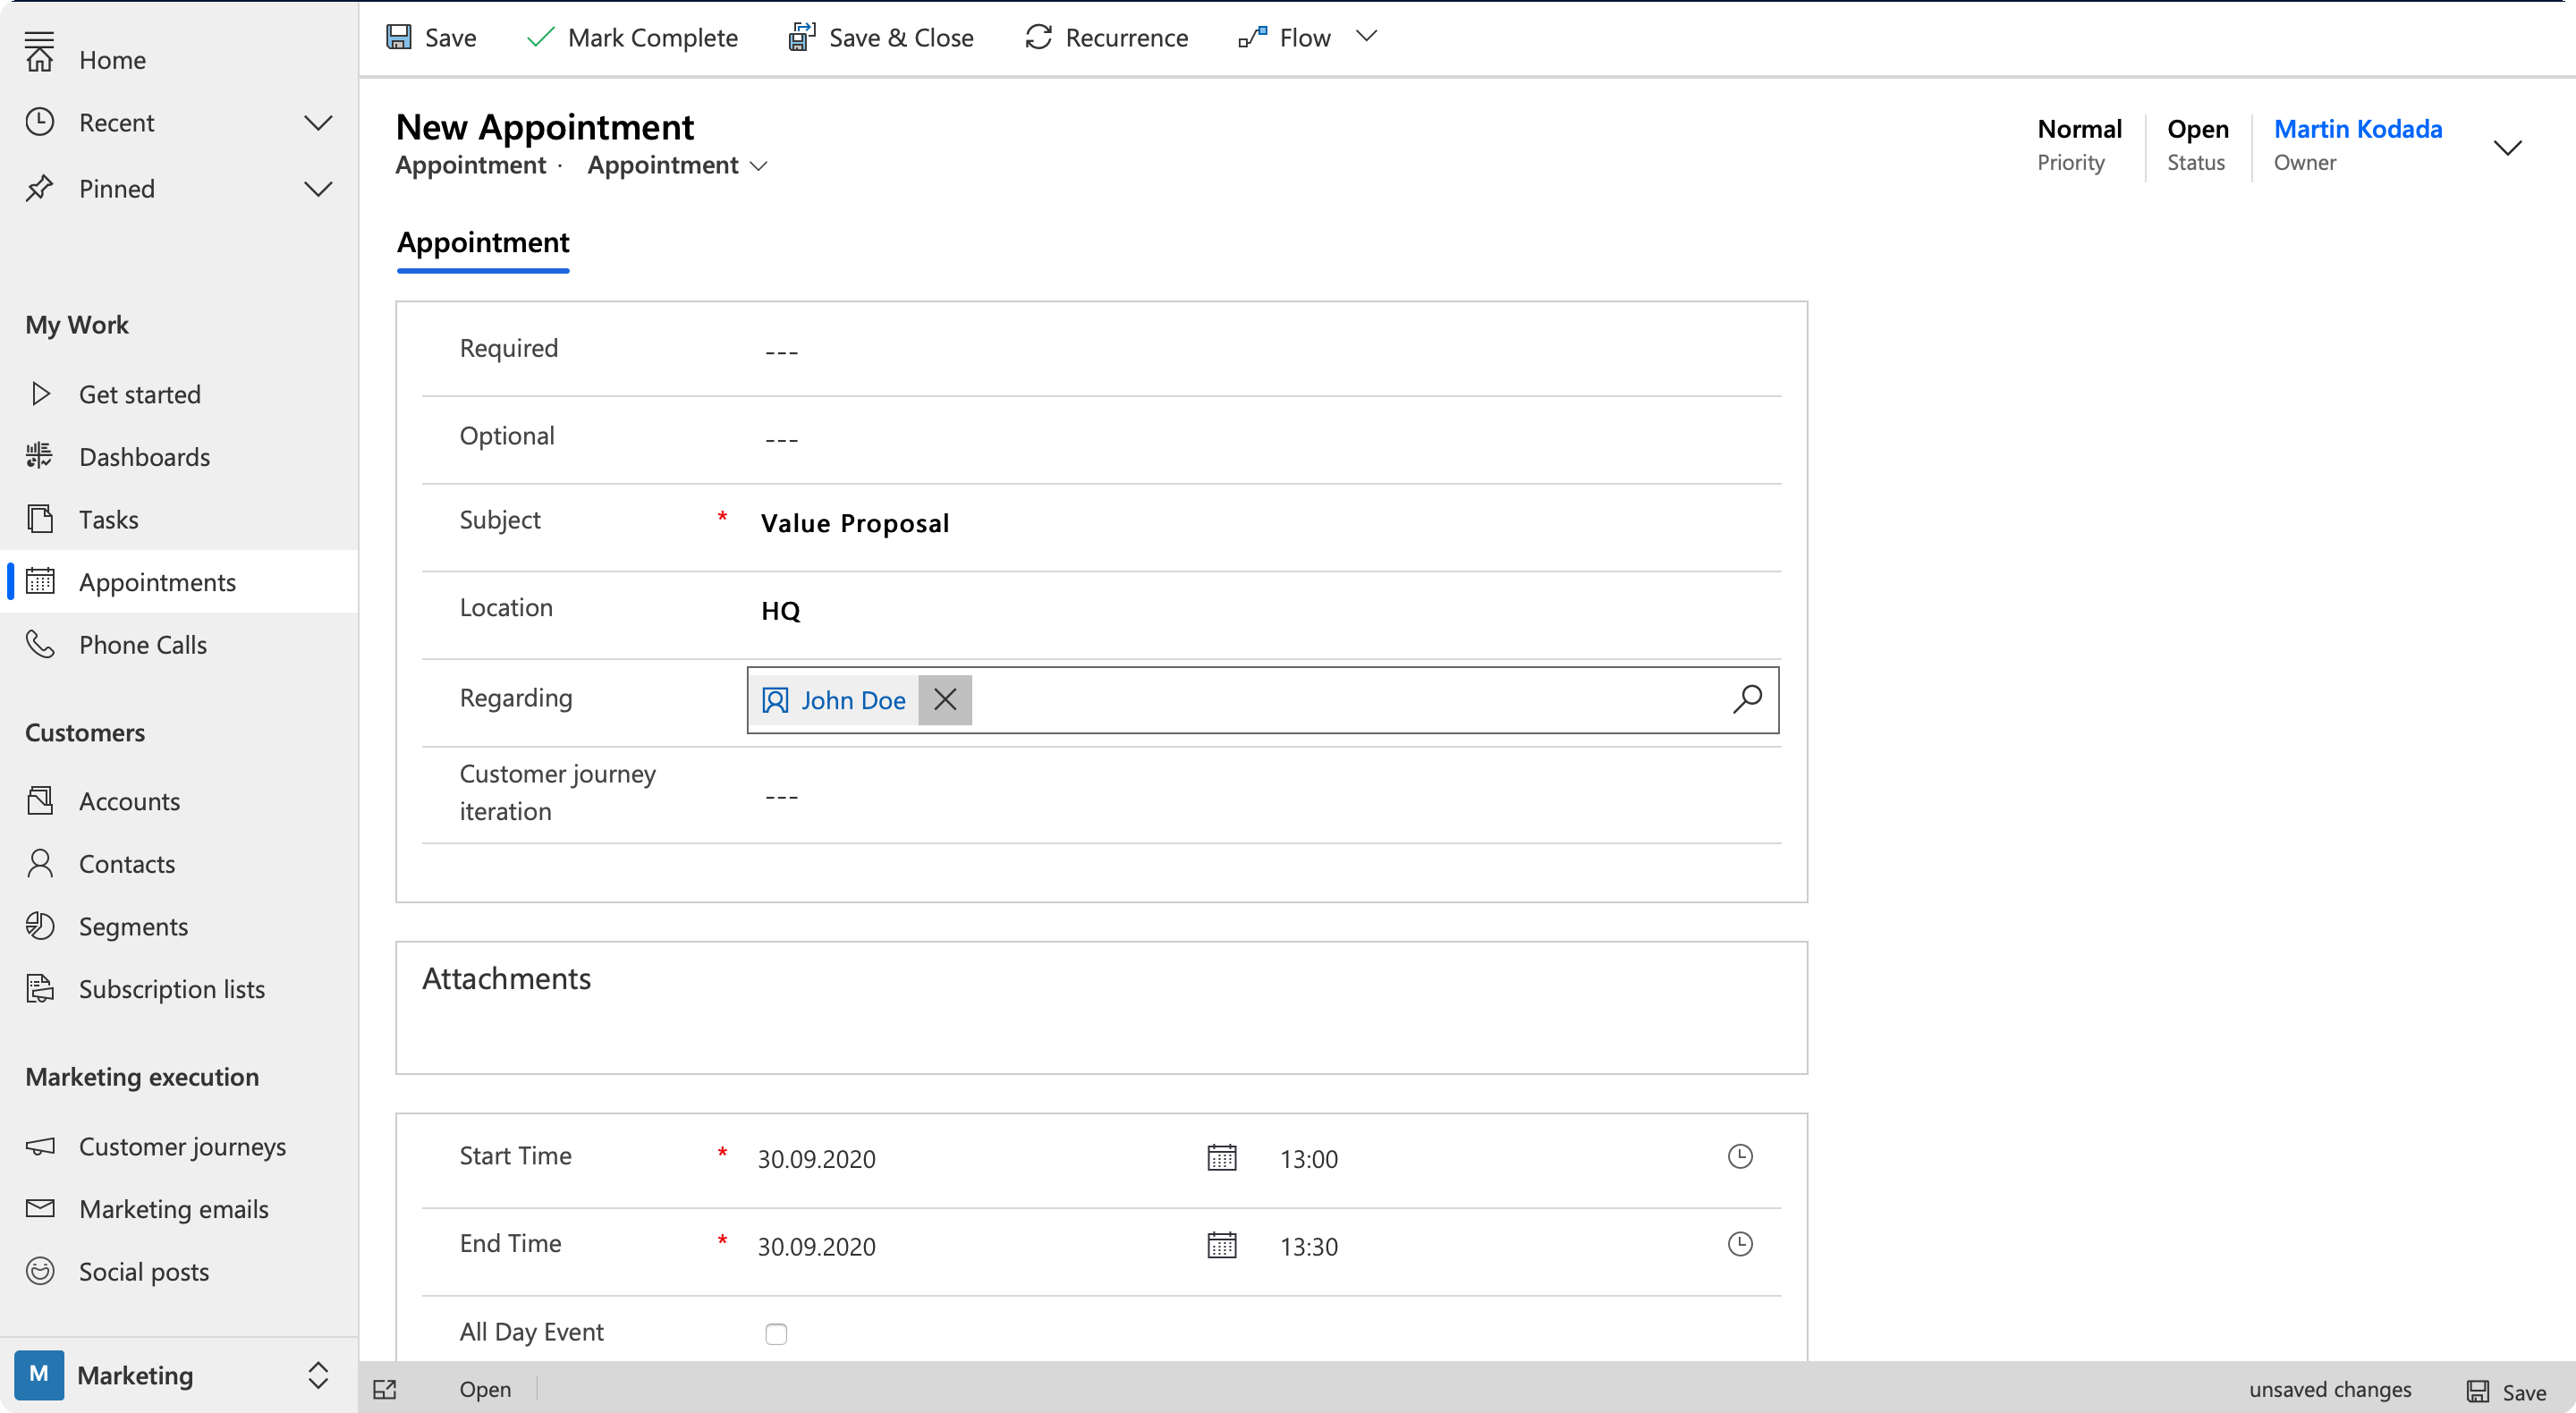
4. Set the Subject (What is this meeting about?), the Location, add contact into Regarding and adjust the time of your appointment. When you are happy with the details, click Save.
5. As soon as you click Save, the Flow starts.
Look at your testing phone and you will see your Viber message.
Congratulations on completing your Flow!
More?
The main power of the tyntec Viber Business connector is that you can use it alongside any connector (Salesforce, for example) that is in Power Automate. Using the Microsoft Dataverse you can access any entity within your Dynamics environment.
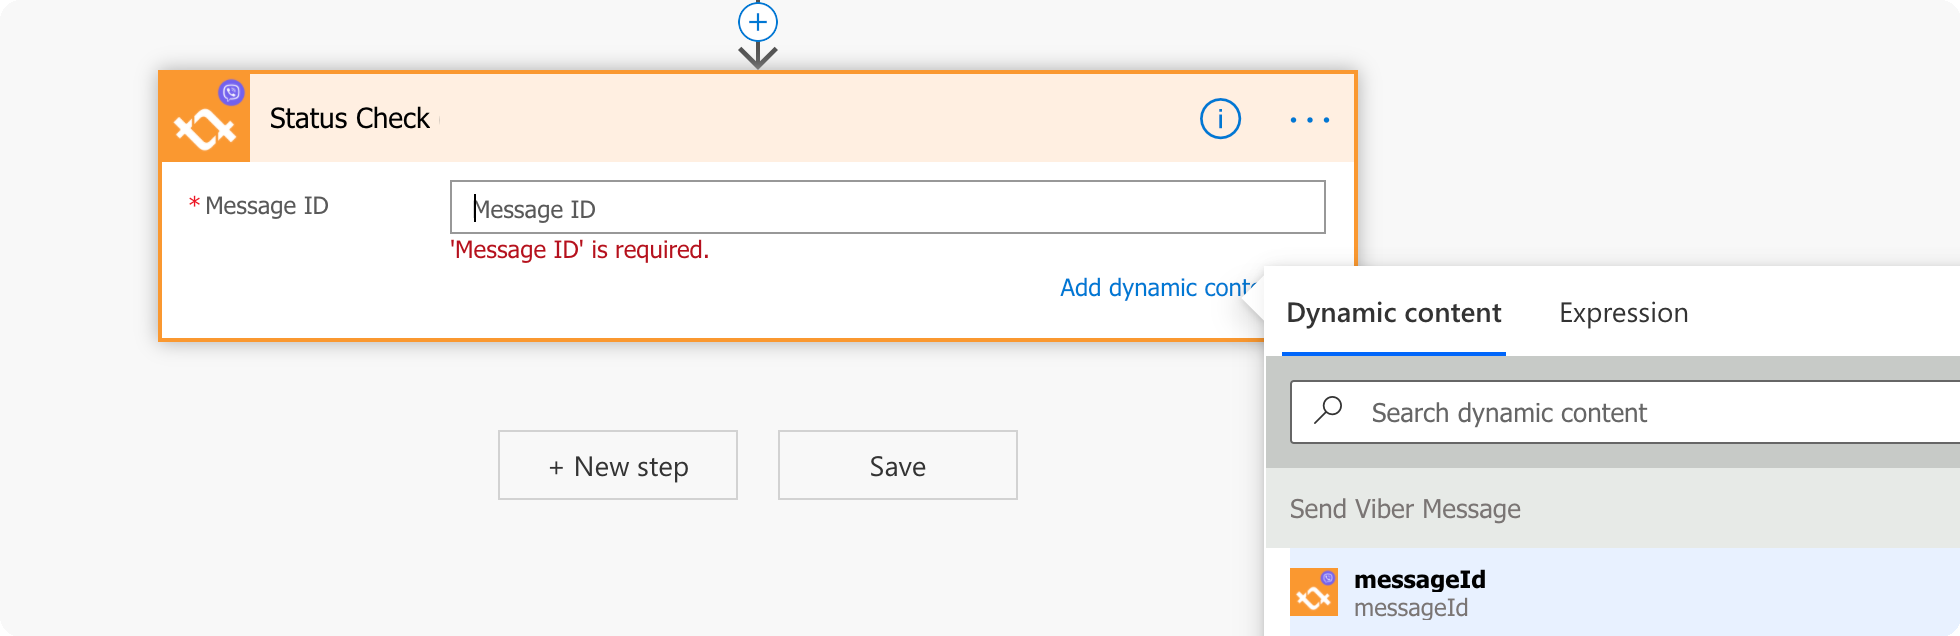
If you would like to scale the capabilities of this flow, it’s a good idea to add analytics to it. Each time you use Send Viber Text Message the Flow receives a messageId dynamic content. Using the tyntec Viber Business action Status Check with the messageId returns you the status of your message (for reference, look at the API Reference). You can save the response from the Status Check in a custom entity or attach it as a note to the appointment.
If you want to add two-way messaging to your flows, the tyntec Viber Business connector has the trigger Incoming Message.

It automatically listens to new messages across all channels (SMS, Viber, WhatsApp) and if a new message is detected, it starts your flow. All message details are stored in the dynamic content.
More information about webhooks as triggers can be found here.
If you are having trouble getting two-way messaging working, please contact our support team at support@tyntec.com